Access Bizagi via Internet
From Business Process Management, BPM and Workflow Automation Wiki | BizAgi BPMS
<keywords content="keywords"> Internet, public, network, apache, firewall, SSL, proxy, IP, publish, set up </keywords>
Contents |
How to set up Bizagi in internet
Overview
This article describes how to set up a secure HTTP server for your Bizagi projects so that they can be accessed via internet. Bizagi supports being accessed from an extranet with proper security measures, and considering a reverse proxy architecture.
Throughout this guide you will be able to implement a reverse proxy for your Bizagi project, using an Apache HTTP server and secure socket layer (SSL) encryption.
The following architecture diagram represents the considered set up.
1. This server will be set up so that access from extranet is redirected in a securer manner to your Bizagi web server. Users in the intranet will continue to access the Bizagi web application as before.
Using Apache HTTP Server
Installing Apache HTTP Server
In order to install Apache as the server to access Bizagi, follow these steps:
1. Download Apache HTTP Server. You may find the latest available version according to your chosen server in the Apache HTTP Server official webpage.
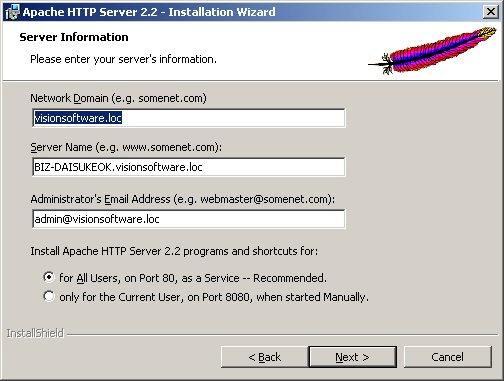
2. Install the server. Notice that the prompted configuration parameters may be later modified. Your chosen path for the Apache HTTP Server will be addressed from now on as <APACHE_HOME>.Secure and advanced configuration in Apache
In order to enable secure and advanced modules in Apache so that the reverse proxy access your Bizagi project, follow these steps:
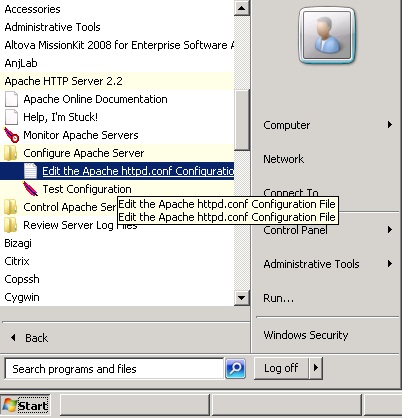
1. Configure Apache proxy options, by editing the httpd.conf file located at <APACHE_HOME>\conf\ as described below. This file may be edited too in Windows by accessing the option through Start – All Programs – Apache HTTP Server 2.2 – Configure Apache Server – Edit the Apache httpd.conf Configuration File.
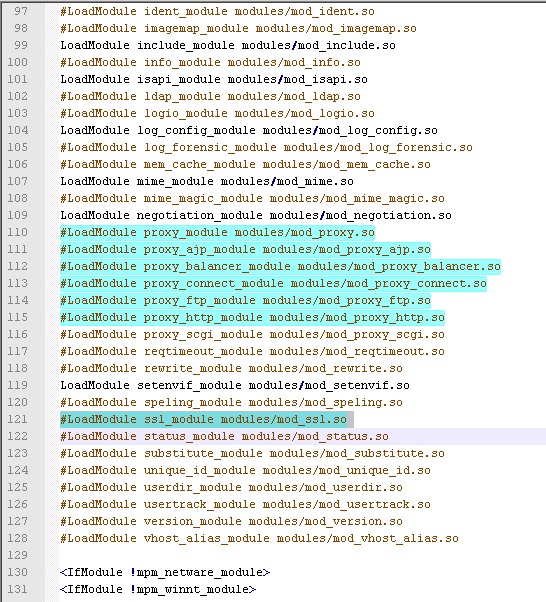
2. Enable the proxy module by removing the "#" character from these lines:
LoadModule proxy_module modules/mod_proxy.so
LoadModule proxy_ajp_module modules/mod_proxy_ajp.so
LoadModule proxy_balancer_module modules/mod_proxy_balancer.so
LoadModule proxy_connect_module modules/mod_proxy_connect.so
LoadModule proxy_ftp_module modules/mod_proxy_ftp.so
LoadModule proxy_http_module modules/mod_proxy_http.so
If you wish to enable and use SSL, remove the "#" character from the following line too: LoadModule ssl_module modules/mod_ssl.so
Further and complete guide information about Apache proxy module at the official documentation).
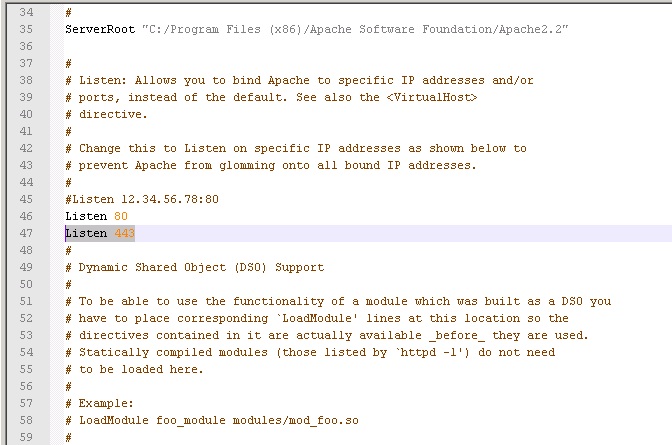
3. Enable SSL's port by including the line Listen 443 under the listening options. This step is optional and would apply if you chose to enable SSL in the previous step.
Notice that the default Listen option uses port 80, but 8080 is also often used.
4. Configure the reverse proxy settings. If your Apache HTTP Server will not use a digital certificate and SSL was not enabled, include the following lines at the end of the file:
<IfModule mod_proxy.c>
	ProxyRequests off
	ProxyPass [path] [url]
	ProxyPassReverse [path] [url]
</IfModule>
Notice you should replace "[path]" and "[url]" with the corresponding values as described: path is the name of the local virtual path and url is a partial URL for the remote server that cannot include a query string. For instance, if your Bizagi project is named "ProcessCentral" and was created on the server "myserver", these values should be:
ProxyPass /ProcessCentral http://myserver/ProcessCentral
ProxyPassReverse /ProcessCentral http://myserver/ProcessCentral
On the contrary, if your Apache HTTP Server will use a digital certificate and SSL was enabled, it is necessary to configure a virtual host by including the following lines:
NameVirtualHost *:443

<VirtualHost *:443>

	DocumentRoot "<APACHE_HOME>/htdocs"
	ServerName <YOUR_SERVER>

	<Directory "<APACHE_HOME>/htdocs">
	    Options Indexes FollowSymLinks MultiViews
	    AllowOverride None
	    SSLRequireSSL
	    Order allow,deny
	    Allow from all
	</Directory>

	SSLProxyEngine on

	<IfModule mod_proxy.c>
		ProxyRequests off
		ProxyPass / http://<YOUR_SERVER>/
		ProxyPassReverse / http://<YOUR_SERVER>/
	</IfModule>

	SSLEngine on

	SSLCipherSuite ALL:!ADH:!EXPORT56:RC4+RSA:+HIGH:+MEDIUM:+LOW:+SSLv2:+EXP:+eNULL
	SSLCertificateFile "<LOCAL_PATH>/public.crt"
	SSLCertificateKeyFile "<LOCAL_PATH>/ApachePrivateKey.key"
	SSLCertificateChainFile "<LOCAL_PATH>/intermediate.crt"

	<FilesMatch "\.(cgi|shtml|phtml|php)$">
	    SSLOptions +StdEnvVars
	</FilesMatch>

	<Directory "<YOUR_SERVER>/cgi-bin">
	    SSLOptions +StdEnvVars
	</Directory>

	BrowserMatch ".*MSIE.*" \
         nokeepalive ssl-unclean-shutdown \
         downgrade-1.0 force-response-1.0
</VirtualHost>
Notice in these lines, you should include the corresponding value for <APACHE_HOME> taking into account that this file's format uses "/" (instead of "\") as a path separator character. Ensure you edit too the <LOCAL_PATH> so that your SSL certificate files are properly referenced.
Futher and complete guide about the SSL directives are available here).
5. Save the changes in this file and restart your Apache HTTP server.
At this point you are set to access your Bizagi project from internet through the Apache HTTP Server in a secure manner!
To verify and access Apache's service you may type in your browser: http://<YOUR_SERVER>:<APACHE_PORT_NUMBER>/
This request will redirect you to your configured project's Bizagi web application.
Related Articles
<comments />


