Export and Import Languages between Projects
From Business Process Management, BPM and Workflow Automation Wiki | BizAgi BPMS
<keywords content="keywords"> Translate, translation, language, languages, share languages, share resources, share internal resuorces, transmit language, transmit translation, import language, import languages, export translation, export translations, share translations, copy language, copy resources, copy resource, paste resource, paste language </keywords>
Import And Export Languages between Projects
Bizagi can be displayed in the Work Portal (or User Interface) in any desired language. It is also possible to define more than one language and allow the final user to choose which language he/she desires their application to be displayed.
There are seven pre-defined languages in which no translation is required. When one of these languages is chosen in the Business Configuration, all the Work Portal will be automatically adjusted. These languages are:
- English
- German
- Spanish
- Portuguese
- French
- Dutch
- Russian
When users have more than one language for a Project or use one that is not pre-defined in the list above, they have to Localize (translate to each language) some internal items in Bizagi Studio. Once this localization has been done, and a new project is created, users will want to Import those configured languages and not translate everything all over again.
The feature presented below allows a user to Export and Import resources between projects in Bizagi.
Export and Import Resources
The Export feature will create a file that has to be saved in the disk. This file can be Imported in another project.
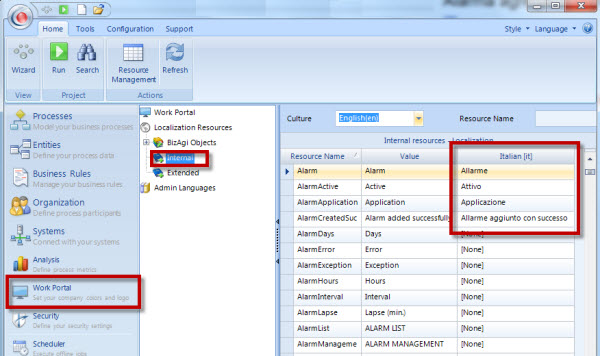
In the next example, the iT (Italian) language configuration will be exported and imported to another project.
1. In Bizagi Studio go to the Modules view and then go to the WorkPortal and select the Internal objects in the Localization Resources node.
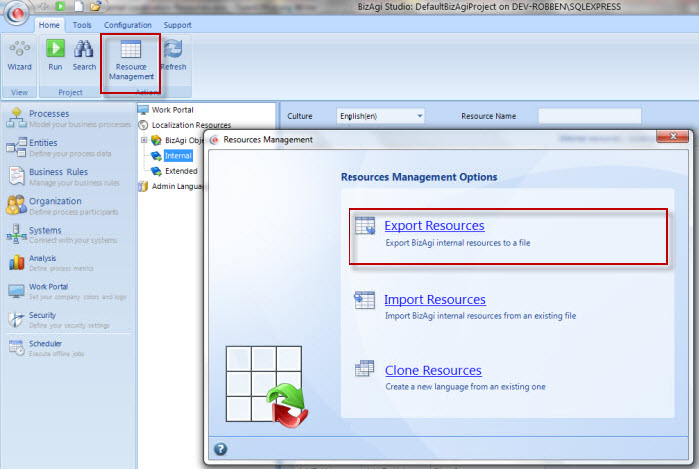
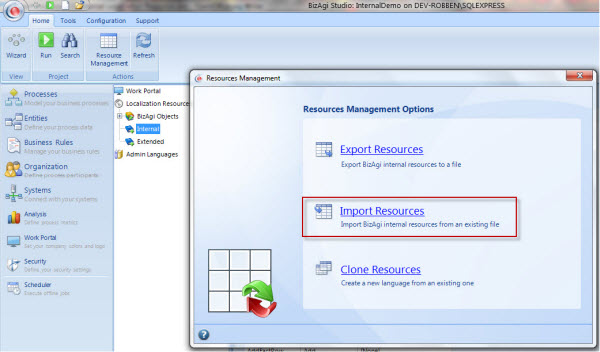
2. Select the Resources Management option in the top menu, and then select the Export Resources.
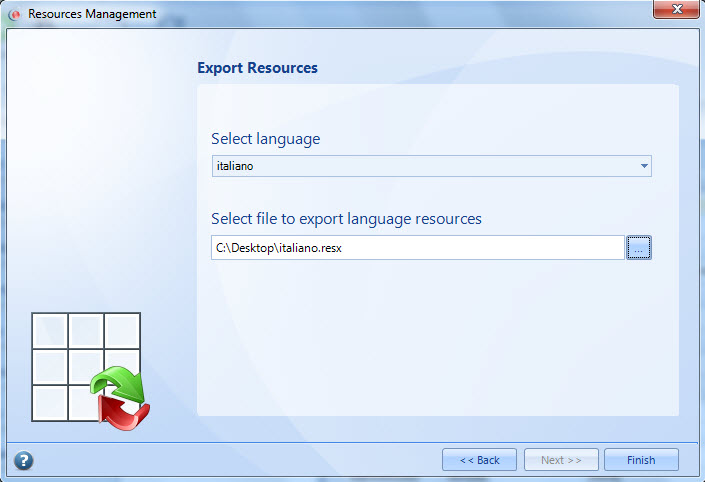
3. Select the Language that you want to export and select the location where you want to save the file.
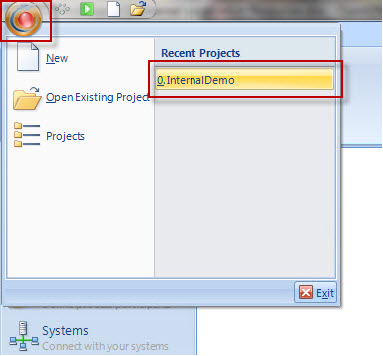
4. In Bizagi Studio, select and open the project where you want to Import the configuration.
5. Go to the Work Portal option and once again go to the Resources Management. Select the Import Resources option.
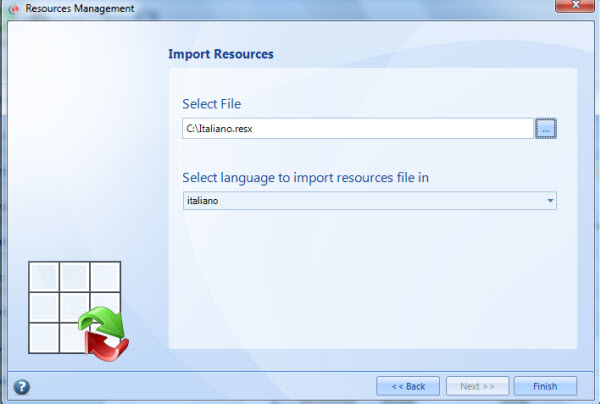
6. Select the file with the resource previously exported and select the Language in the drop down list.
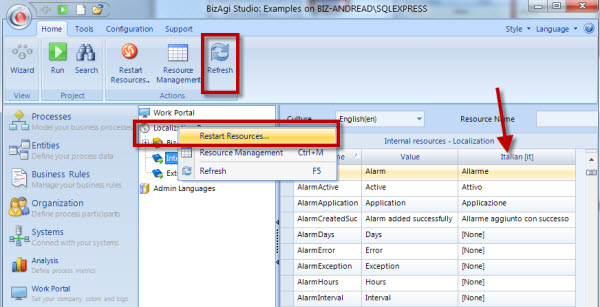
7. Finally, Restart and Refresh the Resources and check that the language configuration has been created correctly.
Clone Resources
The third option is Clone Resources. With this option you can create a new language based on the definition of another. Then make the respective changes in the new language to complete the set up.
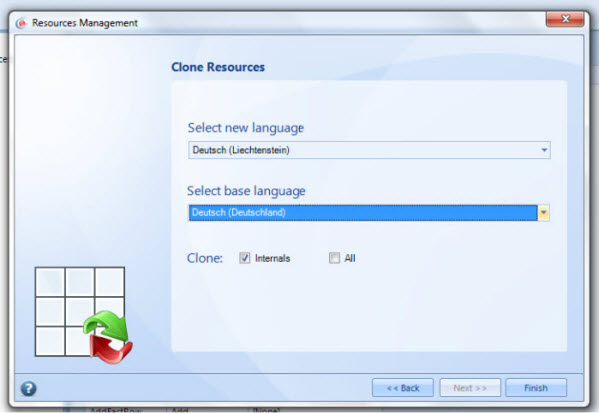
The next example shows how to use the Clone Resources option to clone the de-DE (German Germany) to create the new resource de-LI (German Liechtenstein).
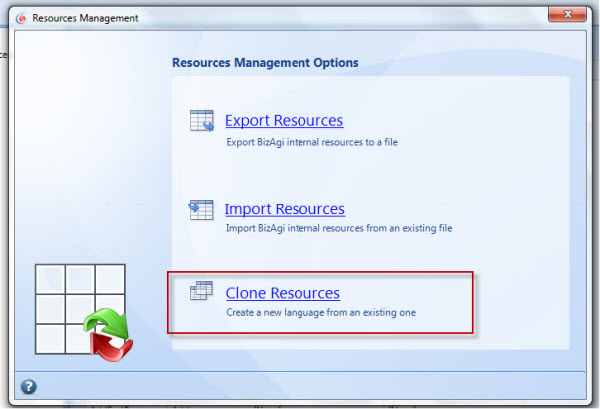
1. Select the Management Resources in the top menu. Then, select the Clone Resources from the pop-up window.
2. Select the new language, and then select the existing language that is going to be used to create the new one.
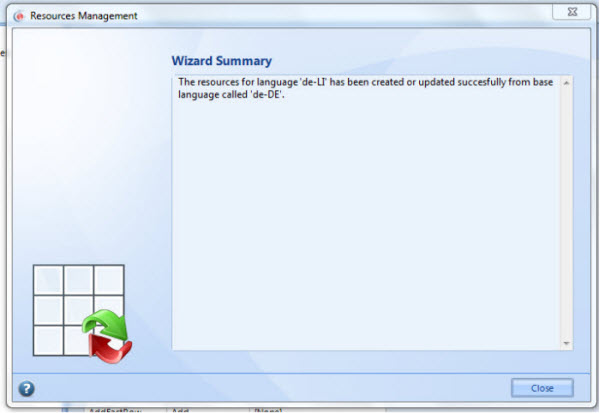
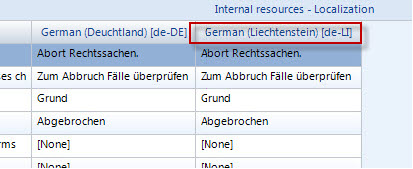
3. Click on Finish and update the resources in the top menu option. The new language will be displayed after the resources have been refreshed.
<comments />
