Nested Form
From Business Process Management, BPM and Workflow Automation Wiki | BizAgi BPMS
<keywords content="keywords">
Nested, forms, activity form, activity forms, create form, relate form, join, nest
</keywords>
Contents |
Form within a Form (Nested Forms)
In order to make the creation of forms easier and quicker, it is possible to create a new form with certain information and 'paste it' onto another form.
This is used, for example, when the same information must be called upon several times within a project. A form is created with all the required information and pasted, or NESTED, into the activity's form. To nest a form, the entities must be related to each other (except for 1-N and N-N relationships)
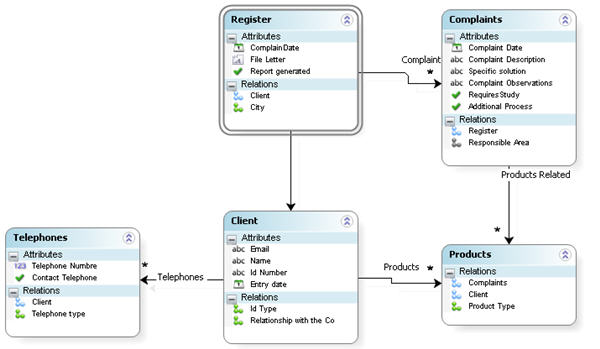
In the next example, a form will be created with all the clients information and then nested into two different activity forms.
This is the data model:
1. Create the form in the entity where the attributes are (in this case the Client's entity).
This can be done directly from the Entity's Menu in Bizagi Studio or in the Form designer.
2. Relate the form to the activity by dragging it to the Display area of the Form Designer.
The next video will show how to create a nested form both ways, and relate it to another form.
<videoflash>38DJhIIKvTc|640|505|</videoflash>
Edit a Nested form
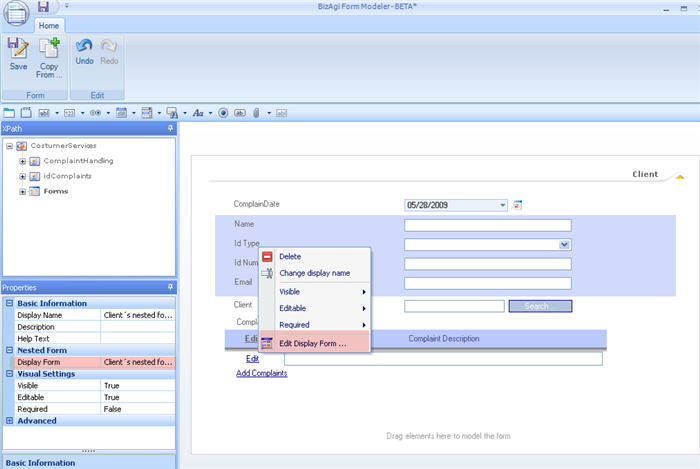
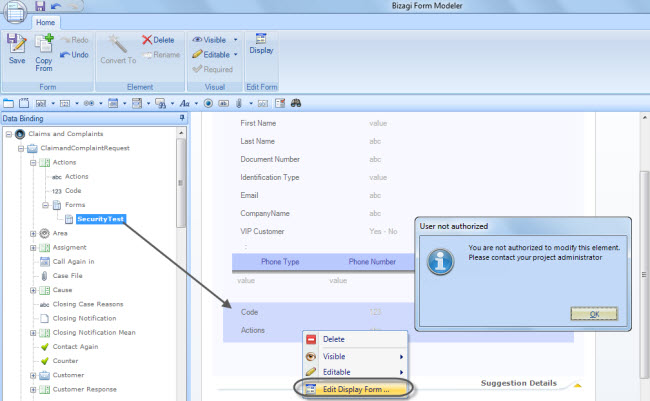
To edit a nested form, right click on the nested form and select Edit Display Form.
The nested form will open in a new tab to be edited. When the changes are complete, click Save and Close.
Nested Form in a Grid
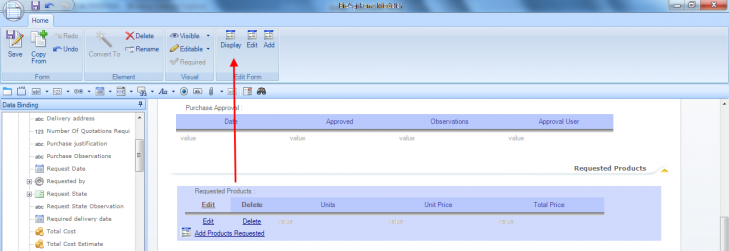
The next example will be based a Purchase Request process. In this case, a nested form would be used in the Display Form of a grid. Assume that someone in your company wants to order office products. Therefore it is important to know some basic information about the each product, such as product name, quantity, unit price, total price, etc. In Bizagi, this information can be displayed in a grid. As shown below.
When a grid is created, the number of attributes depends on business conditions. When the user wants to create a grid, this could be done by dragging and dropping each element or using a form. In this case a form will be used in a grid. The grid for the requested products has been created previously with some elements. As shown in the next image.
If the user wants to use a nested form in the Display Form of a grid, it is necessary to first create the form in the context entity of the grid, and then drag and drop it into the Display Form.
1. First select the grid that has already been created and open the Display Form.
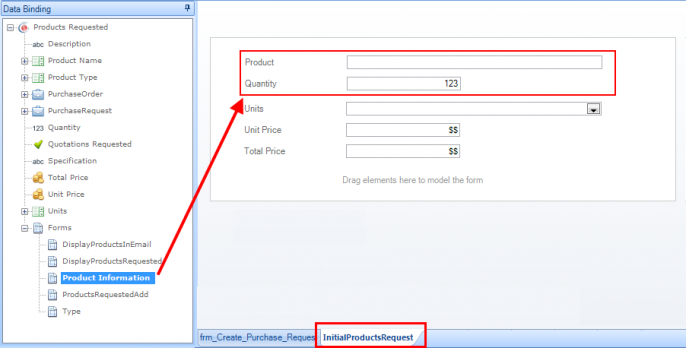
2. Then, the form will be displayed. The attributes of the requested products are shown on this form. Create the new form.
This new form contains two attributes (product and quantity) that are frequently used in all the process.
3. Select a name (in this case the form is called Product Information) for the form and save it.
4. Add the form “Product Information” into the Display Form of the gird, called “Inicial Product Request”.
5. The nested grid is displayed, as shown below.
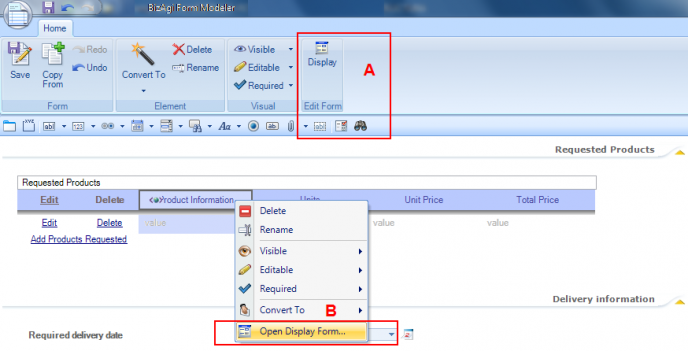
6. Finally, the user has two alternatives to display and edit the new added Nested form
A. Click on the Display icon on the toolbar.
B. Right click on the nested form and select Open Display Form.
7. Check on the web aplication.
Restricted access to Forms
With Bizagi BPM Suite you can have a collaborative environment where you and other co-workers can work simultaneously on your processes. If you have several processes in your project you might need to restrict accesses to some elements to prevent the users modifying one process, to affect others.
When Bizagi Studio Security has been enabled and a user has been restricted (denied) to access a form, he or she will be able to use it. To restrict a user or a group of users to accessing a form, an administrator should deny access to the Entity that contains it.
When the user attempts to edit it a message will be displayed:
You are not authorized to modify this element. Please contact your project administrator.
Click here to learn more about Security on Forms
<comments />
