Cases Administration
From Business Process Management, BPM and Workflow Automation Wiki | BizAgi BPMS
<keywords content="keywords"> case admin, admin case, admin cases, case administration, annul, abort, reasignation, invalidate, delete case, delete instances, delete an instance, instance deletion, How to reassign, reassign activities, reassignation, reassinging </keywords>
Contents |
Cases
This function allow the user to reassign activities or abort cases.
The administrator SHOULD have a valid e-mail address.
How to Invalidate or Abort a Case
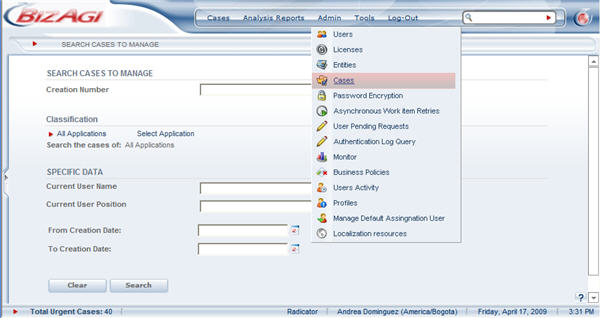
1. Select Cases from the Admin option. In the new window, the user can search for any case by entering the Creation Number, according to the process, to User's Data or with the Creation Date.
2. To find cases that match with the information, click on the “Search” button
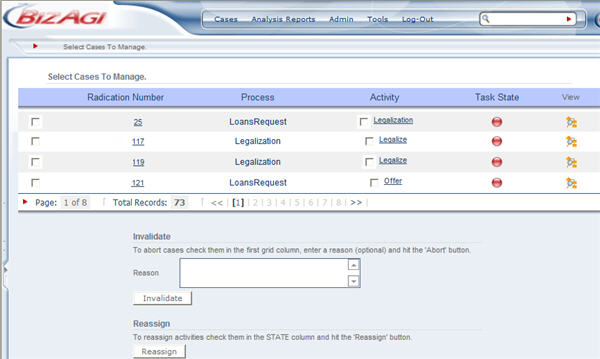
3. <span />A new window will then show the result of the search:
If there are no records, a message will let the user know the search returned no results.
If there are records, a window will show all the cases that match with the search criteria as illustrated below:
4. Select the case from the list by checking the first column of the table ![]() .
.
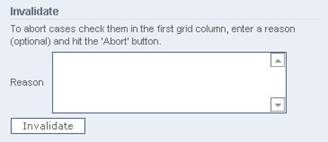
5. Once the case is selected, enter an explanation in the box that appears at the bottom of the screen.
6. Once the information is filled, click on the “Invalidate” button
An email message will be sent to all the users who have pending activities in the case that has been aborted.
How to Reassign Activities
1. Select Cases from the Admin option. In the new window, the user can search for any case by entering the Creation Number, according to the process, to User's Data or with the Creation Date.<span />
2. To find cases that match with the information, click on the “Search” button
3. A new window will then show the result of the search:
If there are no records, a message will let the user know the search returned no results.
If there are records, a window will show all the cases that match with the search criteria as illustrated below.
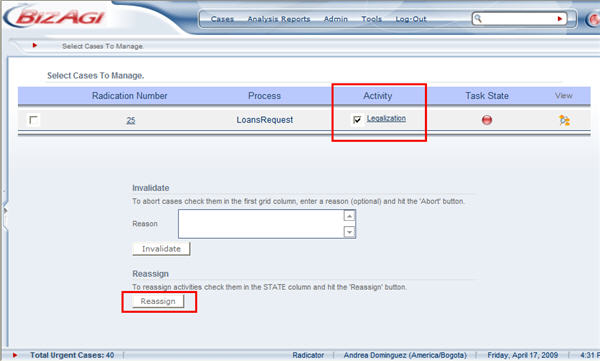
Select the activity that needs to be reassigned: ![]() .
.
4. After that, click on “Reassign” at the bottom of the screen
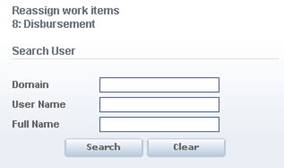
5. A new screen enables the search to find a user that will be in charge of the activity
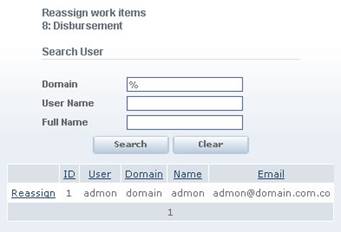
6. Fill in the user information and click on “Search”.
7. The list of users that met the search criteria will then appear. Identify the user that will be assigned and click on “Reassign”.
<comments />
