How to Make Queries in the Web Application
From Business Process Management, BPM and Workflow Automation Wiki | BizAgi BPMS
<keywords content="keywords"> Query, consultation, search, searches </keywords>
Contents |
How to Make Queries in the Web Application
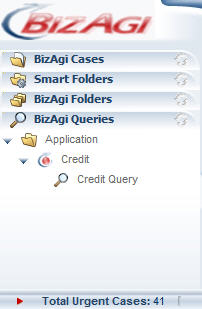
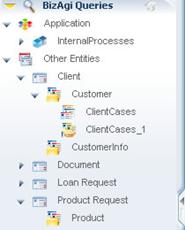
1. Once the user has defined the Query Forms in Bizagi Studio, identify the main menu´s case area in the web application and select Bizagi queries option.
The following levels are displayed on the tree:
![]() All Applications: The query forms that have been defined for all the applications appear as sub-levels.
All Applications: The query forms that have been defined for all the applications appear as sub-levels.
![]() Application: The query forms for each of the applications appear.
Application: The query forms for each of the applications appear.
![]() Other Entities: The query forms created by Entity appear.
Other Entities: The query forms created by Entity appear.
To expand a sub-level, double click on the triangle icon.
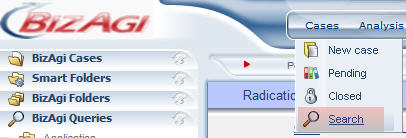
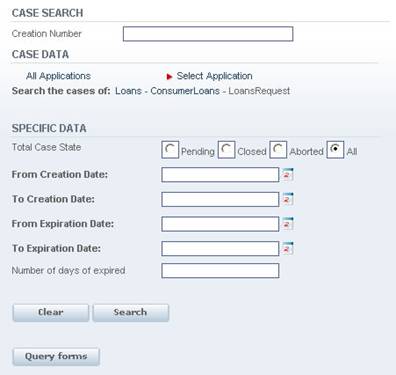
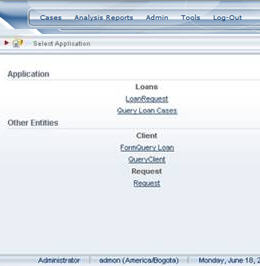
2. Alternatively, in the main menu of the application, select the cases option and click on the Search option on the menu that is displayed. In the Operation Search window, define the search criteria and click on the Query Forms button. The result of the search will display the query forms configured in Bizagi Studio.
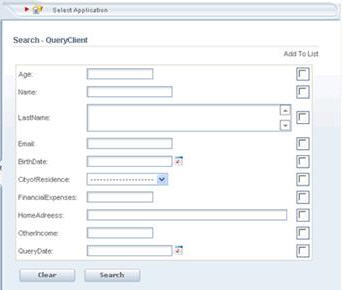
3. When the user selects the query, the respective form will appear and the criteria to carry out the search are defined.
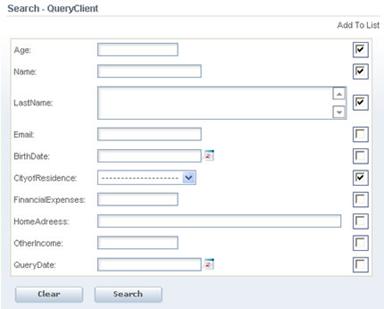
To include search criteria in the result of the search, click on the checkbox in front of the attribute that wants to be included.
4. Carry out the search by completing the criteria required and select the fields to be displayed in the results.
|
Example: Query of the Loan Process Cases where the date of request is between 01/01/2005 and 21/12/2006. The fields to be displayed in the results are “Age”, Name, “Last Name”, “City of Residence”. |
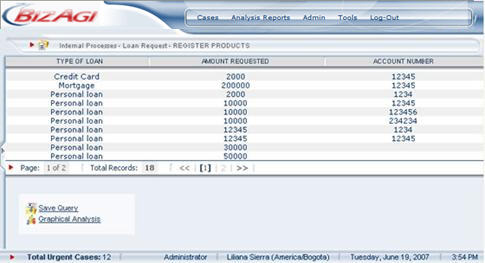
The queries generated from the web application will display the results of the search with the structure of the Pending screen. However, if certain criterion is included in the query, it will be added as a new column in the application.
|
Note: For queries of Other Entities, select at least one field to be displayed in the results. |
5. If the criteria defined is not the one the user wanted, click on the Clear button to delete the selected criteria and generate a new query. If the criteria defined is correct, click on the Search button. The result of the query will be displayed as follows:
|
Note: The results produced when making a query correspond to the information found partially regarding the cases or entities at the time of the search. That is to say, the information that is saved in the database of the case or each entity. Therefore, any information that has been updated, added or deleted in activities that have not been completed or in transactional sub-processes that have not ended on the path, will not be reflected in the queries. |
How to Save a Query
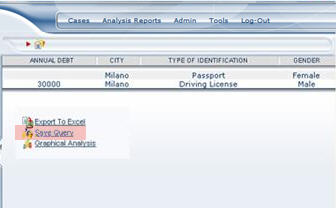
1. When making queries, the user can see the Save Query link at the bottom
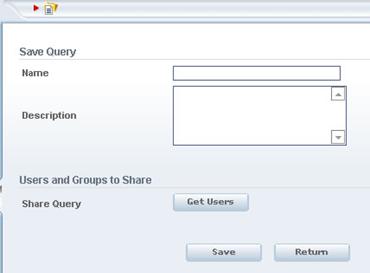
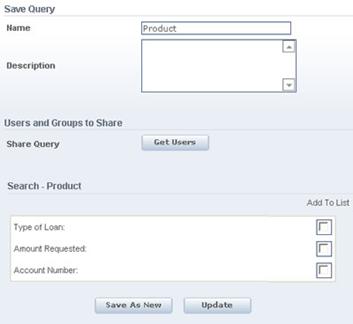
A new window shows the following fields as indicated below:
|
Name: Enter the name of the search. It can be up to 25 characters long. Description: Enter the information of the description so it can be understood when you read the description. |
If the user would like to share the saved query with other users, click on the Get Users button. In the window that pops up, select the users and/or groups desired to share the saved query with.
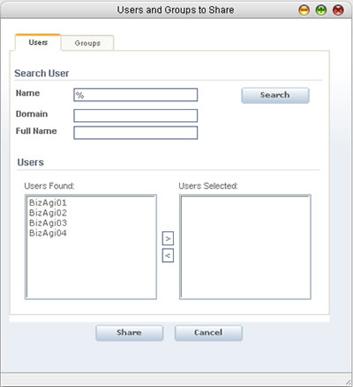
![]() The Users tab presents certain criteria to carry out user queries: User Name, Domain and Full Name. When filling out this information and clicking on the Search button, the Users Found list fills up with those that meet the search criteria.
The Users tab presents certain criteria to carry out user queries: User Name, Domain and Full Name. When filling out this information and clicking on the Search button, the Users Found list fills up with those that meet the search criteria.
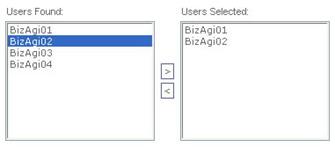
Select the users to share the search with and use the buttons to copy users from one list to another. The users displayed in the Users Selected list can use the search.
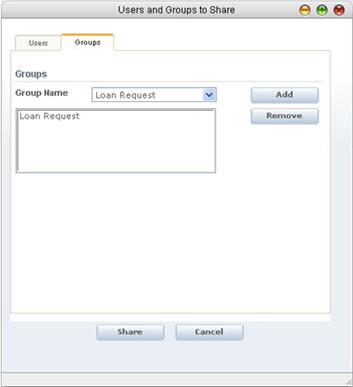
![]() The Groups tab enables to add a group of users to share the search with. In the Group Name combo, all the groups that have been created in the application are listed. To add a group, use the Add button. If the user would like to delete a group from the list, select it and click on the Remove button
The Groups tab enables to add a group of users to share the search with. In the Group Name combo, all the groups that have been created in the application are listed. To add a group, use the Add button. If the user would like to delete a group from the list, select it and click on the Remove button
2. In the case area of the application, in the Bizagi Query section, the saved queries available for execution are listed. The ![]() icon is used for queries saved by users
icon is used for queries saved by users
The ![]() icon is used for queries shared by other users
icon is used for queries shared by other users
|
Note: Users who have access to a saved query, either because they are selected users or they belong to one of the groups, can only see the results of the query. They cannot edit or delete the query, but they can save it as a new saved query. |
How to Edit a Saved Query
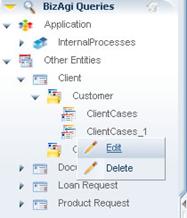
1. In the case area of the web application, in the Bizagi Query section, click on a Saved Query, right click and select the Edit option.
2. The user can edit the name, description and parameters of the query.
3. Click on the Update button to save any changes made. If you would like to save it as a new query, click on the Save as New button.
How to Delete a Saved Query
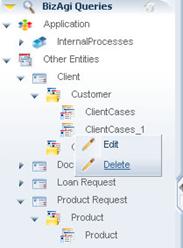
1. In the case area of the web application, in the Bizagi Query section, click on a Saved Query, right click and select the Delete option.
2. In the confirmation window, click on OK.
<comments />
