Policiy Rule-Decision Table-Group And Precondition
From Business Process Management, BPM and Workflow Automation Wiki | BizAgi BPMS
<keywords content="keywords"> business rules, business rule, policy, policies, table, tables, decision, conditions, precondition, preconditions, rule group, rule groups, group rules, tree, trees, decision trees </keywords>
Contents |
Policy Rules
Policy rules are used to evaluate simple business conditions; an action is executed when the condition is fulfilled. These rules are based on “If” and “Else”. The “If” contains conditions and can be combined with more than one condition using AND or OR.
Click for more information about how to create a Policy
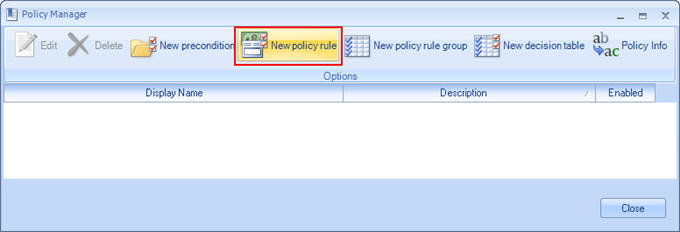
1. In the Policy Manager select New Policy Rule
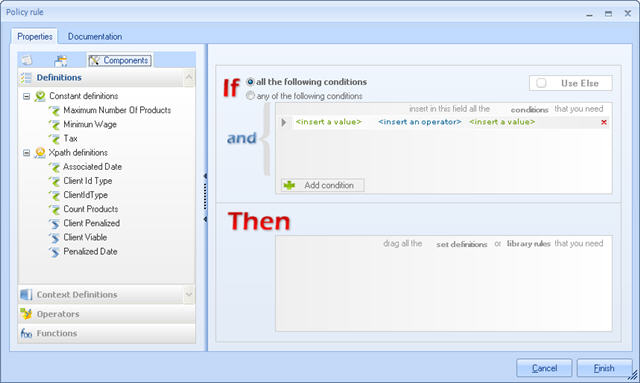
2. A window will be opened where the user can create and edit policy rules.
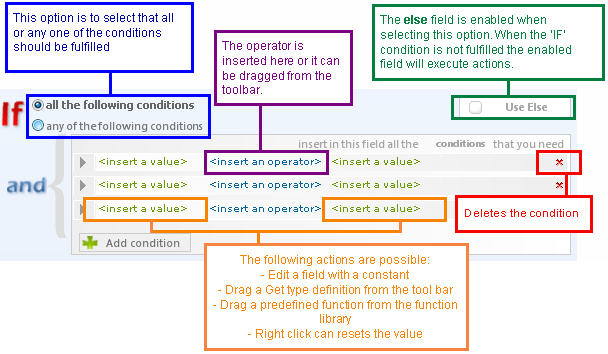
Click on the Add Condition button to include the condition to be evaluated; several options can be added to evaluate the rule if needed.
|
Note:It is an ERROR to compare a text attribute to a NULL value. |
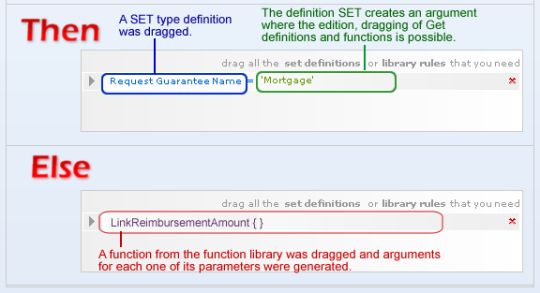
The ELSE box is only displayed when the option Use Else is selected in the upper right corner of the window; this option works in the same way as THEN.
Example: Policy Rules
A client in a Loans Request process will be penalized if, in the first activity, a case is created but he or she does not select any of the products offered.
A policy is created to penalize the client, as the activity finishes, that is, when the user clicks Next.
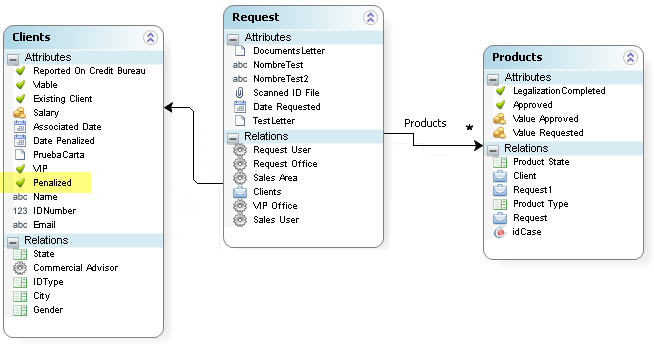
The following is the Data model used in the video example.
<videoflash>4OgwiIe7Ns8|640|505|</videoflash>
Decision tables
Decision tables enable the combination of business conditions to execute an action based on the intersections of the conditions.
A great advantage of this concept is that decision tables are highly parameterized, providing agility when dealing with changing business conditions.
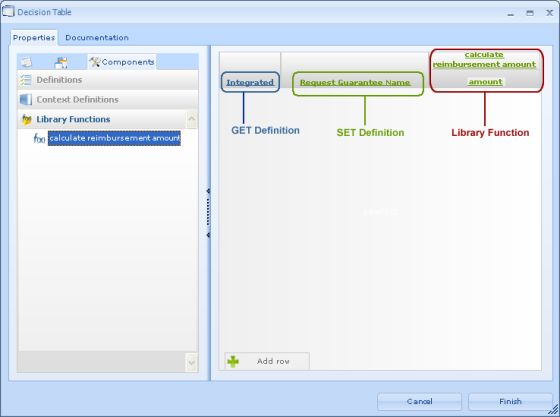
The GET and SET type definitions (vocabulary) are dragged to the table header once all the vocabulary to be used is available in the left menu.
|
Note: the vocabulary is required to create the decision tables and the following steps must be completed. |
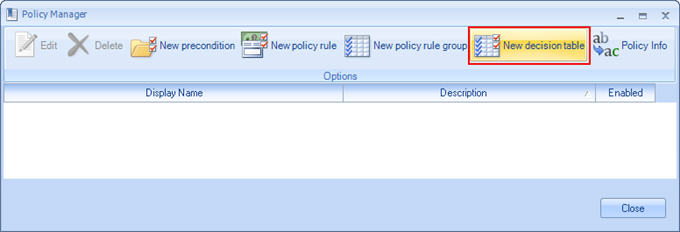
1. In the Policy Manager select New decision table.
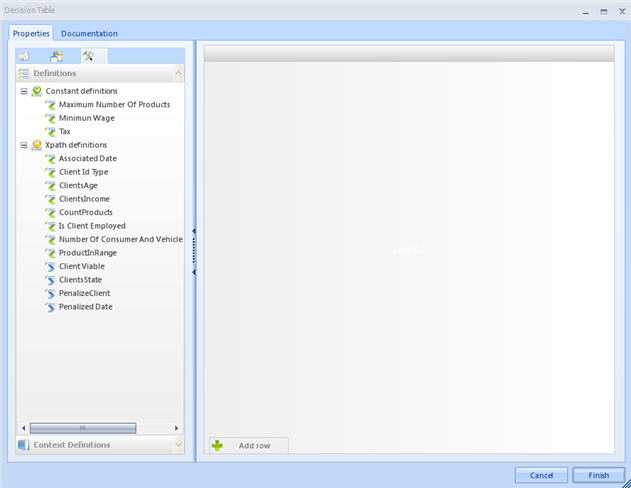
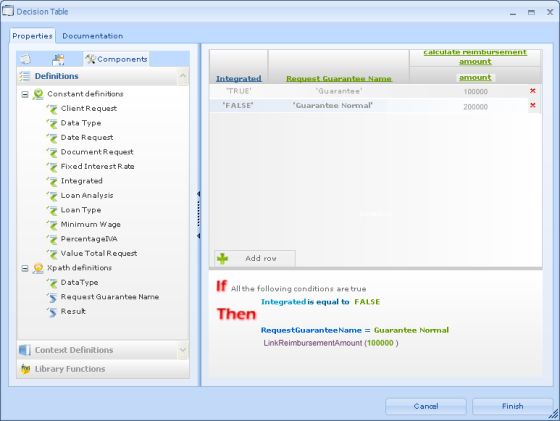
2. A window will be opened where the user can create and edit the decision tables.
Drag the definitions, context definitions and library functions to be evaluated from the list towards the work area to form the columns of the table; the GET conditions will be on top of the SET conditions and the functions always will be used to execute actions.
The Add New Row button will be enabled as shown below; add as many rows as needed.
An operator can be selected by clicking on the cell of the GET definition if they are of integer, currency or date type; double click on the right part of the cell to enter the value to be compared.
To delete a column, all the rows must be deleted first; right click on the column and the Delete column option will be displayed; right click on the row to eliminate it.
3. Double click on the cell of the SET definition to enter the value to be displayed according to the result of the condition; click on Finish.
|
Note: The values to be entered are according to the field type; for instance, the permitted values will be integer numbers when the definition has been generated from an integer field in the database. The permitted values will be text when the definition has been generated from a string field in the database. The editor will be displayed according to the field type. |
Example: Decision Tables
A Client will be eligible to request a bank loan according to his or her income and employee status.
If their income is less than US$500 the client will not be eligible.
If their income is between US$500 and US$3,000, eligibility then depends on the employee status.
If the income is greater than US$3,000 the client is always eligible.
|
Income |
Employed? |
Eligible? |
|
< 500 |
YES/NO |
NO |
|
> 500 and < 3000 |
YES |
YES |
|
> 500 and < 3000 |
NO |
NO |
|
> 3000 |
YES/NO |
YES |
<videoflash>eBOfd1vQ2Tg|640|505|</videoflash>
Rule groups
Rule Groups organize policy rules that have similar purposes to keep them together, and at the same time 'keep an eye' on all the groups rules
All the grouped Conditions are evaluated when the Group is related with a shape.
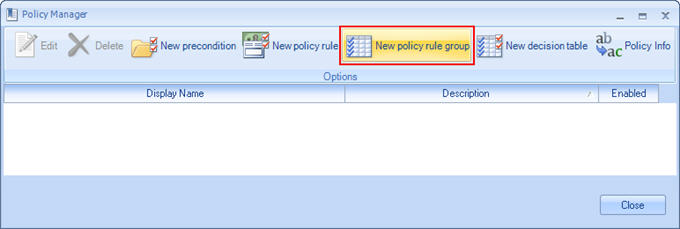
1. In the Policy Manager select New Rule Group
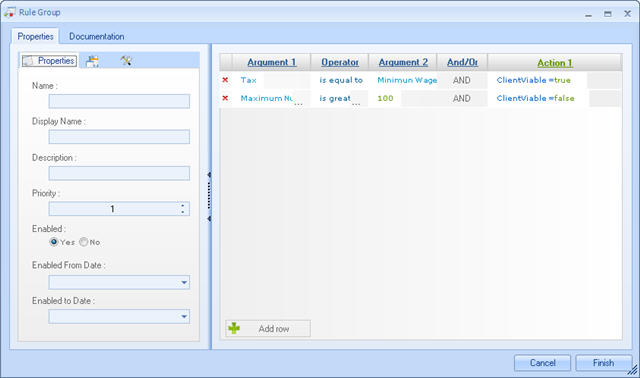
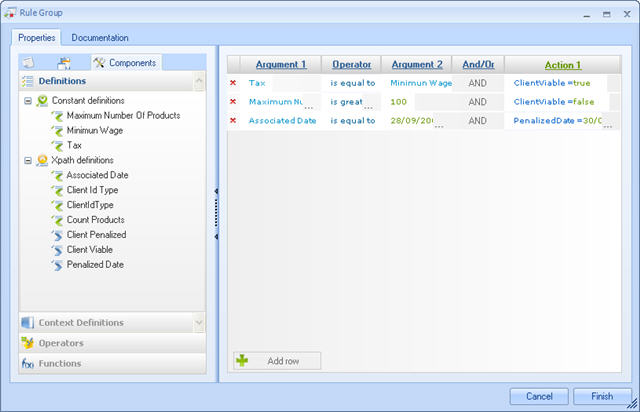
2. The window of Rule Group is displayed with the following information:
A button to add a New Row can be observed in the design environment and is presented similar to the simple rule when selecting this option.
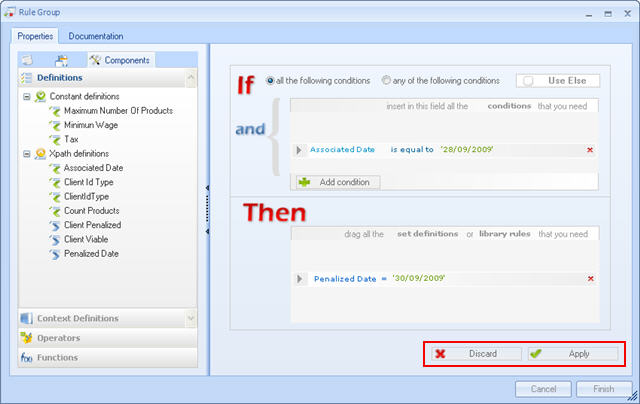
3.The rule is created in a similar way to the simple rule.
Two buttons are found in the bottom of the design environment; the Discard button that cancels all the changes and returns to the previous screen and the Apply button that saves all the rule changes and returns to the previous screen.
4. The previous steps must be repeated to add all the required rules, and the changes can be saved with the Finish button once the steps have been completed.
Preconditions to build Decision Trees
Preconditions are components that enable the creation of decision trees within the policy with a simple interface. This component generates the hierarchy within the items and organizes the execution and logic of them.
Preconditions contain a logical condition that, if fulfilled, allows the execution of the elements found in the lower hierarchy.
In Bizagi you can use the Policies wizard to build a decision tree. Each branch of the tree is a precondition.
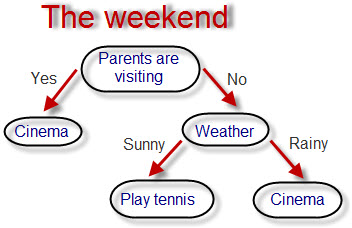
The following image is an example of what a decision tree is. It starts by reviewing conditions and according to the result it will make a decision, or fulfill an action.
According to some conditions, a person will decide what to do on a weekend:
In Bizagi Preconditions can be nested as needed. A single precondition does not constitute a validation that determines an action. At the end of the path or branch there should be a policy rule, rule group, or decision table, which will be responsible for the last validation and execution of the required action according to the result of the validation.
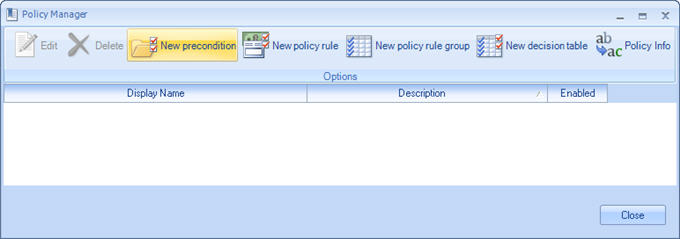
1. In the Policy Manager select New Precondition
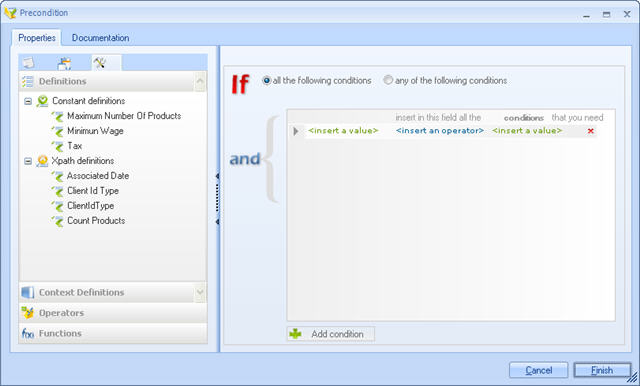
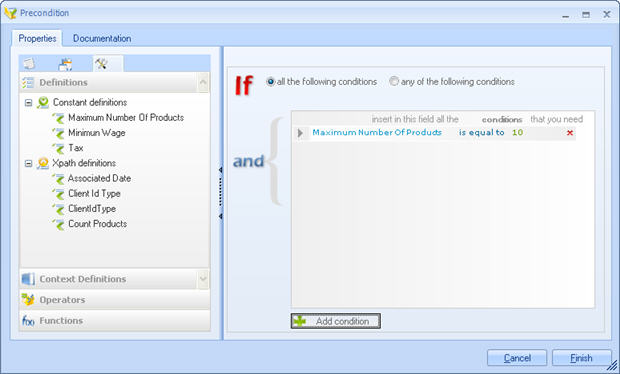
2. The following window will be displayed. It contains an identical interface to the editor of simple rules, with the exception that this interface does not have the Then and Else section.
3.The condition must be created in the same way in which it was created in the simple rules editor.
4. Save the changes by clicking the Finish button .
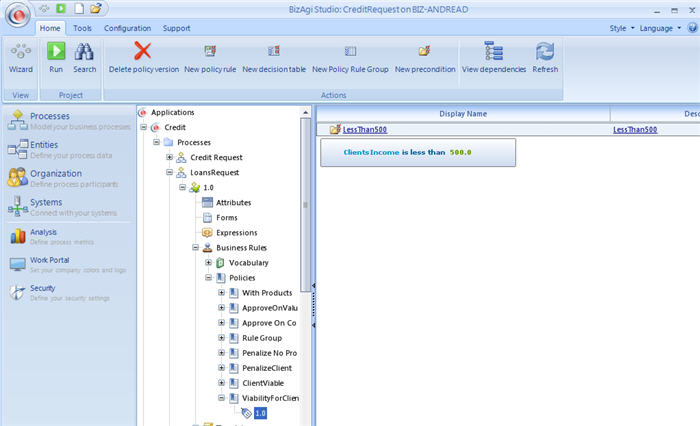
When the new policy is selected, the precondition will be displayed in the right panel.
When the cursor is placed over the precondition a tool tip will show a quick view of the content of the precondition.
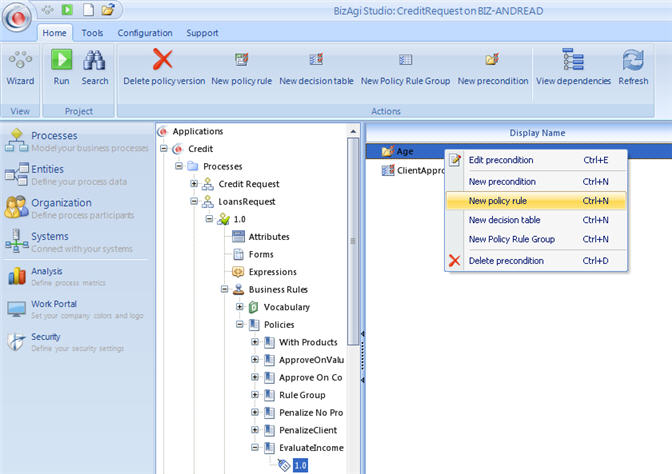
5. Right click on the precondition to create items that will be evaluated when the precondition is fulfilled.
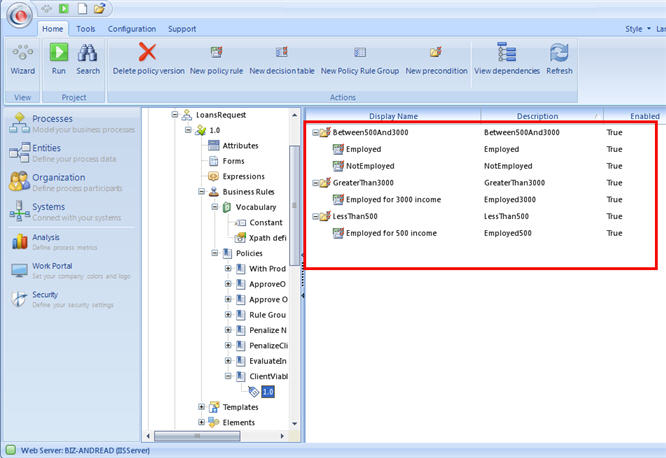
Thus, a hierarchy of items can be created, which is illustrated as follows:
Preconditions Example
This is the same example used in Decision Tables, but using preconditions and policy rules.
A Client will be eligible to request a bank loan according to his or her income and employee status.
If their income is less than US$500 the client will not be eligible.
If their income is between US$500 and US$3,000, eligibility depends on the employee status.
If their income is greater than US$3,000 the client is always eligible.
|
Income |
Employed? |
Eligible? |
|
< 500 |
YES/NO |
NO |
|
> 500 and < 3000 |
YES |
YES |
|
> 500 and < 3000 |
NO |
NO |
|
> 3000 |
YES/NO |
YES |
<videoflash>dsdmIUX9aAI|640|505|</videoflash>
<comments />
