How to Make Date Operations
From Business Process Management, BPM and Workflow Automation Wiki | BizAgi BPMS
<keywords content="keywords">Date, Time, DateTime, Compare, Add, Subtract, Operation, calculate age, year, Minute, Business Rule, Today, DateTime.Now, DateTime.Today</keywords>
Contents |
How to Make DateTime Operations in Business Rules
This document explains some date operations that may be required when automating processes with Bizagi.
The following are some, but not all, of the most commonly used date operations:
![]() Assign Today's Date to an Attribute
Assign Today's Date to an Attribute
Compare Dates (applies to .NET Editions)
An automated process may require the comparison of dates to validate certain conditions that enable the process to continue.
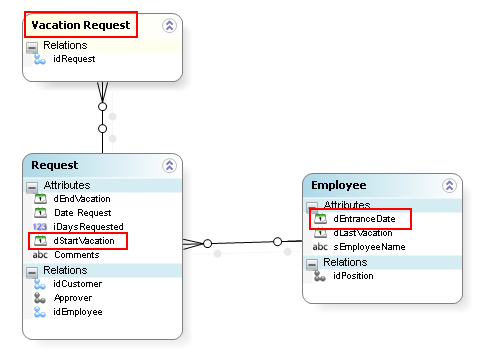
An example may be seen in the process of requesting vacations. An employee must have completed at least one year with the organization to be entitled to vacations. The process must validate that the vacation start date is greater than the employee's entry date plus one year.
To perform a date comparison follow these steps:
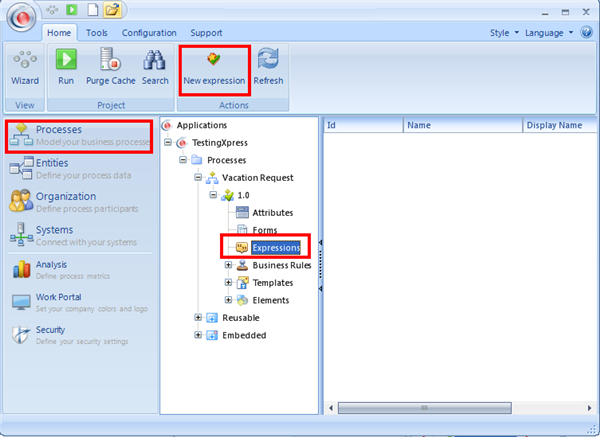
1.Create a rule by going to Bizagi Studio > Select the Process (in this case Vacation Request) > Expressions > Execution Rules and then click onNew Expression
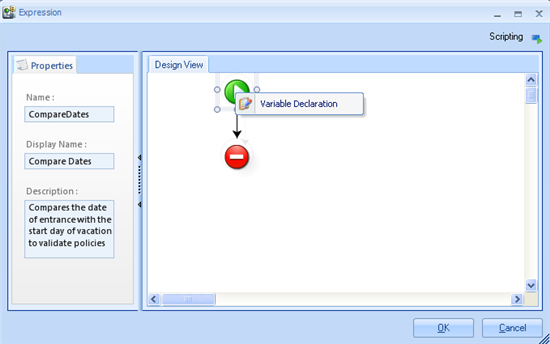
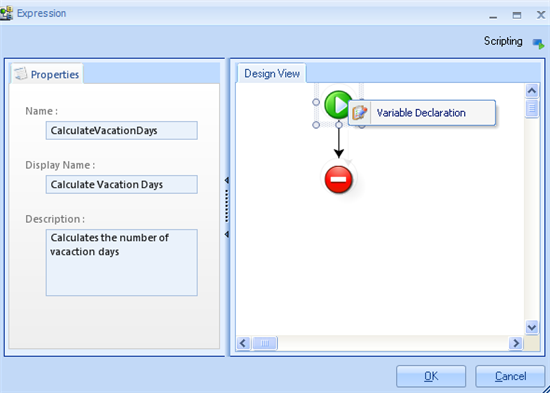
2. Fill in the basic information of the rule as shown below.
3.Declare the variables that are required in the rule by right clicking on ![]() and selecting Variable Declaration.
and selecting Variable Declaration.
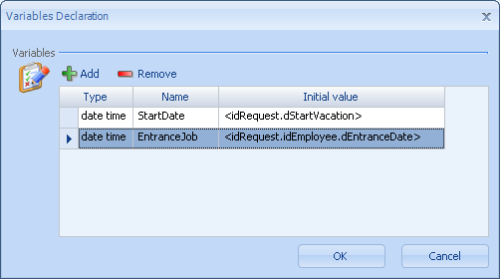
Add the attributes (employee entrance date and vacation start date) that are to be used in the business rule as indicated below.
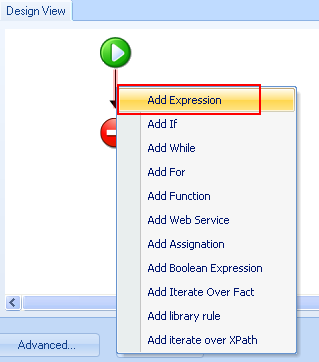
4. Create an expression to add one year to the employee entrance date variable by right clicking on the black arrow and selecting Add Expression.
Give a meaningful name to the expression to make the rule easy to understand e.g. "Add Year".
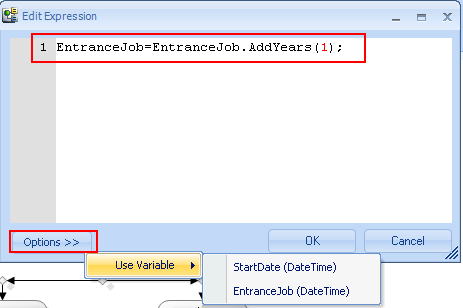
Double click on the expression to add one year to the employee entrance date variable. To avoid errors when writing a variable's name use the Options function.
The initial expression should read as follows:
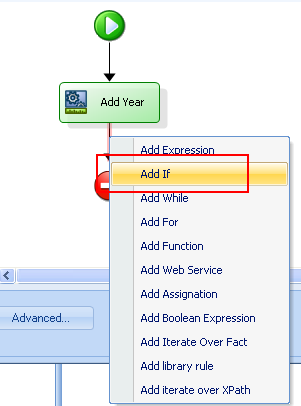
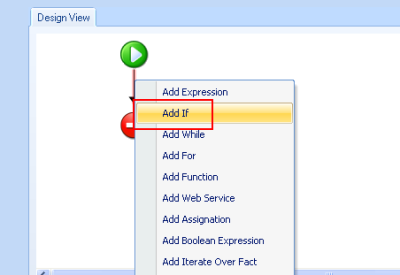
5. Create the IF condition to compare the variables by right clicking on the arrow that starts from the expression and select Add If<span style="font-style: italic;"
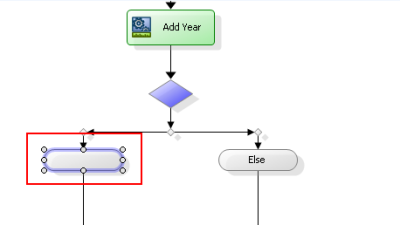
Double Click on the blank grey rounded rectangle.
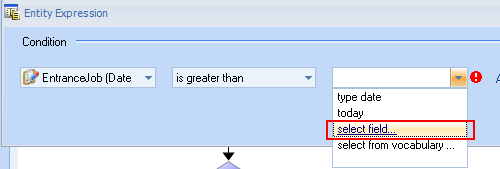
Set the condition as shown below and in the right hand drop down list choose Select Field
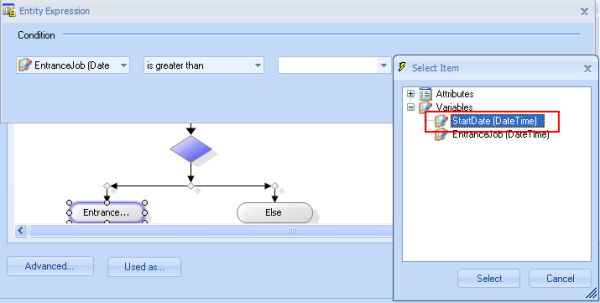
Then Select the Variable StartDate and click on Select
Click on the Select button again
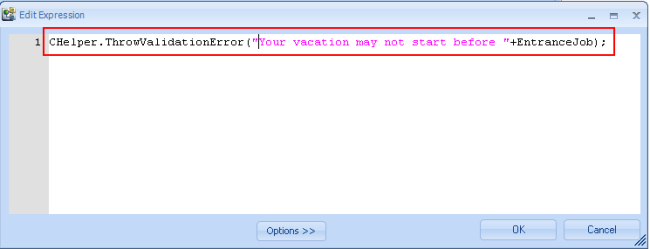
6. On the transition that satisfies the condition established in the previous step create an expression as in Step 5. This expression will include the error message that will appear to the user if the vacation request date is before the entitled date. The expression should look like this:
Note that at the end of the expression the variable EntranceJob is used to show the user the date from which vacations are allowed.
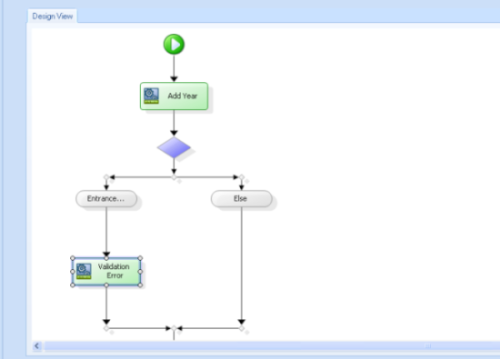
The rule looks like this:
7. Save the rule by clicking on the OK button.
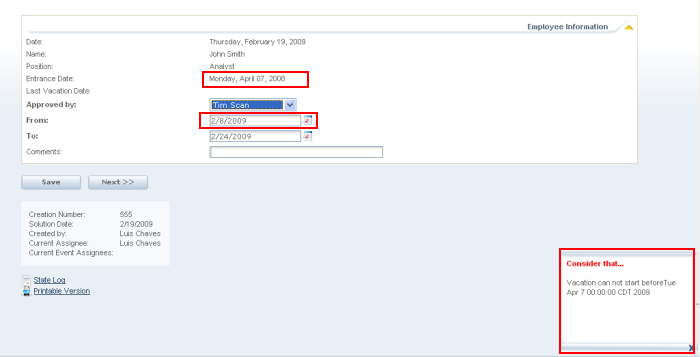
The rule can now be tested. If the user requests a vacation prior to one year of being employed the message will look like this.
Subtract Dates
It may be necessary to subtract dates to find out the number of days (years, hours, minutes) between two dates in a process. To illustrate this operation, the number of business days in a vacation request will be calculated using the vacation's start and end dates.
1. Create a new rule as in Steps 1 and 2 in Compare Dates above.
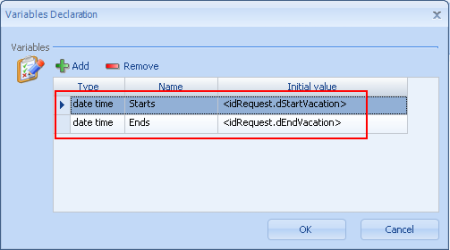
2. Declare as variables the start and end dates of the vacation requested by right clicking on ![]() and then click on Variable Declaration
and then click on Variable Declaration
Include the variables as shown below. Bear in mind that the initial value for each variable in this case is determined with XPath expressions using the structure of the data model.
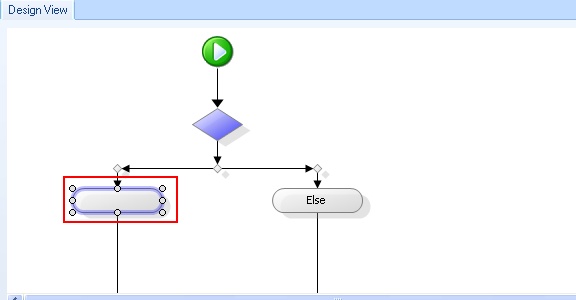
3. After declaring the variables add an IF condition by right clicking on the black arrow.
Then double click on the blank grey rounded rectangle.
Set the condition as shown below. In the right hand drop down list click on Select Field.
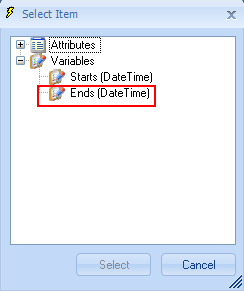
Then select the variable that needs to considered. In this case Ends.
Click on Select
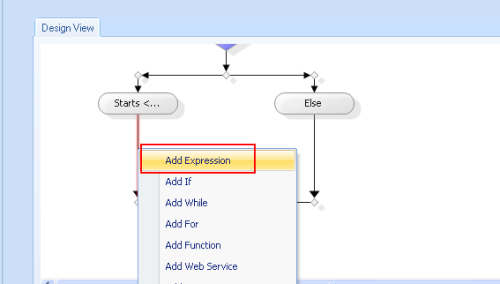
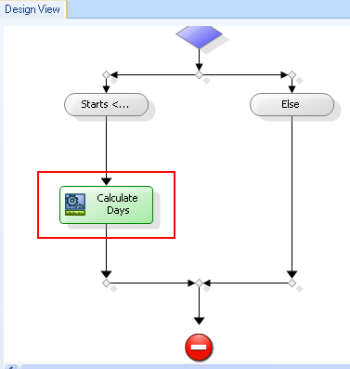
4. Now an expression is required to calculate the days. Right click on the black arrow that comes out of the left side of the IF condition just created and select the option Add Expression.
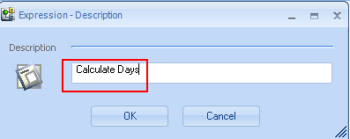
Include a name that makes the rule easy to understand. In this case Calculate Days.
Double click on the expression just created.
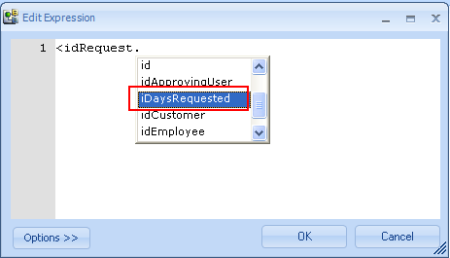
Find the attribute where the difference in the number of days will be stored. Use the help facility in order to prevent mistakes as shown below. In this case the attribute to store the calculation is iDaysRequested and is located in the Request entity.
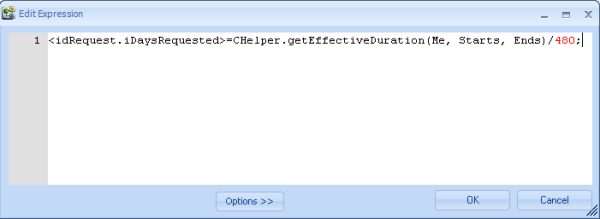
Make that attribute equal to the expression shown below. This will automatically calculate the number of minutes between the two dates.
Note that the expression above is divided by 480. This is done for two reasons: the first is the result needs to be in days and the working time for this application has 8 hour working days (60 min.* 8 hours = 480 min). So if the result is required in minutes the division can be omitted.
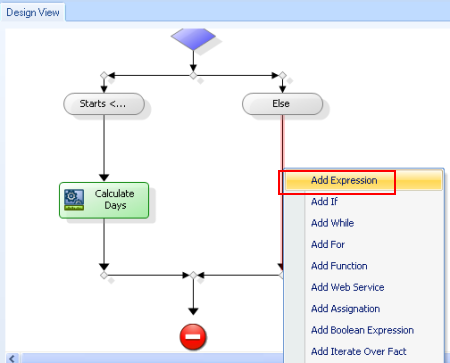
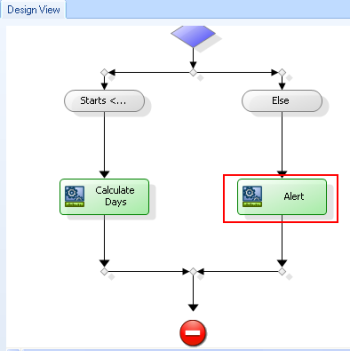
5. Add an expression on the Else side of the condition to inform the user of an error. Right click on the black arrow that comes out of the Else condition, and select Add Expression.
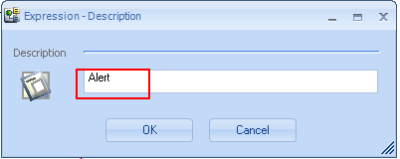
Name it Alert.
Double click on the expression just created.
Include the error message as shown below to ensure the user includes the information as expected.
6. The rule is now finished but needs to be associated in the process. Open the Properties of the shape where it is to be included and go to the Actions tab to select the rule. In this case, the rule is associated On Exit of the first activity and the field where the value is saved is shown in the second activity of the process.
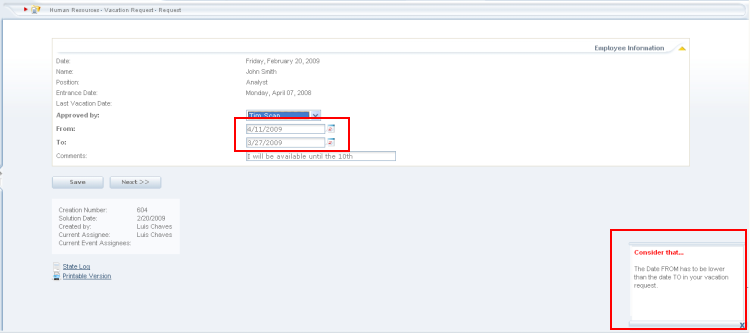
7. Now test the rule. Make a mistake in the dates as shown below to test the error message.
Now test the calculation. This is how the second activity looks with the field that saved the number of days calculated in the rule.
Assign Today's Date to an Attribute
The Vacation Request process will again be used to show how this works. The objective in the following example is to include today's date in the request as a reference for everybody during the process and after the process is closed.
1. Create a new rule as in Steps 1 and 2 in Compare Dates above.
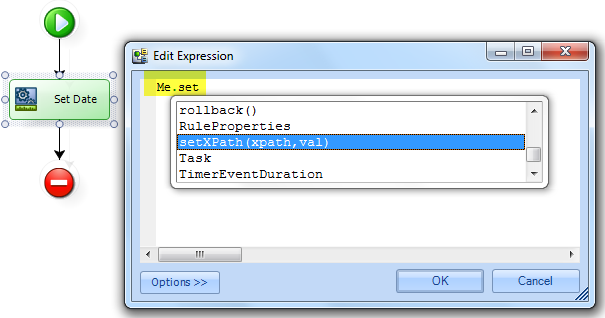
2. Create an expression by right clicking on the black line and selecting Add Expression as shown below
Name the Expression Set Date.
Then double click on the expression.
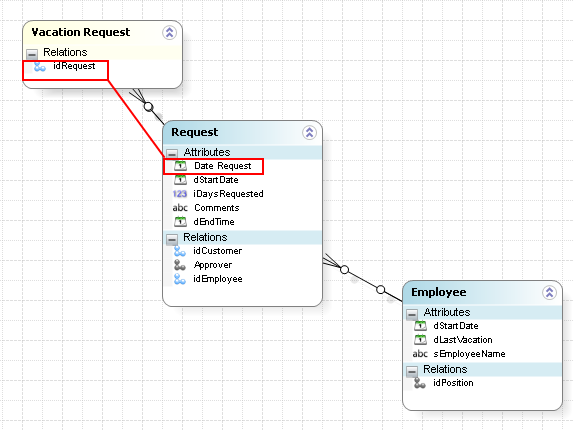
3. Starting from the entity that was used as context in the rule, use Xpath to determine the attribute needed to assign today's date. In this example, Today's Date needs to be assigned to an attribute called dRequestDate (Attribute name in the diagram is Date Request) in the entity Request. This entity will save the date that the employee requested vacations as reference in the process forms. The data model looks like this:
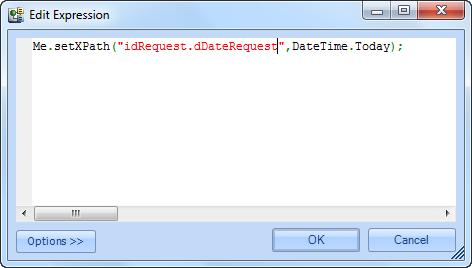
To assigne DateTime.Today to an attribute using XPath you should always user Me.setXPath function.
To include today's date as a value in the attribute make it equal to: DateTime.Now, to include the time and today's date, or DateTime.Today, for the date only. The example looks like this:
Me.setXPath("idRequest-dDateRequest",DateTime.Today);
4. Save the rule and now associate it in the process wherever it is required, in the example, the date the case was created to indicate when the request started.
The rule will now be included in the process. Go to Process> Select the process (In this example, Vacation Request) > then click on Check-out
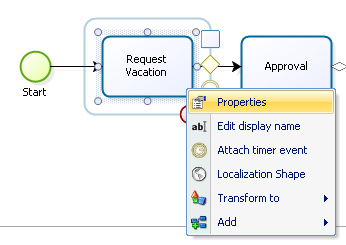
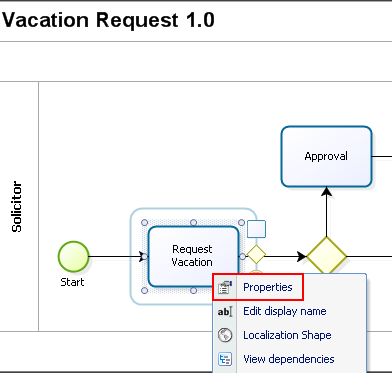
Right click on the activity and click on Properties, as shown below. In the example, the rule is required in the first activity Request Vacation
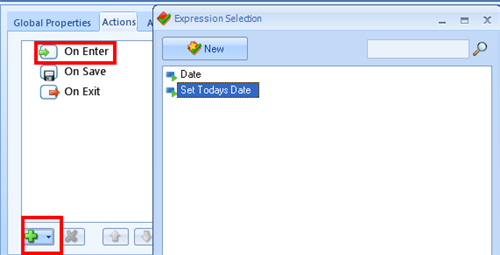
Go to the Actions tab and add a new action. Then select the rule just created using the Plus (+) sign.
Determine if the rule should be executed On Enter, On Save or On Exit. In this example, we need the rule to be executed On Enter.
Click on Ok. It is now ready to be tested.
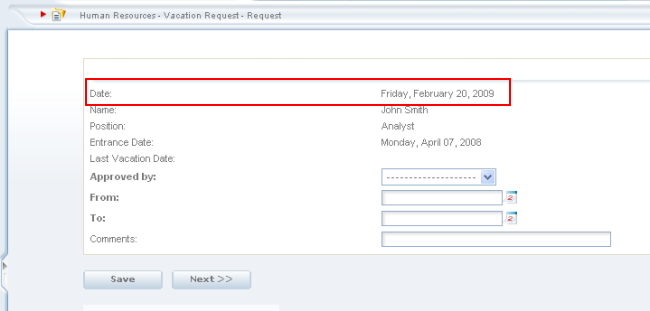
Today's date will now be assigned whenever a new case is created. It will be shown as follows:
Related Articles
<comments />
