Modules: For While and Web Service
From Business Process Management, BPM and Workflow Automation Wiki | BizAgi BPMS
<keywords content="keywords"> for, while, web service, add for, add while, loop, iteration </keywords>
Contents |
For, While, and Web Service modules in Bizagi rules
For
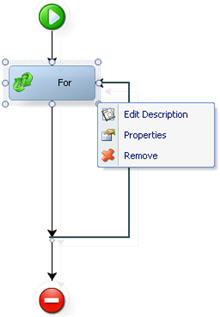
This module offers the possibility to include the logic of a cycle executed a number of times, which may be equal to the number of iterations required to reach a final value starting with an initial value and increasing this value by a certain amount on each iteration. Right click on the rectangle to display the following list of options:
![]() Edit Description: Makes changes to the name given to the module.
Edit Description: Makes changes to the name given to the module.
![]() Properties: Allows you to establish the conditions for the cycle.
Properties: Allows you to establish the conditions for the cycle.
![]() Remove: This option allows you to eliminate the entire module.
Remove: This option allows you to eliminate the entire module.
How to Add a For
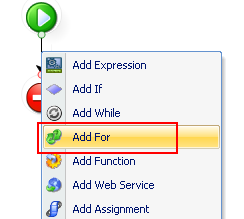
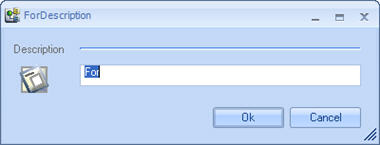
1. Right click on the vertical line of the rule and select the Add For option; the For-Description window will pop up for you to name the module
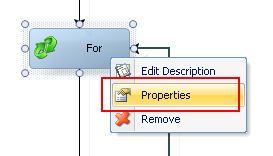
2. Right click on the module created and select the Properties option to establish its characteristics in the new window.
3. The For window includes the following characteristics:
|
Loop Initialization: indicates the declared variable that will be used for the cycle, = indicate the initial value of the variable Loop Condition: indicates the condition that must be fulfilled to enter the cycle. When the condition is no longer met the cycle finishes. Loop Increase/Decrease: indicates the amount of which the variable is going to increase/decrease in each of the iterations. |
|
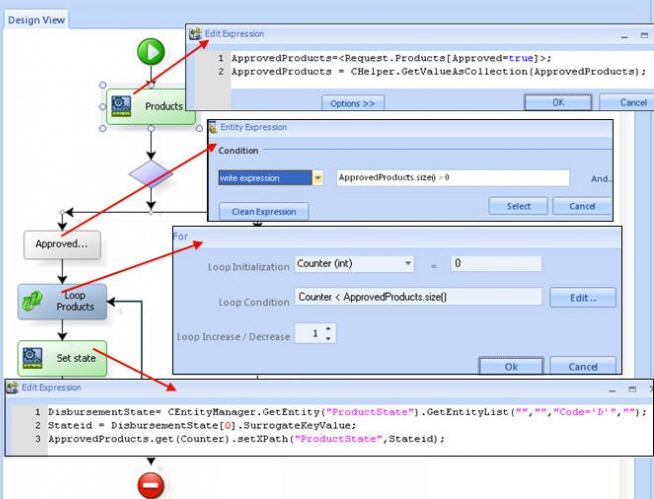
Example: In the Loan Request process, as soon as a Credit Analyst approves a credit, each product has to change its state. It is necessary to loop through each approved product, and set a new Product State. |
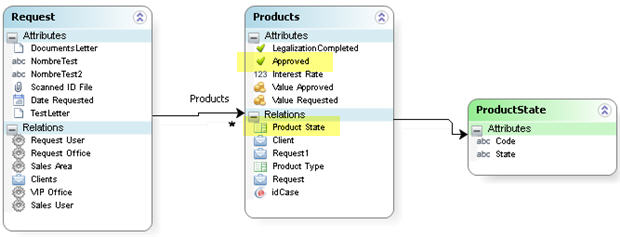
This is how the data model looks like for the example:
While
This module offers the possibility to include the logic of a cycle executed while a condition is true.
|
Note:Make sure the condition is associated and there is no possibility of generating a never-ending loop |
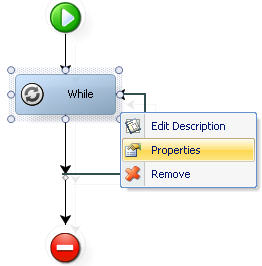
Right click on the diagram to display the list of options described below associated with this module:
![]() Edit Description: Makes changes to the name given to the diagram.
Edit Description: Makes changes to the name given to the diagram.
![]() Properties: Allows you to edit the condition in the “Entity Expression” window.
Properties: Allows you to edit the condition in the “Entity Expression” window.
![]() Remove: This option allows you to eliminate the entire module.
Remove: This option allows you to eliminate the entire module.
How to Add a While
1. Right click on the vertical line of the rule and select the Add While option; the While-Description window will pop up for you to name the module
2. Right click on the module created and select the Properties option to establish its characteristics in the new window.
3. The While window includes the condition for the cycle to be carried out.
a. In the first field, select the object to be evaluated: The combo offers the following options:
![]() List of attributes of the Context Entity: allows you to select any of the attributes in the Context Entity.
List of attributes of the Context Entity: allows you to select any of the attributes in the Context Entity.
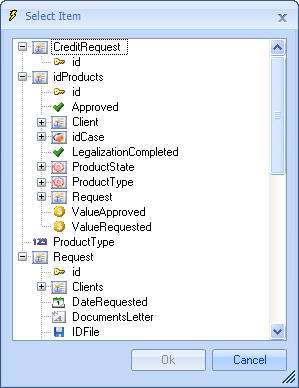
![]() Select Attribute: allows you to select an attribute related to the Context Entity. If you select this option, the Select Item window will pop up with a tree to select the item from.
Select Attribute: allows you to select an attribute related to the Context Entity. If you select this option, the Select Item window will pop up with a tree to select the item from.
![]() Write Expression: allows you to type in an expression directly. If you choose this option, a text box will open to the right of the combo for you to type it in.
Write Expression: allows you to type in an expression directly. If you choose this option, a text box will open to the right of the combo for you to type it in.
b. If you chose an attribute in the previous step, another combo will appear presenting several options depending on the type of attribute selected,including:
|
Attributes/Definitions |
Operators |
|
Numerical |
Equal, Different, Less Than, Less Than or Equal To, Greater Than, Greater Than or Equal To, Empty, Full. |
|
Text |
Equal, Different, Empty, Full, Contains, Does Not Contain, Starts With, Does Not Start With. |
|
Boolean |
Empty, Full, Equal to Yes, Equal to No. |
c. If your selection requires the inclusion of another argument, another combo will appear offering the following options:
![]() Enter Number: Allows you to enter a constant, only available for numerical attributes.
Enter Number: Allows you to enter a constant, only available for numerical attributes.
Enter Text: Allows you to type in a text, only available for string type attributes.
Enter Date or Date and Time: Allows you to enter a constant date or date and time, only available for date type attributes.
![]() Select Field: When you choose this option, the Select Item window will pop up with a tree for you to select the attributes of the Context Entity and the attributes related to the Context Entity.
Select Field: When you choose this option, the Select Item window will pop up with a tree for you to select the attributes of the Context Entity and the attributes related to the Context Entity.
List of Variables: Allows you to select any of the variables declared in the Start module.
![]() Select Entity Value: Allows you to select the value of the attribute evaluated when it is reacting with a parameterization entity.
Select Entity Value: Allows you to select the value of the attribute evaluated when it is reacting with a parameterization entity.
4. If you need to add another condition, the And button allows you to include it by means of a logical operator "And" or "Or". In the event that the conditions have to be grouped together with parentheses, click on the Link button, which will nest the condition with the one preceding it. To delete conditions, click on the Delete button to eliminate them one at a time.
Web Service
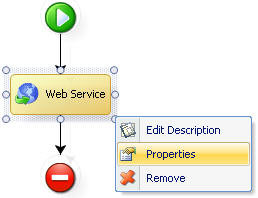
This module allows you to effortlessly include calls on web services in the rule. Right click on the diagram to display the list of options described below associated with this module:
![]() Edit Description: Makes changes to the name given to the diagram.
Edit Description: Makes changes to the name given to the diagram.
![]() Properties: Allows you to configure the call on the web service.
Properties: Allows you to configure the call on the web service.
![]() Remove: This option allows you to eliminate the entire module.
Remove: This option allows you to eliminate the entire module.
How to Add a Web Service
To learn how to create and use a web service from a Bizagi rule, go to Invoking a web service from a rule.
Take into account that a web service can also be invoked from an activy action in a task. For more information about this option, view the web services example.
Related Articles
- Invoking a web service from a rule.
- Web service invocation example from an activity action.
- Adding other modules in rules.
<comments />
