Adding Modules in Rules
From Business Process Management, BPM and Workflow Automation Wiki | BizAgi BPMS
<keywords content="keywords">add, expression, expressions, rules, if, while, for, function, web service, boolean expression, iteration over fact, iteration over xpath, modules, rule modules</keywords>
Contents |
Adding Modules in Rules
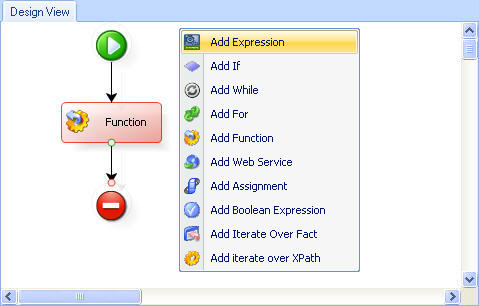
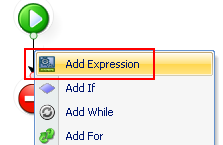
Modules are options that allow you to establish specific behaviors, characteristics and conditions for a business rule. In order to add modules, right click on the corresponding vertical line to drop down a list with the following options:
When working with the modules, the code associated with the logic expressed in the design is created automatically in the Code View.
Boolean Expression
This module allows the user to include Boolean or conditional expressions. Remember that the conditions are met or not met if they result in a true or false response when evaluated.
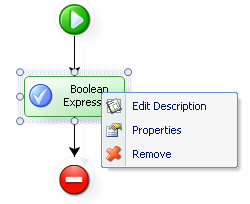
Right click on the diagram to display the list of options described below associated with this module:
![]() Edit Description: Makes changes to the name given to the diagram.
Edit Description: Makes changes to the name given to the diagram.
![]() Properties: Allows the user to define the condition. The Entity Expression window pops up for the user to add the condition. Complex expressions can be included.
Properties: Allows the user to define the condition. The Entity Expression window pops up for the user to add the condition. Complex expressions can be included.
![]() Remove: This option allows the user to eliminate the entire module.
Remove: This option allows the user to eliminate the entire module.
How to Add a Boolean Expression
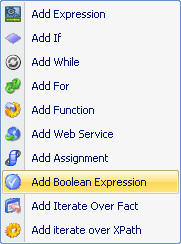
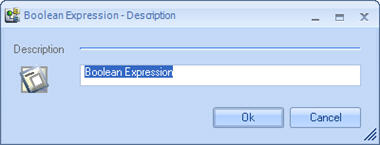
1. Right click on the vertical line of the rule and select the Add Boolean Expression option; a Condition-Description window will pop up for the user to name the Boolean Expression
2. Right click on the Boolean Expression and select the Properties option to establish its characteristics. The Entity Expression window will then pop up.
3. The conditions of the Boolean Expression are defined in the Entity Expression window.
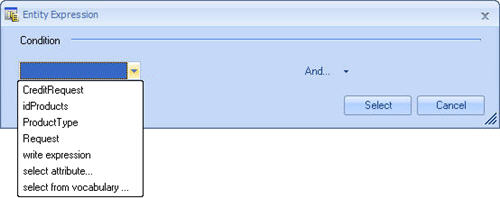
a. In the first field, select the object to be evaluated. The combo offers the following options:
![]() List of attributes of the Context Entity: allows the user to select any of the attributes in the Process Entity. In this example, these are the first four attributes shown in the image above.
List of attributes of the Context Entity: allows the user to select any of the attributes in the Process Entity. In this example, these are the first four attributes shown in the image above.
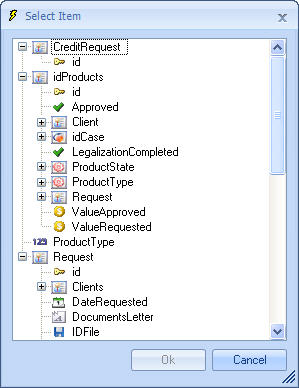
<span id="selectitem" />![]() Select Attribute: allows the user to select an attribute of the Data Model. If the user selects this option, the Select Item window will pop up with a tree to select the item from.
Select Attribute: allows the user to select an attribute of the Data Model. If the user selects this option, the Select Item window will pop up with a tree to select the item from.
![]() Write Expression: allows the user to enter an expression directly using XPath navigation. If the user chooses this option, a text box will appear to the right of the combo for the user to type in the expression.
Write Expression: allows the user to enter an expression directly using XPath navigation. If the user chooses this option, a text box will appear to the right of the combo for the user to type in the expression.
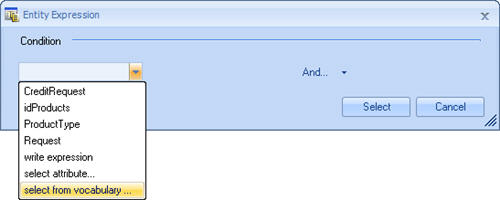
![]() Select from vocabulary: allows the user to select the “Get” definitions of the vocabulary used in the policies. If the user selects this option, the select item window will appear presenting all the GET definitions of the process selected.
Select from vocabulary: allows the user to select the “Get” definitions of the vocabulary used in the policies. If the user selects this option, the select item window will appear presenting all the GET definitions of the process selected.
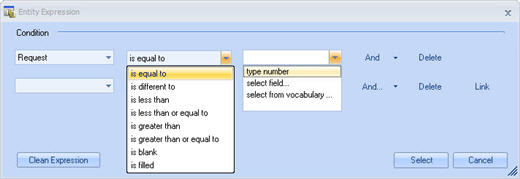
If the user chose an attribute in the previous step, another combo will appear presenting several options depending on the type of attribute selected, including:
|
Attributes/Definitions |
Operators |
|
Numerical |
Equal, Different, Less Than, Less Than or Equal To, Greater Than, Greater Than or Equal To, Empty, Full. |
|
Text |
Equal, Different, Empty, Full, Contains, Does Not Contain, Starts With, Does Not Start With. |
|
Boolean |
Empty, Full, Equal to Yes, Equal to No. |
c. If the user's selection requires the inclusion of another argument, another combo will appear offering the following options:
![]() Enter Number: Allows the user to enter a constant number, only available for numerical attributes.
Enter Number: Allows the user to enter a constant number, only available for numerical attributes.
Enter Text: Allows the user to type in a text, only available for string type attributes.
Enter Date or Date and Time: Allows the user to enter a constant date or date and time, only available for date type attributes.
![]() Select Field: When the user chooses this option, the Select Item window will be displayed, where the user can select the attributes of from the data model.
Select Field: When the user chooses this option, the Select Item window will be displayed, where the user can select the attributes of from the data model.
List of Variables: Allows the user to select any of the variables declared in the Start module.
![]() Select Entity Value: Allows the user to select the value of the attribute evaluated when it is reacting with a parameterization entity.
Select Entity Value: Allows the user to select the value of the attribute evaluated when it is reacting with a parameterization entity.
![]() Select Definition: Allows the user to select the “Get” definitions from the vocabulary used in the policies. If the user selects this option, the select item window will appear presenting all the GET definitions of the process selected.
Select Definition: Allows the user to select the “Get” definitions from the vocabulary used in the policies. If the user selects this option, the select item window will appear presenting all the GET definitions of the process selected.
4. If the user needs to add another condition, the And button allows the user to include it by means of a logical operator "And" or "Or". In the event that the conditions have to be grouped together with parentheses, click on the Link button, which will nest the condition with the one preceding it. To delete conditions, click on the Delete button to eliminate them one at a time.
|
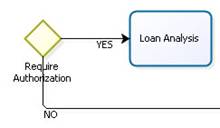
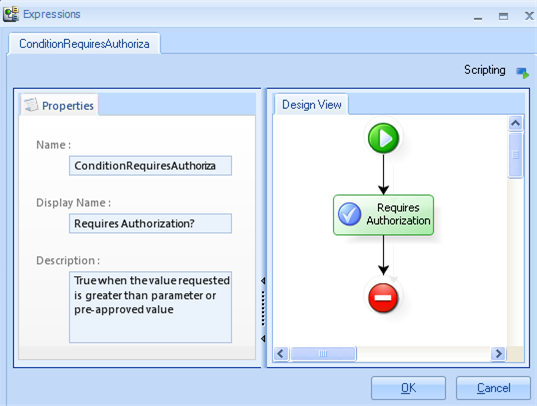
Example: A Loan analysis is required for a Loan Request process when the amount requested by the client is greater than 1000 or the amount requested is greater than a Maximum Value established. |
|
The Maximum value is in the Vocabulary, because it must be administrable. |
Expression
This module offers the possibility to type the desired code.
After a sentence is written ALWAYS FINISH EACH ONE WITH A SEMICOLON ( ; )
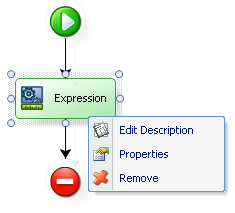
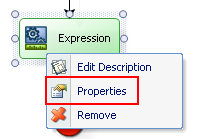
Right click on the diagram to see the options associated to the module, described in detail below.
![]() Edit Description: Makes changes to the name given to the diagram.
Edit Description: Makes changes to the name given to the diagram.
![]() Properties: This option displays a window for you to type in the code directly.
Properties: This option displays a window for you to type in the code directly.
![]() Remove: This option allows the user to eliminate the entire module.
Remove: This option allows the user to eliminate the entire module.
How to Add an Expression
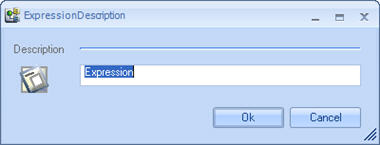
1. Right click on the vertical line of the rule and select the Add Expression option; the Expression-Description window will pop up for the user to name the Expression
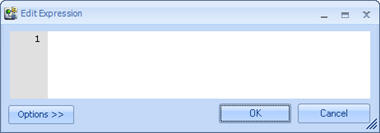
<span id="editexpression" />2. Right click on the Expression module and select the Properties option to establish its characteristics. The Expression window will then pop up.
The code must be typed in directly in this window.
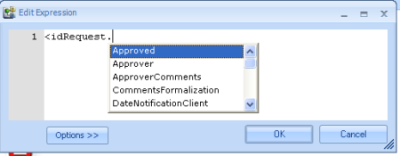
![]() To make use of the attributes of the entity relation model, Bizagi uses “intellisense” to effortlessly construct the rules. To enter the attribute desired, type in the “<” symbol. A list will then appear with all the attributes of the Context Entity where the user will select one. In the event that the attribute the user is looking for is in another entity related to this one, the user must select the attribute related to the other entity (also known as Foreign Key). The user must type in the “.” Symbol and a list will appear for the user to select the attribute desired from the related entity. This procedure can be repeated once and again. Finally, when the user finds the name of the attribute the user is looking for, type in the “>” symbol.
To make use of the attributes of the entity relation model, Bizagi uses “intellisense” to effortlessly construct the rules. To enter the attribute desired, type in the “<” symbol. A list will then appear with all the attributes of the Context Entity where the user will select one. In the event that the attribute the user is looking for is in another entity related to this one, the user must select the attribute related to the other entity (also known as Foreign Key). The user must type in the “.” Symbol and a list will appear for the user to select the attribute desired from the related entity. This procedure can be repeated once and again. Finally, when the user finds the name of the attribute the user is looking for, type in the “>” symbol.
|
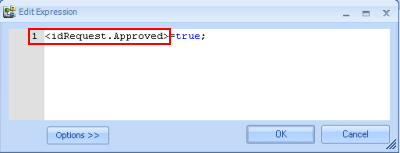
Example: The following figures indicate how to obtain the name of a specific attribute. The attribute Approved was found in the related entity Request using idRequest. |
The users can also use Xpath expressions, activity or process attributes and variables in the expressions.
To use a variable that has been declared in the Start module, click on the Options button and select the variable.
The operators that can be used in the Expression module are:
|
Attributes |
Operator |
Fomula |
|
= |
Assignment |
<idRequest.idClient.idCity> = 1 |
|
+ |
plus |
nDays = <idRequirement.DaysTask> + 1; |
|
* |
Times (Multiply) |
<idRequest.Interest> = <idRequest.Interes> * 3; |
|
- |
Minus |
nDays = <idRequirement.DaysTask> - 1; |
|
/ |
Divided by |
nDays = <idRequirementDaysTask> /3 ; |
|
== |
Equals |
<idRequest.idClient.idCity> == 1 |
|
!= |
Is not equal to |
<idRequest.idClient.idCity> != 1 |
|
> |
Greater than |
<idRequirement.DaysTask> > 3 |
|
< |
Less than |
<idRequirement.DaysTask> < 3 |
|
>= |
Greater than or equal to |
<idRequirement.DaysTask> >= 3 |
|
<= |
Less than or equal to |
<idRequirement.DaysTask> <= 3 |
|
&& |
and |
<idRequirement.idConcept> == 1 && <idRequirement.DaysTask> > 3 |
|
|| |
or |
<idRequirement.DaysTask> >= 3 || <idRequirement.idConcept> != 1 |
|
Note: The names of the entity attributes should be written starting from the Context Entity. That is, the attribute should belong to an entity that is somehow related to the Context Entity. |
|
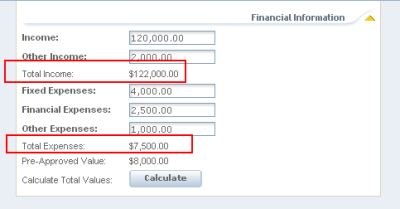
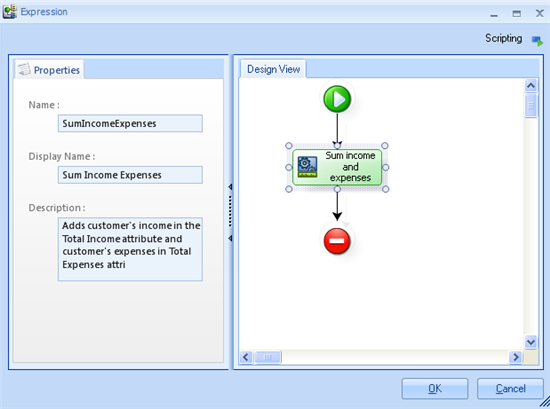
Example: During the Loan Request process, the Client’s income and expense data is required. In order to prevent errors in the addition, the Client’s income and expenses must be added up. The total Income is equal to the sum of the Income plus other income and the total expenses is equal to Expenses, plus financial expenses plus other expenses. |
This is how the screen will look :
This would be the design view of the rule that does the calculations :
This is how the in the rule in the button would look:
(Have in mind that this is having the Client entity as the context entity)
This is how the rule executing On Exit of the activity would look:
(Have in mind that this is having the application entity as the context entity)
|
Alert:When you finish an Expression that returns a value, and the value to return is Undefined, the expression will return the LAST line that was assigned that was NOT undefined. For example, returning a variable that contains a sum: var SUM = <Attribute1> + <Attribute2>; SUM; If the variable SUM is is undefined, the rule will return the last line that was assigned that was NOT undefined. . |
Related Information
<comments />
