Bizagi Folders
From Business Process Management, BPM and Workflow Automation Wiki | BizAgi BPMS
<keywords content="keywords"> folder, folders, keep, store, organize, organizing, organization, information </keywords>
Contents |
Smart Folders
Smart Folders are case repositories that meet certain filters. Each smart folder can be associated with a filter, for example, all files that have been registered as of a determined date.
How to Create a Smart Folder
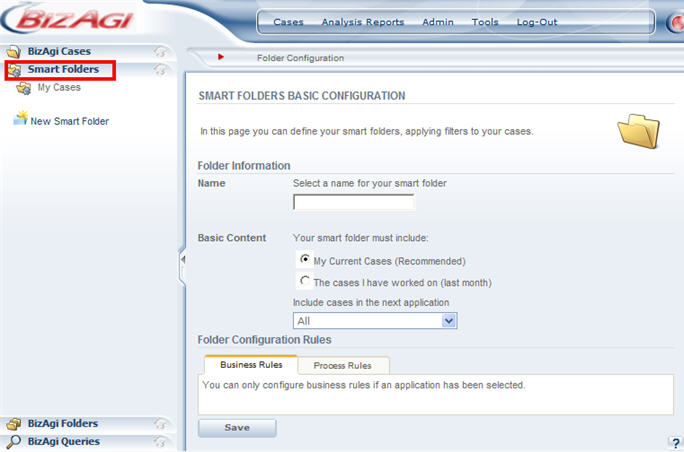
1. On the main screen of Bizagi's web application identify the Case Area at the left, and select the Smart Folders option. Click on the New Smart Folder link, and the configuration will appear for the folder in the work area of the application.
|
Note: One smart folder appears for all users by default, called “My cases”. It shows the cases for all the applications that have been registered by the user in the last 3 months. Although this folder is common to all users, each user can modify it independently. |
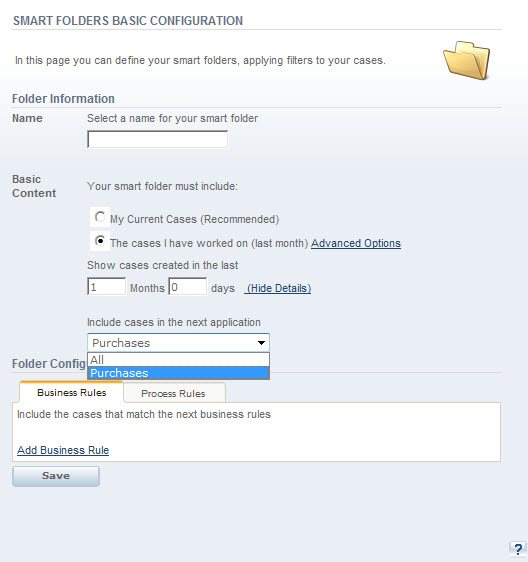
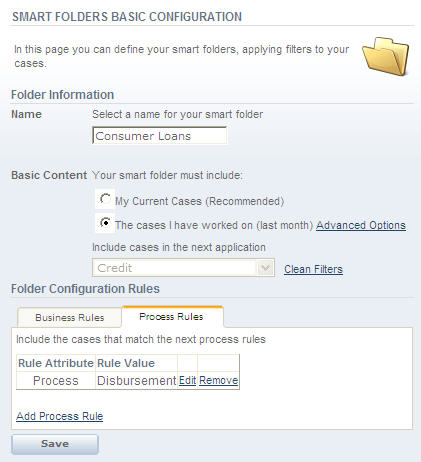
2. In the Folder Information Section, enter the name and basic content of the new folder.
The basic content of the smart folder is configured according to the following filters:
Basic Content
|
Filter |
Description |
|
My current cases (recommended) |
When this is checked, the second option is disabled |
|
The cases I have worked on (last month) |
When this is checked the first option is disabled and the number of months can be configured since the case was registered |
|
Include cases in the next application |
This combo filters cases for a specific application or for all the applications. |
3. In the Folders Configuration Rules section the specific filters are defined for the smart folders. The filters are divided in two, Business Rules and Process Rules
![]() Business Rules (Applies to ENTERPRISE .NET EDITION and ENTERPRISE JEE EDITION) : These filters correspond to true data for a case, for example the client name, the ID number, the value of the amount, etc. Business filters can only be associated with the folders of one application in particular (not all the applications) defined in the basic content of the folder creation, for this reason these cannot be defined in the Xpress Edition.
Business Rules (Applies to ENTERPRISE .NET EDITION and ENTERPRISE JEE EDITION) : These filters correspond to true data for a case, for example the client name, the ID number, the value of the amount, etc. Business filters can only be associated with the folders of one application in particular (not all the applications) defined in the basic content of the folder creation, for this reason these cannot be defined in the Xpress Edition.
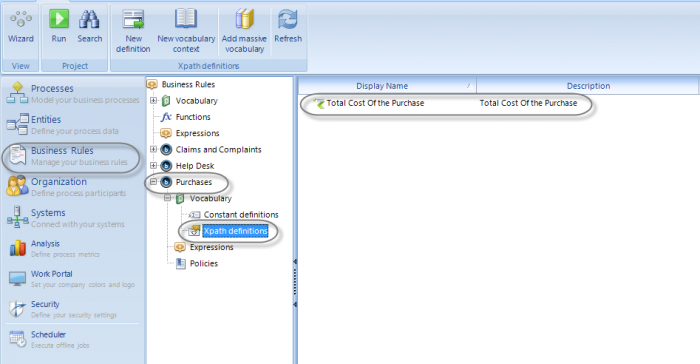
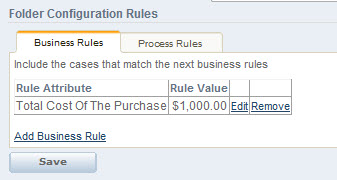
The possible business filters (variables) are configured from the Vocabulary in the Business Rules associated to an application. In the following image it can be seen that the vocabulary has been created (Total Cost Of The Purchase) and associated to the Purchases application.
It is important to bear in mind that the Business filters can only be defined by XPaths definitions for values and not for collections. Additionally the option "definition will be used to get a value" must be selected.
If you want to get more informacion, please read the article how to create a vocabulary
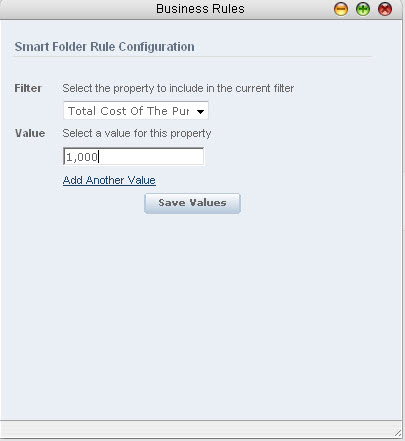
It is recommended to execute the iisreset command at this point in ordero to be able to see the changes reflected in the application. In the user portal, click on Add Business Rule in the Smart Folder's creation form and select the vocabulary that has been created in the previous step. The user will need to insert the parameters that will be used as filter for the search.
Once the changes are saved, they will be reflected in the creation form of the smart folder.
![]() Process Rules: this filter refers to the information for the cases that are not related to the business. For example, the registration date, the state of the task, the name of the person who registered the case, the process name, etc.
Process Rules: this filter refers to the information for the cases that are not related to the business. For example, the registration date, the state of the task, the name of the person who registered the case, the process name, etc.
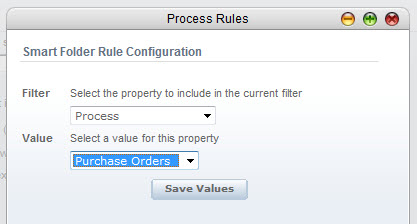
To create this type of filter, select the link Add Process Rule, and select the filter and value.
A new window will be displayed. The property (value) that will be included in the filter can be selected.
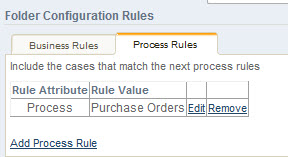
Once the changes are saved, they will be reflected in the creation form of the smart folder
Process Rules
|
Filter |
Value |
|
Creator Login Name |
Name of Creator |
|
Task State |
Expired Cases Cases that Expire in the future Today Expiration cases |
|
Process |
Shows the existing processes |
|
Category |
Shows the categories created by process |
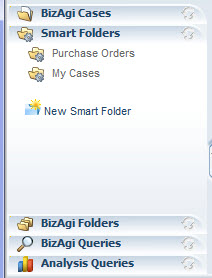
4. Once the basic configuration of the folder is created, press the Save button. Once created, the Smart Folder appears in the Cases area of the application. When you click on the smart folder, the application will automatically show all the cases that meet the configured criteria.
In the following shows the result of a search applying the filter defined in the associated vocabulary associated to the smart folder
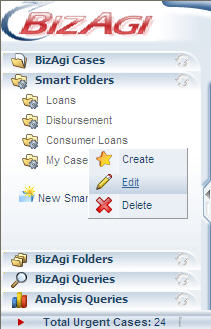
You can right click on a smart folder to make the contextual menu appear. With this menu you can carry out the following actions:
![]() Create: Permits the creation of a related folder for the current folder. The folders can thus be seen in a tree form. The related folder's cases have no connection to the cases that belong to the parent folder, in other words, the user can move the cases toward the related folder, the parent folder.
Create: Permits the creation of a related folder for the current folder. The folders can thus be seen in a tree form. The related folder's cases have no connection to the cases that belong to the parent folder, in other words, the user can move the cases toward the related folder, the parent folder.
![]() Edit: This allows you to change the name of the folder.
Edit: This allows you to change the name of the folder.
![]() Delete: This permits the removal of the selected folder. Its related folders will also be removed. It is important to mention that the cases ARE NOT DELETED. They are simply disassociated from a folder. A case can be in more than one folder.
Delete: This permits the removal of the selected folder. Its related folders will also be removed. It is important to mention that the cases ARE NOT DELETED. They are simply disassociated from a folder. A case can be in more than one folder.
When a smart folder is created or edited, it presents the same screen for making changes.
Bizagi Folders
Custom folders permit the storage of cases selected by the user. Each user can create a “directory” structure that contains folders, and each one of them can have associated cases, in a similar way Windows directories are managed.
This concept is useful for organizing information since the user can create a structure according to his needs, and include the cases that interest him.
How to Create a Bizagi Folder
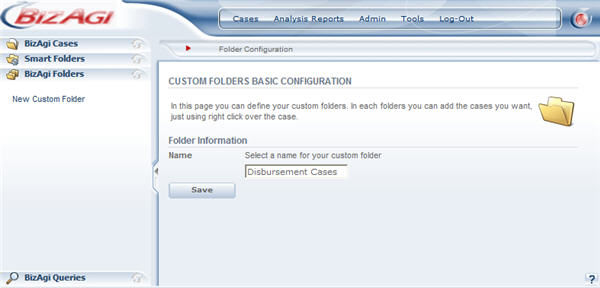
1. On the main screen of Bizagi, identify the Cases area and select the option Bizagi Folders. Click on the New Custom Folder link, and a window will appear to configure the folder in the work area of the application.
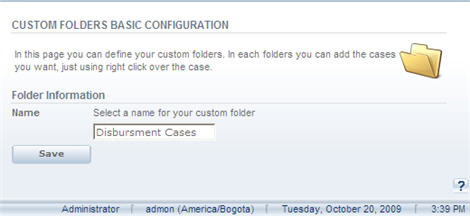
2. In the folder’s information section enter the name of the new folder. For custom folders, only the name can be configured.
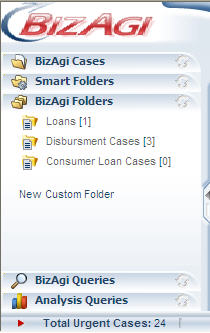
The number [0] next to the name of the custom folder indicates the current number of cases.
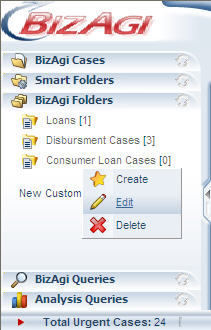
You can right click on a custom folder to make the contextual menu appear. Using that menu, you can take the following actions:
![]() Create: Permits the creation of a daughter folder for the current folder. The folders can thus be seen in a tree form. The daughter folder cases have no connection to the cases that belong to the parent folder, in other words, the user can move the cases toward the daughter folder, the parent folder, or toward both of them.
Create: Permits the creation of a daughter folder for the current folder. The folders can thus be seen in a tree form. The daughter folder cases have no connection to the cases that belong to the parent folder, in other words, the user can move the cases toward the daughter folder, the parent folder, or toward both of them.
![]() Edit: This allows you to change the name of the folder.
Edit: This allows you to change the name of the folder.
![]() Delete: This permits the removal of the selected folder. Its daughter folders will also be removed. It is important to mention that the cases ARE NOT DELETED. They are simply disassociated from a folder. A case can be in more than one folder.
Delete: This permits the removal of the selected folder. Its daughter folders will also be removed. It is important to mention that the cases ARE NOT DELETED. They are simply disassociated from a folder. A case can be in more than one folder.
When a Bizagi folder is created or edited, the same screen will be presented for the changes.
How to Associate a Case to a Folder
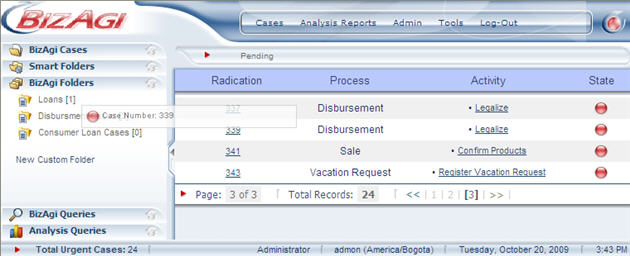
1. To associate a case to a folder you should “drag & drop” the case over the custom folder. For example, in the list of pending cases or in a search, drag and drop the case state icon ![]()
![]() over the corresponding folder.
over the corresponding folder.
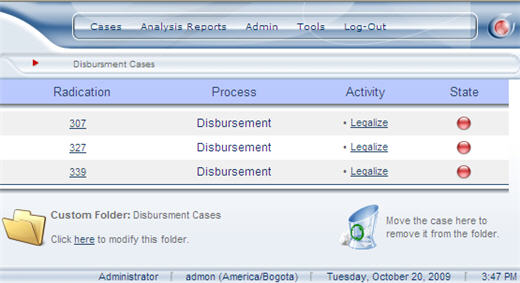
When you click on a folder containing cases, a list of the cases will appear.
On the screen the information on the folder can be edited (name), the cases can be seen (clicking on the registration number) or the cases can be disassociated from the folder. To do that, the case ![]()
![]() should be dragged toward the recycling bin found in the lower part of the screen.
should be dragged toward the recycling bin found in the lower part of the screen.
<comments />
