Tables in e-Mail Messages
From Business Process Management, BPM and Workflow Automation Wiki | BizAgi BPMS
<keywords content="keywords"> table, tables, notifications, notification, grids, grid, email table, collections in email, in e-mail, in messages </keywords>
Contents |
How to Create Tables in e-mail Messages
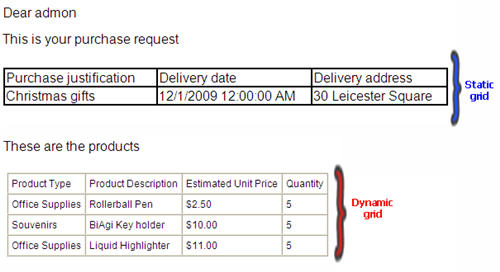
To include tables in an e-mail messages, users have two options to choose from: Static Grids and Dynamic Grids.
In this type of table there is a fixed number of columns and rows. Users can type the information to be displayed (to enter titles for example) or include attributes of the data model.
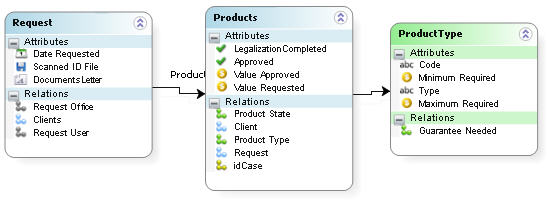
This type of tables display the information (or records) that are contained in the collections defined in the data model. For this kind of table there should be a one-to-many relationship created in Bizagi.
This is an e-mail with the two types of tables:
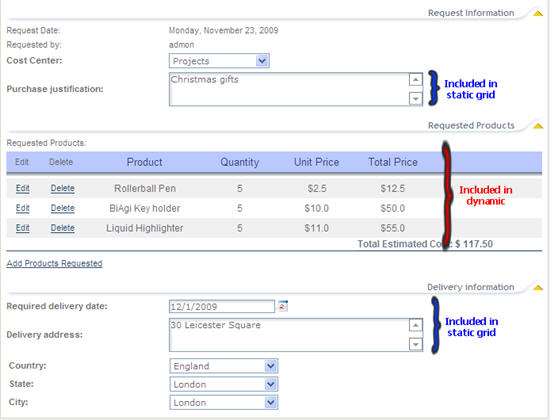
This is how the information looks like in the web application
How to include a Static Grid
|
Example: When a Purchase Request is created, an e-mail is sent to confirm the products and delivery information. |
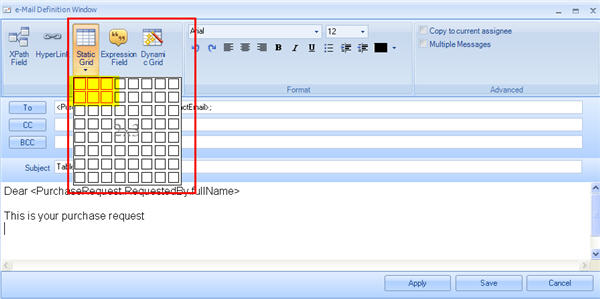
1. Click on the Static Grid button, on the top of the window. Select the number of rows and columns the table will have.
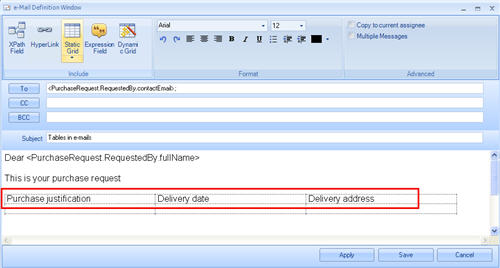
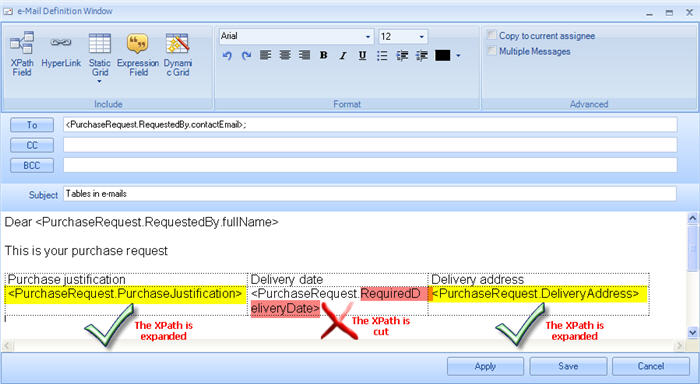
2. Type the information desired. In this case, we type the titles of the columns.
3. Include the data model information.
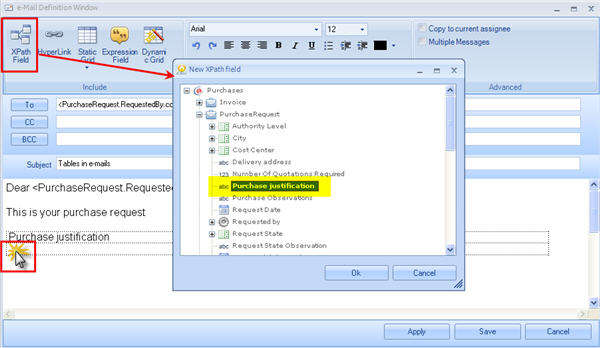
Place the cursor where the information will be placed in the table. Then, click on the XPath Field button on the top of the window.
A new window will display the data model. There, choose the attribute and click OK.
Make the table's columns as long as the XPath name is. If the XPath is cut, the e-mail will not display the information correctly.
How to include a Dynamic Grid
|
Example: When a Request is approved in a Loan Request process, a notification is sent to the Client with the information on the loans (products) that were approved. |
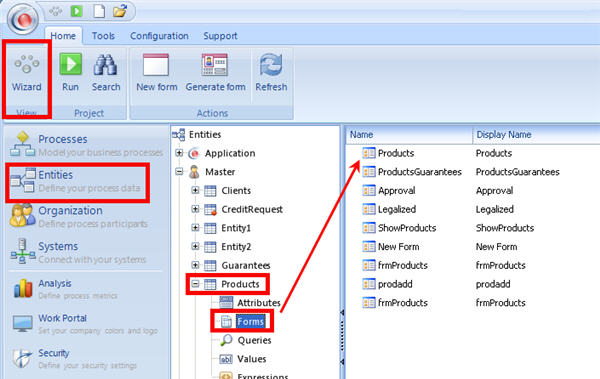
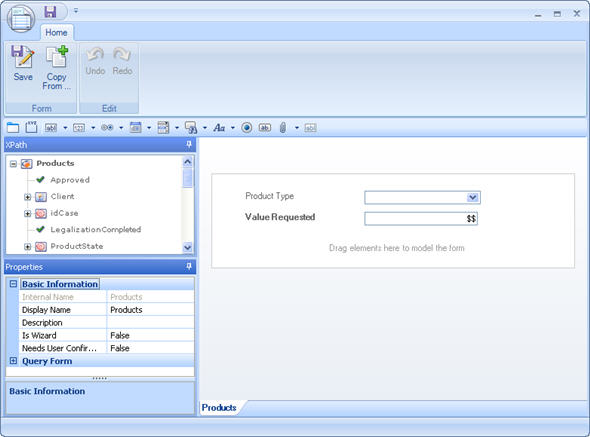
1. Create the form using the attributes to be presented as columns in the table. The form is in the N entity, in this case Products. The form can be created from the Modules view in Bizagi Studio or when typing the e-mail message. When creating the form, it is very important that the Is Reusable property has TRUE checked to enable it to be selected it in the e-mail.
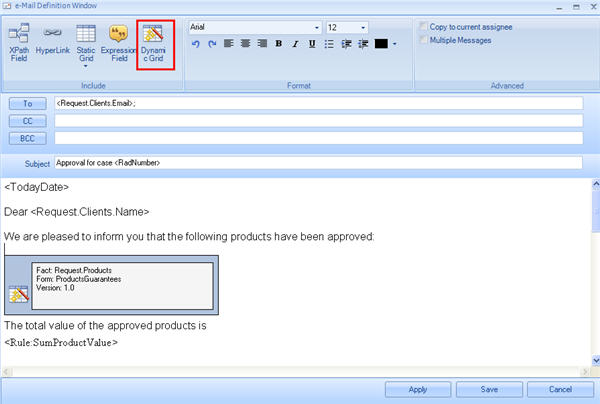
2. Create the message in the Process Modeler, and click on the Dynamic Grid icon at the top of the screen
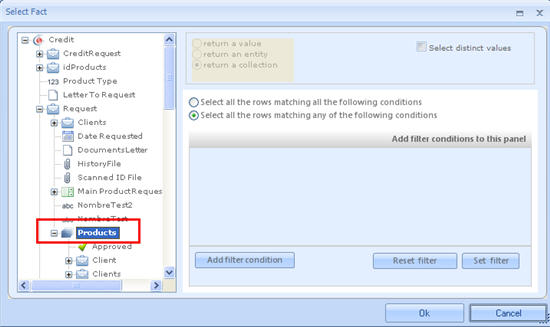
3. A new window will display the options to build the required table
The Fact Name is the name of the 1:N relationship that can be selected from the Data Model:
In this case, the table is Products.
When creating the form, it is very important that the Is Reusable property has TRUE checked. This is to enable it to be selected in the e-mail.
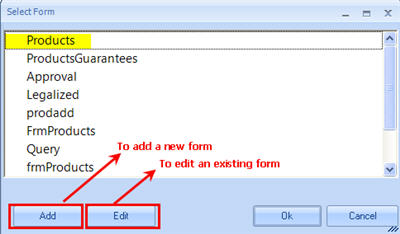
- If the form has already been created, select it by double clicking on its display name.
- If the form needs editing, click once over the name and click on the Edit button. A new window will open the form to be edited.
- If the form has not been created, click on the Add button. A new window will be displayed to build the form.
4. The same window will allow the user to customize the table with the desired Font, Color and Table Style.
Table Style
This tab contains the following properties:
![]() Table Alignment: indicates whether the table will be aligned to the left, right or centered.
Table Alignment: indicates whether the table will be aligned to the left, right or centered.
![]() Use Headers: shows the field names at the top of the table as displayed in the letter.
Use Headers: shows the field names at the top of the table as displayed in the letter.
Header Style
In this section, the user can configure the table header. These values will be taken into consideration only if Use Headers has been enabled in the table properties tab.
The following properties can be configured:
![]() Back Color: color of the background of the body of the table.
Back Color: color of the background of the body of the table.
![]() Align: alignment of the values of each of the columns of the body of the table.
Align: alignment of the values of each of the columns of the body of the table.
![]() Font: Choose the font color, name and size, and indicate whether it will be displayed in bold print and/or italics
Font: Choose the font color, name and size, and indicate whether it will be displayed in bold print and/or italics
Body Style
In this section, the user can configure the color, alignment and font of the body of the table.
The following properties can be configured:
![]() Back Color: color of the background of the body of the table.
Back Color: color of the background of the body of the table.
![]() Align: alignment of the values of each of the columns of the body of the table.
Align: alignment of the values of each of the columns of the body of the table.
![]() Font: Choose the font color, name and size, and indicate whether it will be displayed in bold print and/or italics.
Font: Choose the font color, name and size, and indicate whether it will be displayed in bold print and/or italics.
The table that has been created can be edited. In order to do so, double click on it and change the style.
To delete it, delete the icon shown using backspace.
This is how the e-mail will look:
|
Note:This way of including tables in Notifications does not allow filters in the entries of the table. It shows all the entries that belong to the relation. |
<comments />
