How to use Working times and Calendars
From Business Process Management, BPM and Workflow Automation Wiki | BizAgi BPMS
<keywords content="keywords">working times, time, schedule, work time, worktime, expired, calendar, calendars</keywords>
Contents |
How to use Working Times and Calendars
Working times and calendars are configured in Bizagi Studio.
Using this document enables the use of Bizagi's working times and calendars effectively in your process.
When to use it?
Configure Working Times if, when automating a process, the following situation arises:
![]() The default working time that Bizagi uses (Standard Calendar: Monday - Friday from 7 a.m. to 11 a.m. and then from 1 p.m. 5 p.m.) is different from the one the process requires (known as: Updating Working Times).
The default working time that Bizagi uses (Standard Calendar: Monday - Friday from 7 a.m. to 11 a.m. and then from 1 p.m. 5 p.m.) is different from the one the process requires (known as: Updating Working Times).
Why are working times important?
Configuring working times correctly for all participants in the process is important because:
![]() Users will have their pending work automatically classified in their process, making their work more efficient.
Users will have their pending work automatically classified in their process, making their work more efficient.
![]() Process Analysis using Bizagi's indicators will provide useful information to enable effective improvements to be made to the process.
Process Analysis using Bizagi's indicators will provide useful information to enable effective improvements to be made to the process.
![]() Notifications and alarms can be used adequately.
Notifications and alarms can be used adequately.
The following explains how to update working times.
Updating Working Times
To illustrate how to update working times in a calendar, the example that described below involves a process whose users have a different working time than Bizagi's Standard calendar. In this case, the users involved in the process work with the following schedule:
- Monday - Thursday from 8 a.m. to 12 p.m. and from 1 p.m. to 6 p.m.
- Friday from 8 a.m. to 12 p.m.
To modify the configuration of the Standard Calendar in Bizagi follow these steps:
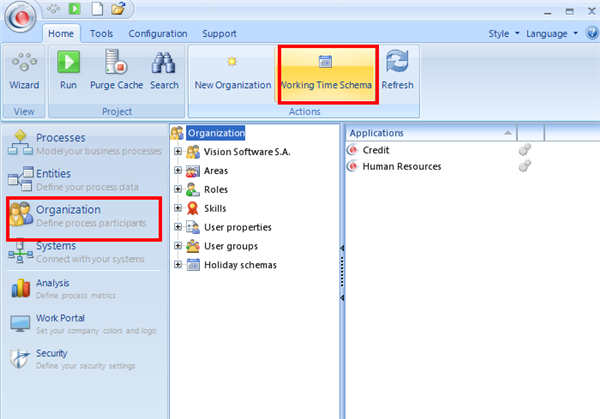
1. In Bizagi Studio go to: Organization and click on Working Time Schema.
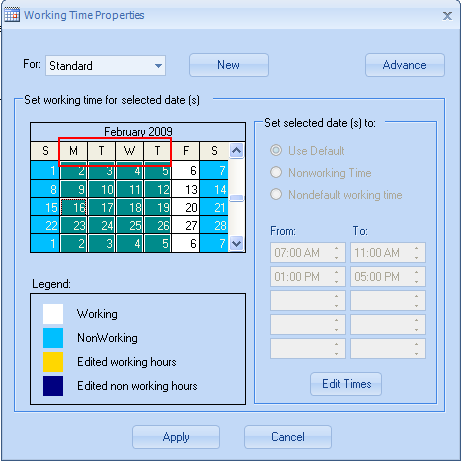
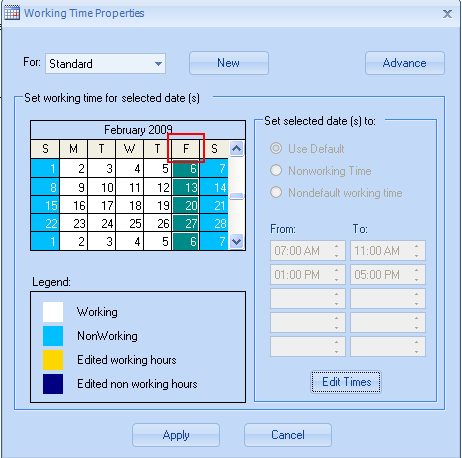
2. Select the appropriate letter at the head of each column representing the days of the week. In this case Monday through Thursday (M,T,W,T). Click on each letter while holding the Control (Ctrl) key
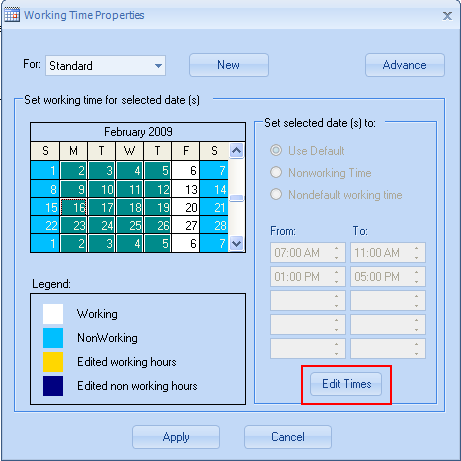
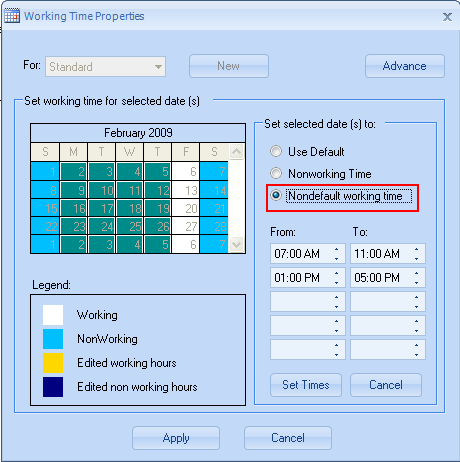
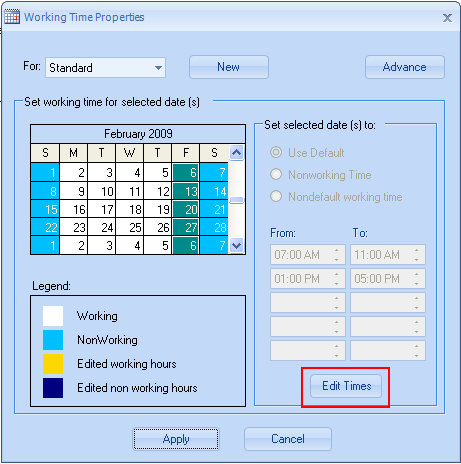
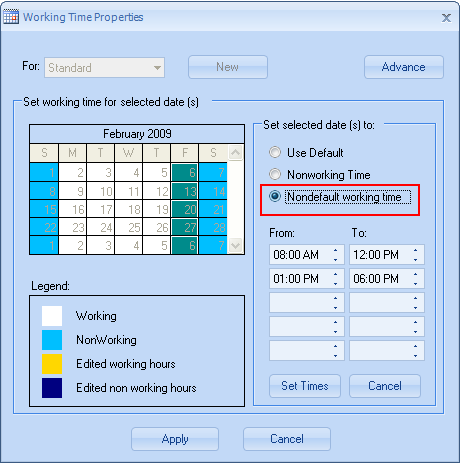
3. Click on Edit Times and then Nondefault working times.
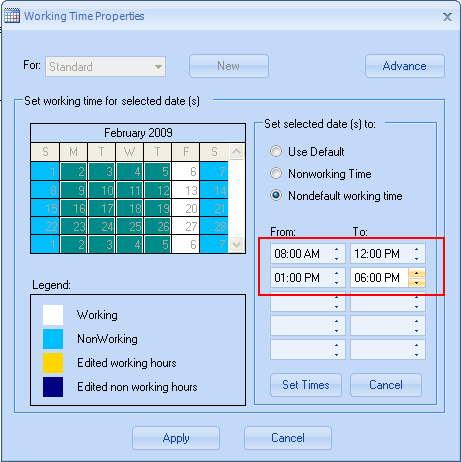
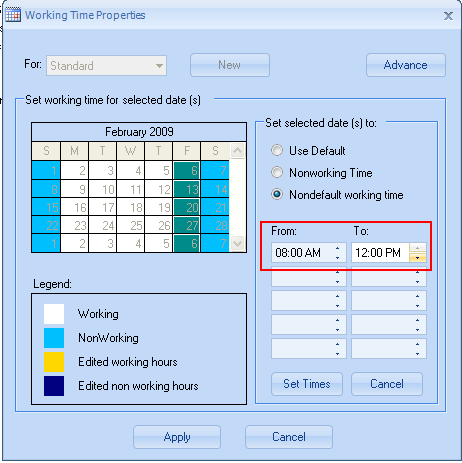
4. Change the required schedule for the days selected. In this example, enter in the first row From: 8:00 AM To: 12:00 PM and in the second row From: 1:00 PM To 6:00 PM. The up/down arrows may be used to select the required hour. The rest of the rows should be left blank.
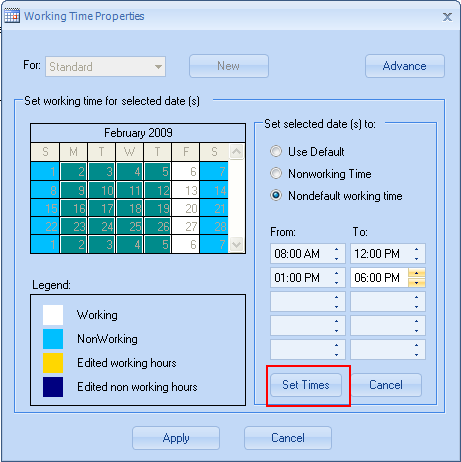
5. Click on Set Times.
6. Select the letter F at the head of the column for Friday.
7. Click on Edit Times and then Nondefault Working Times.
8. Enter the required schedule. In the example, enter in the first row From: 8:00 AM To: 12:00 PM. Make sure the rest of the rows are blank.
9. Click on Set Times and then Apply.
The changes to the calendar will now be available for all users
Relate Calendar to users
As soon as a calendar is created, it will be available for any user.
The calendar has to be related in each user´s properties.
1. To change a user's calendar select the Admin option on the Web Application's Main Menu and go to Users.
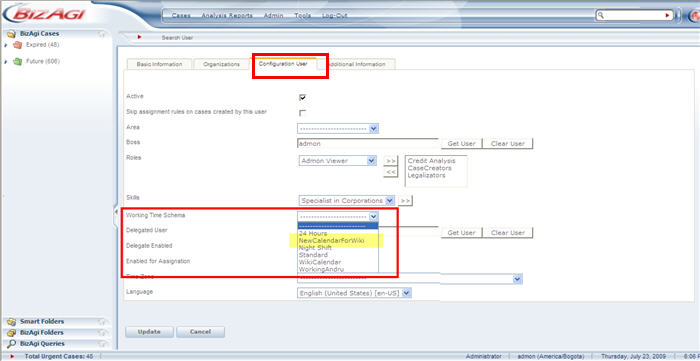
2. Select a user and go to the Configuration User tab.
3. Select the desired Calendar in Working time Schema option and click Update to save changes.
|
Note: The time displayed in the user's work portal corresponds to the local computer's time. NOT the server time. |
<comments />
