How to create a Bizagi project in Oracle
From Business Process Management, BPM and Workflow Automation Wiki | BizAgi BPMS
<keywords content="keywords"> Oracle, Oracle XE, Oracle express, Oracle 10g, Oracle 10, Oracle 10g R2, Oracle project, Oracle db, Ora, Oracle database </keywords>
|
Applies to the ENTERPRISE EDITIONS |
Contents |
How to create a Bizagi project in Oracle
Overview
This article serves as a guide to create a Bizagi project in an Oracle database.
Notice that Oracle can be used as your processes repository for the Enterprise JEE and Enterprise .Net editions.
Prerequisistes
To create a Bizagi project in an Oracle database, take into account the following:
- In Bizagi 9.1.x versions, Oracle 10g R2 database is supported. Oracle's Express edition (XE) is not supported.
- It is required that the Oracle Data Provider is installed in the BPM Server (from where the project is created through Bizagi Studio).
- Keep in mind that you should use for all your different Bizagi environments (Development, Test and Production), a database server with the same Oracle version and character set configured for the database instance.
- It is required that the Oracle instance is previously configured to work with Bizagi. This instance configuration involves that it has the BizagiAdmon user created.
Further detail about Creating the BizagiAdmon user is treated in the following section.
Creating the BizagiAdmon user
The BizagiAdmon user is the user employed to create the metadata structure for the Bizagi project. To create this user, you need access to the Oracle instance as the sys user (sysdba).
New projects in Bizagi are created as new users in the Oracle instance, by using the BizagiAdmon user.
You may choose to manually run a SQL script to create this user at the instance, or you may have Bizagi automatically create this user. Both options are described below.
Creating BizagiAdmon through a script
To create the BizagiAdmon user by running a SQL script, you will need to connect to your Oracle instance as the sys user (sysdba) and run the BizagiAdmon script called ConfigureInstanceForBizAgi-10g.sql. To do this, take into account the following:
1. This script is included in Bizagi's installation path, by default at "C:\Program Files (x86)\BizAgi\BizAgi Enterprise\ProjectModel\Database\". Before running this script, you will need to edit and define in it, the information related to:
- Path location where Bizagi will create its tablespaces datafiles (BA_TABLES_DATAFILES_DIR).
- Path location where Bizagi will create its indexes datafiles (BA_INDEXES_DATAFILES_DIR).
- Path location where Bizagi will store the backups (BA_BACKUP_PATH).
- A password for the BizagiAdmon user (BA_BIZAGIADMON_PASSWORD).
2. This script is subject to change in each Bizagi version. Therefore, the mentioned script corresponds only to that installed Bizagi version.
Creating BizagiAdmon through a new project
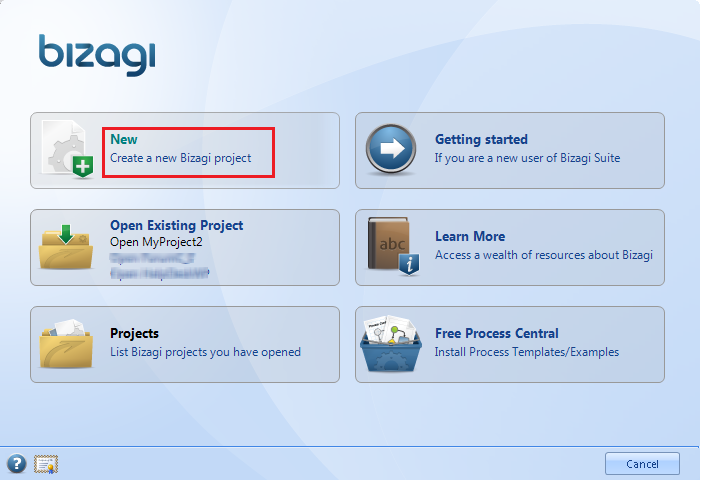
To create the BizagiAdmon user from Bizagi, go to the "New project" option in Bizagi. You may click directly in this option when Bizagi Studio is opened:Notice that creating the BizagiAdmon user through a new project, will create immediately a new project as well.
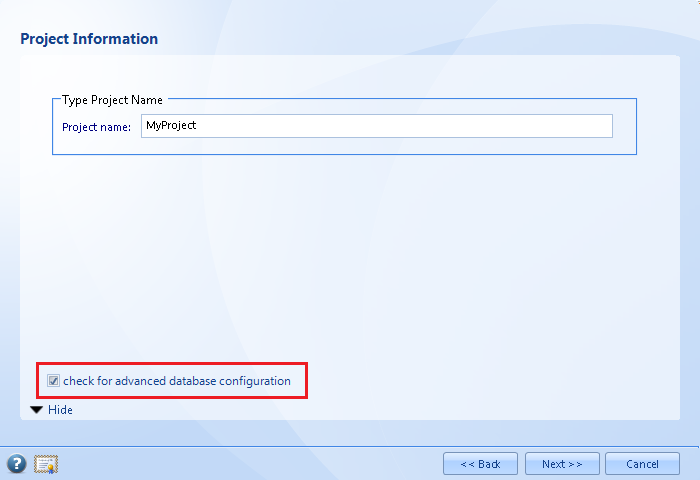
Type a name for your project, and mark the "Advanced database configuration" checkbox:
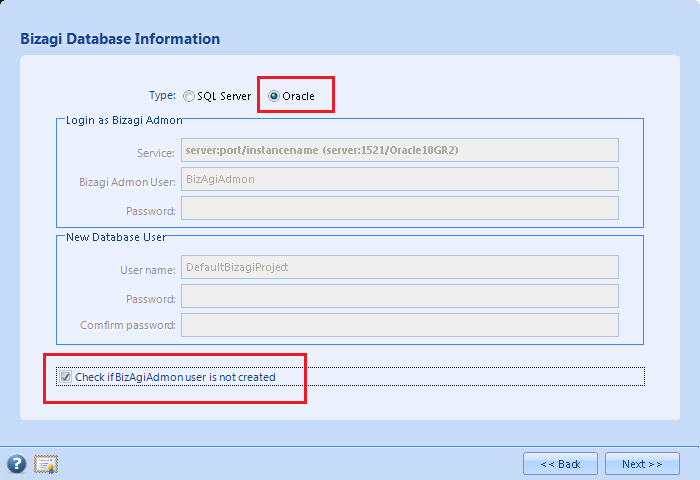
Click on "Next". In the "Bizagi database information" Window, select "Oracle" and mark the "Check if BizagiAdmon user is not created" checkbox:
Click on "Next".
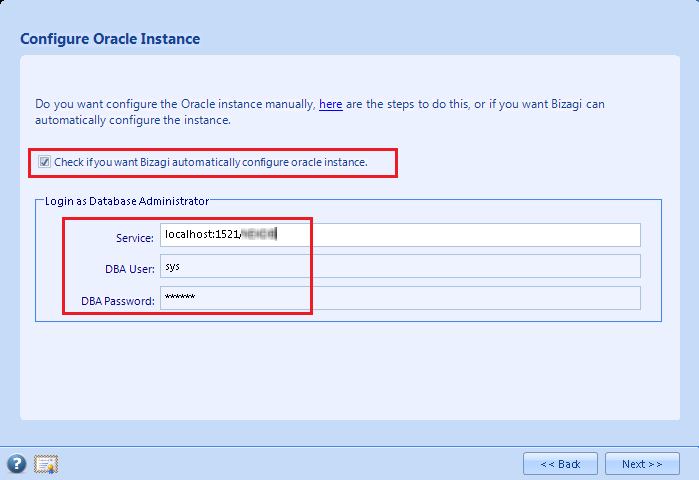
In the "Configure Oracle instance" window, mark the checkbox for Bizagi to create the BizagiAdmon user automatically.
Then, type the connection credentials for the sys user to your Oracle's instance:Notice that the service to your Oracle instance is specified as "databaseServer:port/serviceName".
Click on "Next".
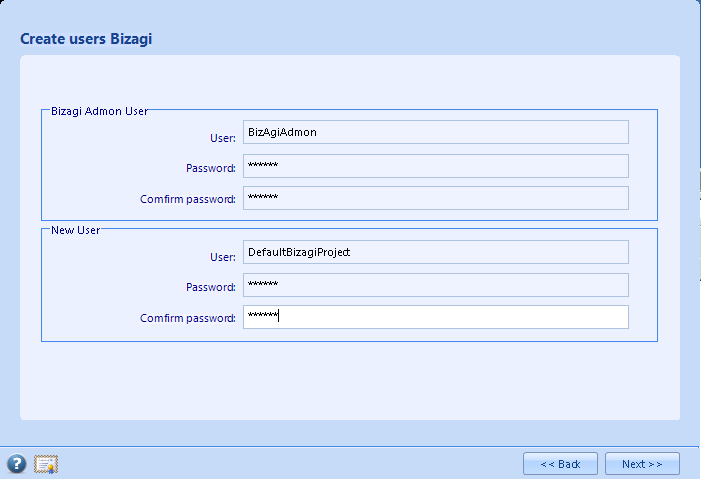
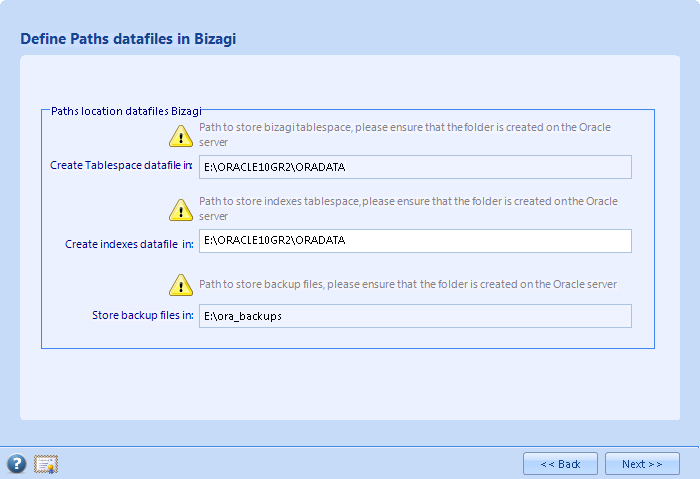
Next, type and confirm the password that will be used for both: the BizagiAdmon user and for the new project you will create.In the "Define paths datafiles in Bizagi" window, specify valid paths for the datafiles used by Bizagi:
Notice that the paths include: the location where the Tablespace datafile and the indexes datafile will be created, and the location where the backups will be stored.
Click on "Next" to start the instance's configuration, and the project creation.
Creating a new Bizagi project
Once you have your Oracle instance configured to work with Bizagi (having created the BizagiAdmon user in your Oracle instance), creating new projects is done as described:
Go to the "New project" option in Bizagi. You may click directly in this option when Bizagi Studio is opened:Type a name for your project, and mark the "Advanced database configuration" checkbox:
Click on "Next".
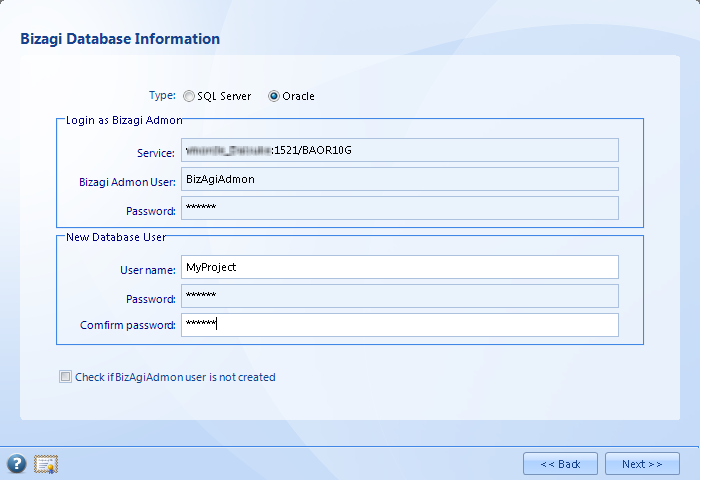
In the "Bizagi database information" Window, select "Oracle" and input both: the instance connection details and the information for this new project.
The connection details include the Oracle instance information (Service), and the password for the BizagiAdmon user (as specified in its creation, as prerequisite).
The information for this new project will show how the project is named (this will be a new user in your Oracle instance), and will ask for a password and its confirmation for this new project:
Notice that: the service to your Oracle instance is specified as "databaseServer:port/serviceName", and that it is not necessary to mark the "Check if BizagiAdmon user is not created" checkbox.
Click on "Next" to start the project creation.
