Association Control
From Business Process Management, BPM and Workflow Automation Wiki | BizAgi BPMS
<keywords content="keywords"> association, associate, multiple, many </keywords>
Association Control
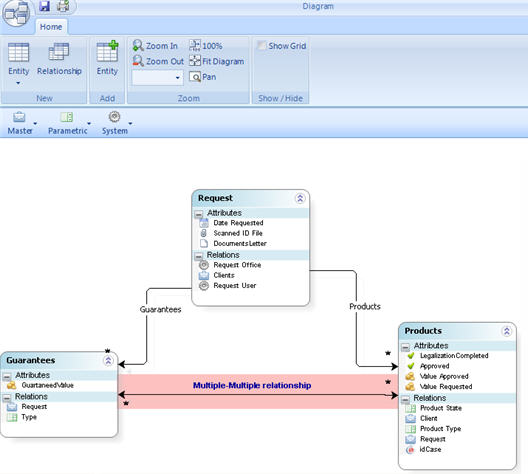
Sometimes it is necessary to relate the values of tables that have a Multiple-Multiple relationship.
Bizagi has developed a tool called Association Control in which values relate easily from a table with many values to another.
If there is a Multiple - Multiple relationship between a Master entity and a Parameter entity, the Search List Control should be used to relate the tables. Association Control only works between master entities.
For example, in a Credit Request process, each Request has many Products and also has many Guarantees.
It is necessary to relate which Guarantee relates to which Products, and which Product relates to which Guarantees. This can be achieved using the Association Control tool.
In this example, the Credit Request process will be used. Some products and guarantees will be added and then the decision will be taken as to which product will be covered by which guarantee.
How to use the Association Control
1. The N-M relationship must be created in the Data Model Diagram
For further information about N-N relationships, go to Relationship.
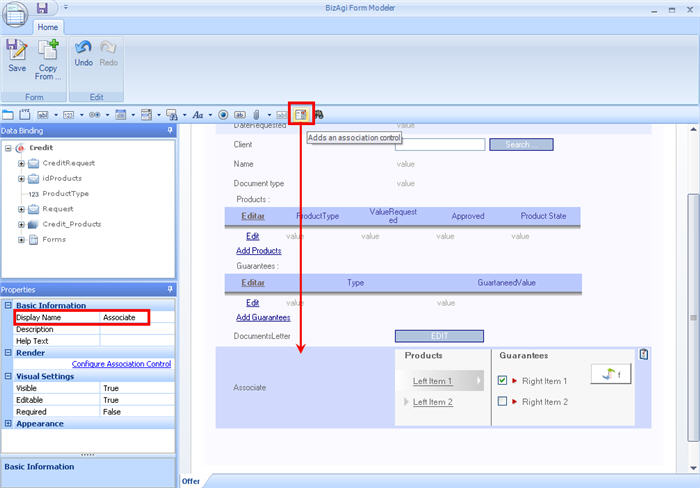
2. In the form where the Association Control is needed, drag and drop an Association Control item from the Field Types.
Make sure to change the display name, or select Apperance - Display Type - Value to display only the control without a label.
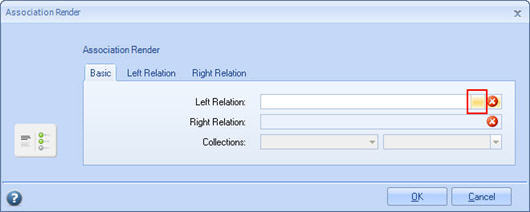
3. When the Control is dragged, a little window will display the needed information to create it.
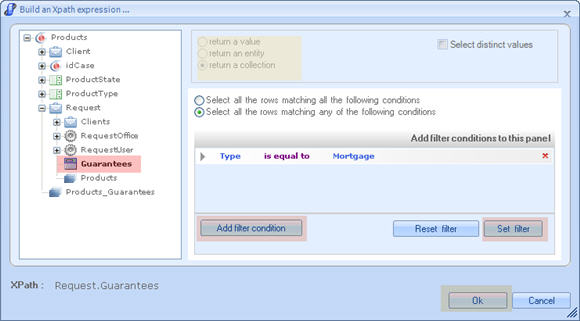
Select the Left and Right Relations (that means the two entities to relate). A window will appear, to choose them from the Entity Relationship model using the XPath navigation.
Notice that the XPath navigation allows filters: In this example the Guarantees are being filtered to show only the Mortgages.
This should be repeated for the Left Relation, selecting the Products.
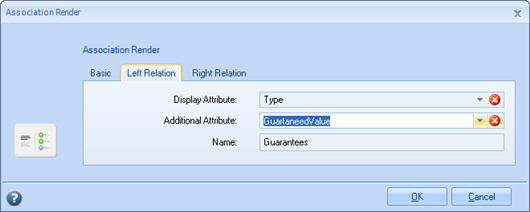
4. The Association Render has two tabs for each Left and Right Relations. In each tab the user should select a Display Attribute and a Additional Attribute. This used to select the attribute from each entity that is to be shown in the web application.
Click on the arrow, and select the attribute.
Also select suitable Names for the Left and Right Relations.
Click Ok to save.
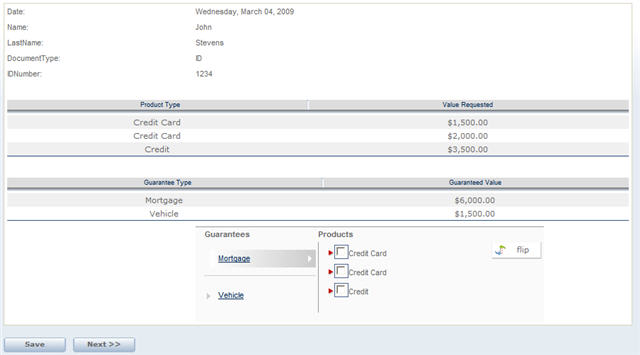
5. The web application will then show the Association Control.
This association control is NOT filtered.
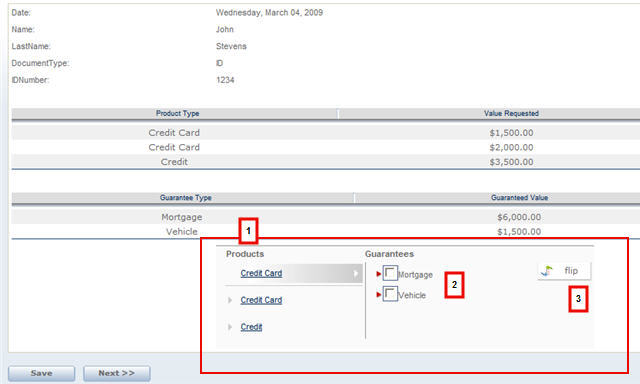
In order to view records in the control, there MUST be records added in each entity; in this case there are three products and two guarantees ready to be related.
The Association Control has the following items:
1. The Left and Right Relations: these are the entities selected in the form. Notice that the product type is displayed. This was selected in the Display Attributes: Product Type and Guarantee Type.
2. The Right Relation has a check in front, and the first product is highlighted. That means the Credit Card will be related to the Guarantee that the user selects.
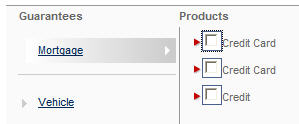
3. The user can click FLIP in order to change the Right Relation with the Left Relation:
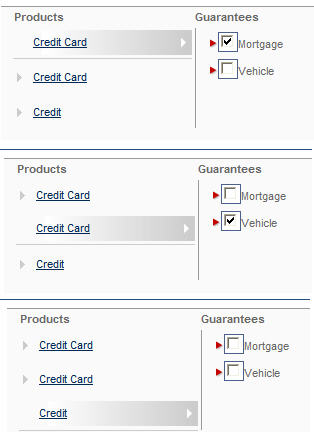
In the next image, the first Credit Card has been related to the mortgage guarantee. The second Credit Card has been related to the Vehicle guarantee. Credit has no related guarantees.
Finally, this is what the Association Control will look like
<comments />
