Custom Jobs
From Business Process Management, BPM and Workflow Automation Wiki | BizAgi BPMS
<keywords content="keywords"> scheduler, scheduled jobs, job </keywords>
|
Applies to ENTERPRISE .NET EDITION |
Contents |
Custom Jobs
Custom jobs are a set of steps that can be run according to a schedule. For example, run once by specifying a specific date, or run periodically during a given interval of time.
Jobs are business rules that can be carried out periodically, and their main characteristic is that they are general expressions of the process, not associated to a specific business case.
|
Alert:This feature requires that the Scheduler service is started. Learn here where to start the Scheduler |
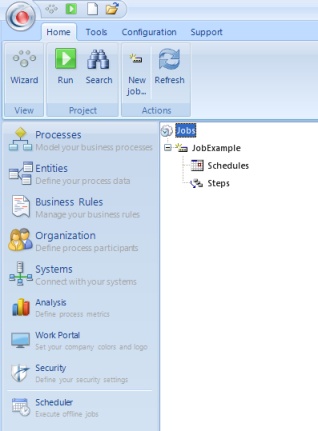
These jobs are configured in Bizagi Studio in the Scheduler module, available in the Enterprise .Net edition. A custom job has several elements:
![]() General properties of the job: Name, Description, Enable, etc.
General properties of the job: Name, Description, Enable, etc.
![]() Schedules: that determines when the job will be carried out and how often.
Schedules: that determines when the job will be carried out and how often.
![]() Steps: where the action to be carried out is determined, that is, the rule of execution is indicated or the code is entered. In addition, the action can be carried out in several steps, depending on the behavior of each of them, if the execution was a Success or Not.
Steps: where the action to be carried out is determined, that is, the rule of execution is indicated or the code is entered. In addition, the action can be carried out in several steps, depending on the behavior of each of them, if the execution was a Success or Not.
How to create Custom Jobs
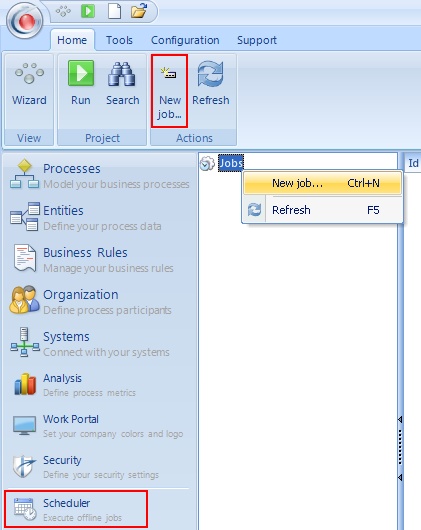
1. On the Bizagi menu open the Scheduler module, and select the Jobs element. Right click and choose the option New job. You can also access it using the contextual menu by selecting the 'Jobs' element.
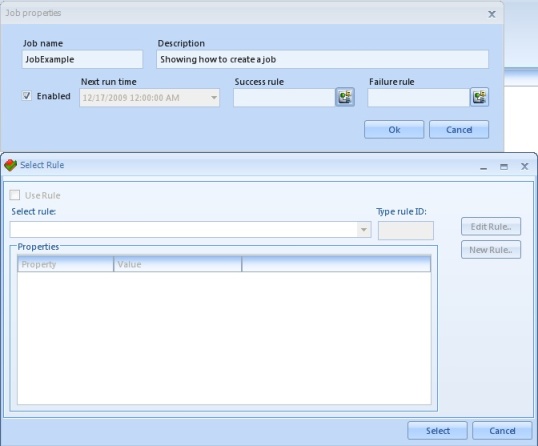
2. The system will display the Job properties windows, where you will enter the general information of the job, such as the Job name, a Description of what it does, whether the job will be Enabled or not, information about its Next run time and the Expressions that will be executed whenever the job is completed with success or failure.
|
Job Name: Indicates the Name of the Job. The name can be 15 characters long at most. This field should not contain spaces, accent marks or symbols. Description: Enter a brief description of what the job does. Enabled: This check allows you to enable or disable the execution of the job. Next run time: Indicate the date and time at which the job will be run next. This date re-schedules each time the job is run depending on the periodicity indicated for the job. Success Rule: Indicates the business rule that will run the job when it is successful. Failure Rule: Indicates the business rule that will run the job when it is unsuccessful. |
The Success rule and the Failure rule are configured by means of the Select Rule option in which you can use and edit a business rule.
3. Once you have created the job, enter the information regarding the date, time and frequency at which the job will be run and the steps that will be carried out.
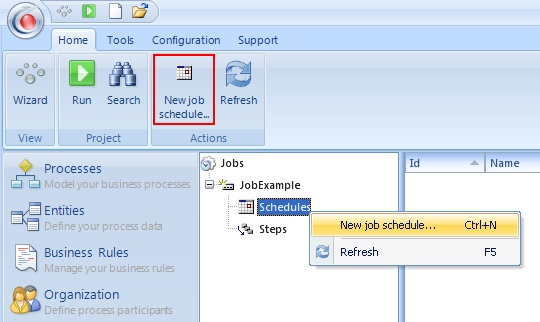
4. To schedule the job, right click on the Schedules option and select New Job Schedule from the dropdown menu, where you will enter information regarding the date, time and frequency to run the job.
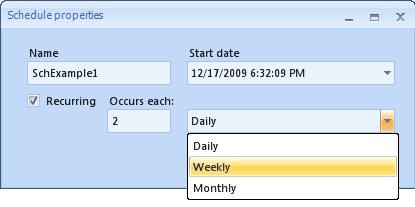
5. The system will display the Schedule Properties screen, where you will enter the following information:
|
Name: indicate the name of the schedule. The name can be 15 characters long at most. This field should not contain any spaces, accent marks or symbols. Start Date: Date on which the job will begin to run. Recurring: Indicates whether the job will be carried out once or several times, depending on the frequency established. To carry out the job several times, check the box. Occurs each: in the first field, enter how often the job will take place according to the frequency indicated, and in the second field, enter the frequency (Example: Every 2 weeks). |
6. Once you have created the job and the schedule, Bizagi allows you to carry out the job in several steps.
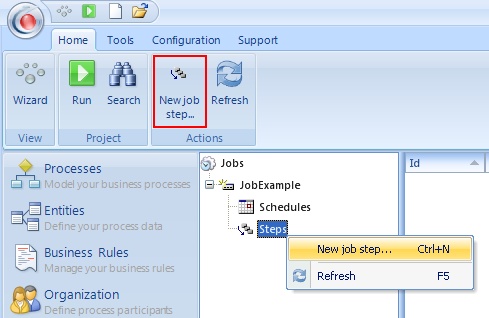
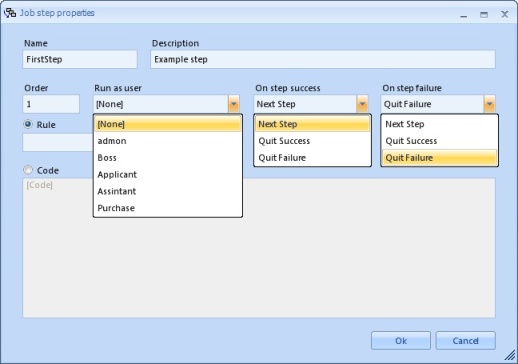
7. To enter each step, right click on Steps, and select New Job Step from the dropdown menu. After that, the Step Properties screen will pop up where you will enter the following information:
|
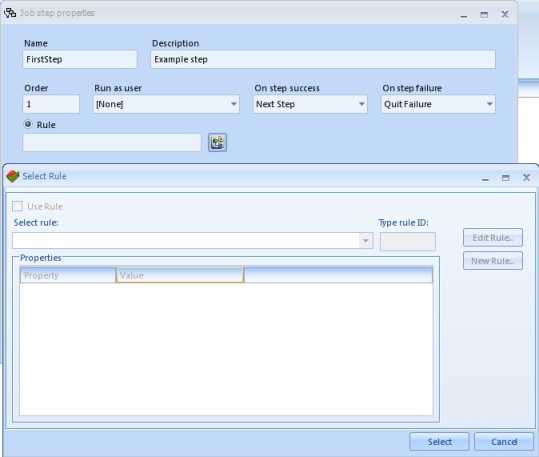
Name: enter the name of the step. The name can be 15 characters long at most. This field should not contain any spaces, accent marks or symbols. Suggestion: choose a name that characterizes the function or the formula used in the step. Description: enter the information of the description of the job step. This is done in order to be able to understand the function of the step when you read the description. Order: Indicates the order in which the step is carried out regarding the other steps that belong to the job. Run as User: this field indicates the user who will run the job. Since these are jobs that are run automatically and are independent from the users of the processes, this property allows you to configure the user who will be registered in the systems as the one who carried out the job. If you do not select a user, the system will register the administrator by default. On Step Success: If running on step success, indicate what needs to be done. The options are "Next Step", "Quit Success" or "Quit Failure". On Step Failure: If running on step failure, indicate what should be done. The options are "Next Step", "Quit Success" or "Quit Failure". Rule: In this field, select the business rule that you would like to be carried out. If you would like to call on a business rule, they can in turn call on a component or a method. Code: If you would like to include the code directly, click on this option and enter the JScript.NET code in the field. |
The rule for the steps of the task is configured by means of the Select Rule option in which you can use and edit a business rule.
|
Note: When a Job cannot be run or generates a run error, Bizagi disables it automatically. |
Custom Jobs in production
When a project has been deployed, some elements like Custom Jobs will remain editable in the development environment. However to avoid possible problems with subsequent deployments Bizagi restricts changes on some these elements. For this reason, when a Custom Job is already in production it will not be possible to delete it. Everything else will remain editable (job steps and scheduling).
Related Articles
<comments />
