SMTP Service
From Business Process Management, BPM and Workflow Automation Wiki | BizAgi BPMS
<keywords content="keywords"> IIS, Windows, Windows Server, mail server, send mails, smtp server, install, smtp </keywords>
Installation Of SMTP Server (Windows Server 2008)
The following procedure is shown for IIS 7, such as that present on Windows Server 2008.
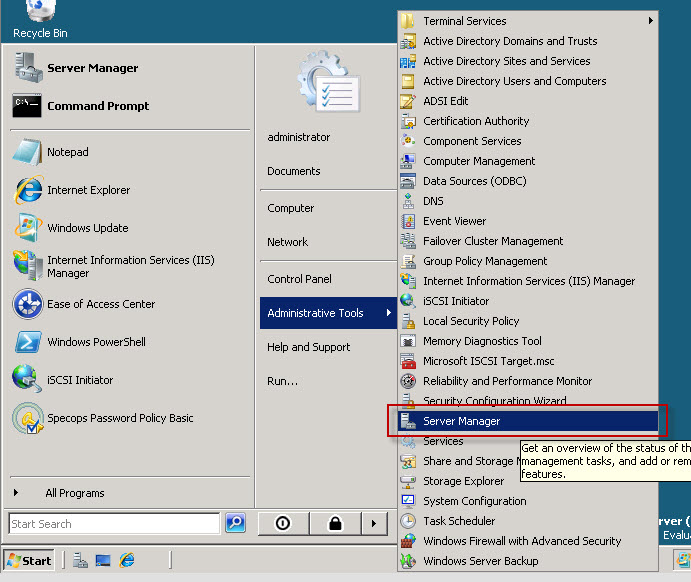
1. Start-> Administrative Tools-> Server Manager
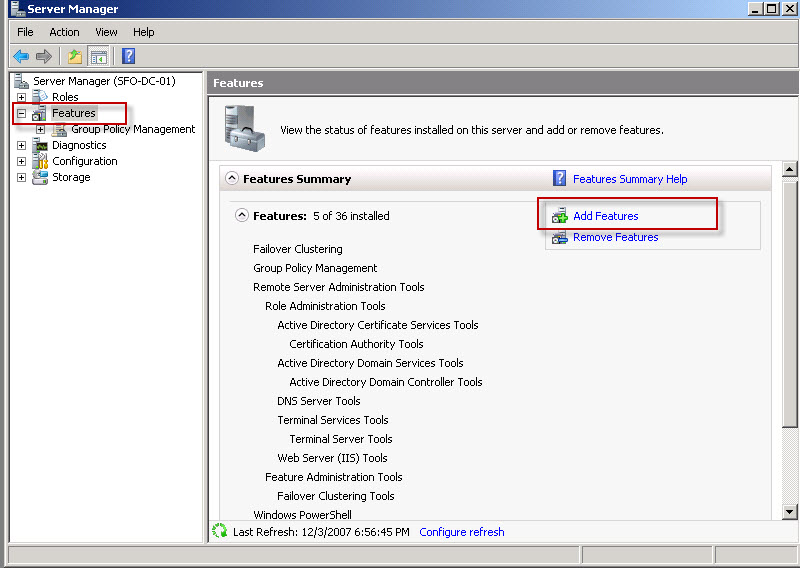
2. Go to features, select "Add features"
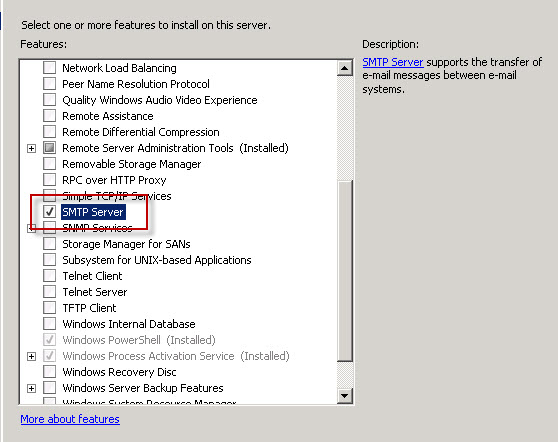
3. Tick "smtp server" (if it is not already installed), choose to install the required "Remote Server Admin Tools”.
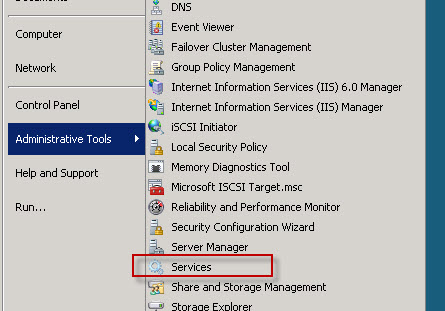
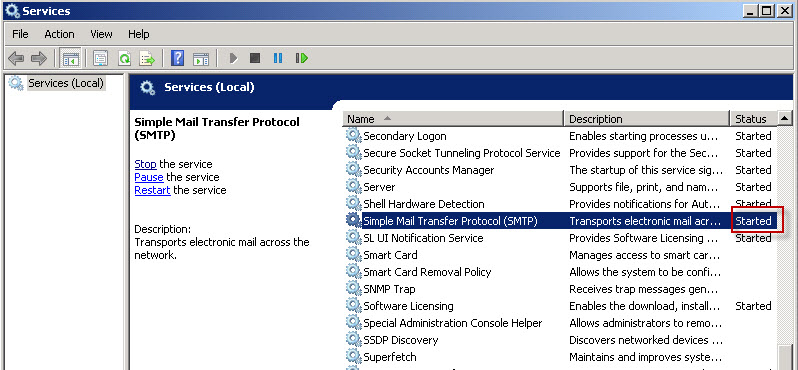
4. Check to confirm that "Simple Mail Transfer Protocol (SMTP)" service is running.
At this point, the SMTP service is up and running!
|
Alert: Notice that while Windows 7 does include IIS 7, the SMTP service is unavailable to send e-mails in this specific operating system due to a restriction from Microsoft. Therefore, in Windows 7 you may configure e-mail tests to store the e-mails in a local path as shown in the SMTP Configuration |
To configure the service to send e-mails, follow the next steps described with IIS 6.0.
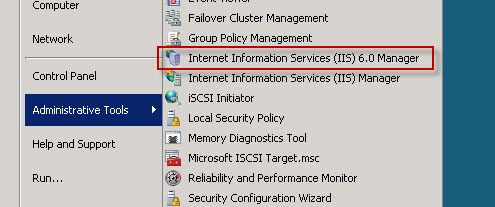
5. Go to Start->Administrative Tools>Internet Information Services 6.0
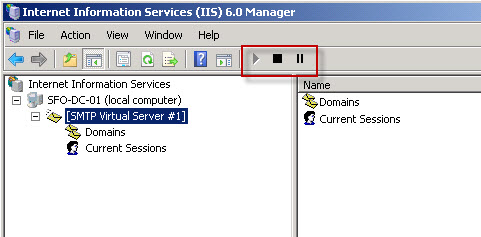
6. Make sure that SMTP virtual server/default smtp server is running, if not, right click, then choose "start".
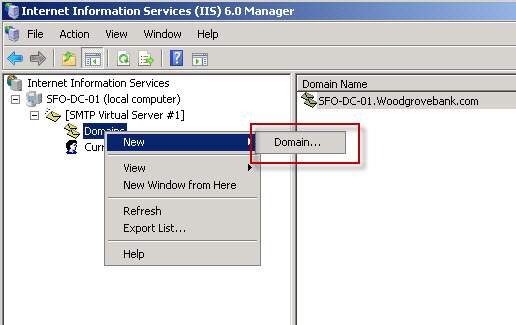
7.In the left hand panel of the IIS administration console expand the tree structure under the server name and right click over SMTP service.
8. In the pop-up menu click on New > Domain.
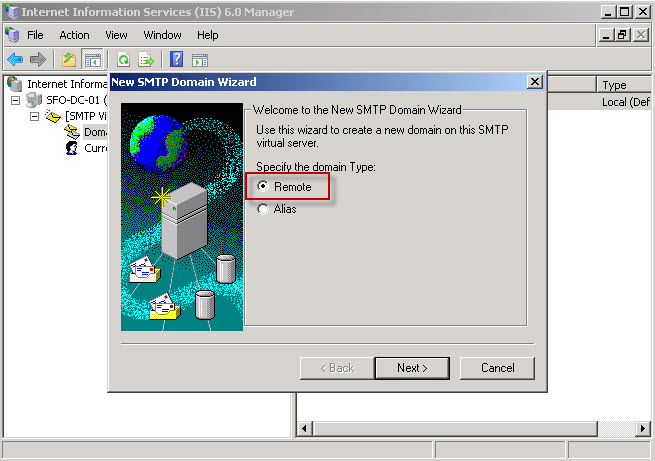
9.In the New SMTP Domain Wizard select the Remote option and click on Next.
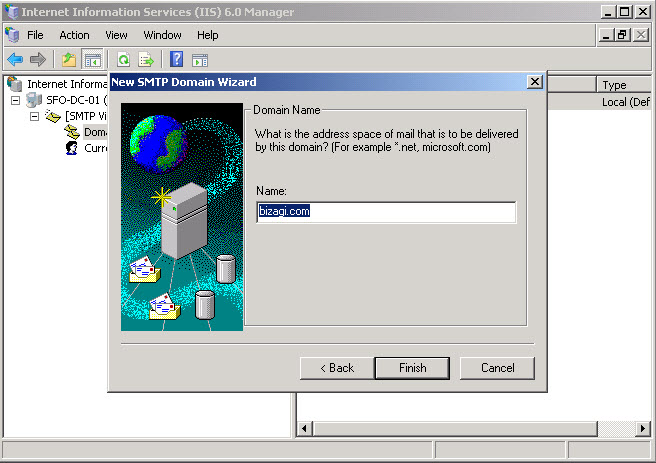
10. In the text box write the DNS name of the domain to which you wish to re-send email messages. For example, if you are going to send email addresses to the address [email protected] the name of the domain that you should specify is Bizagi.com.
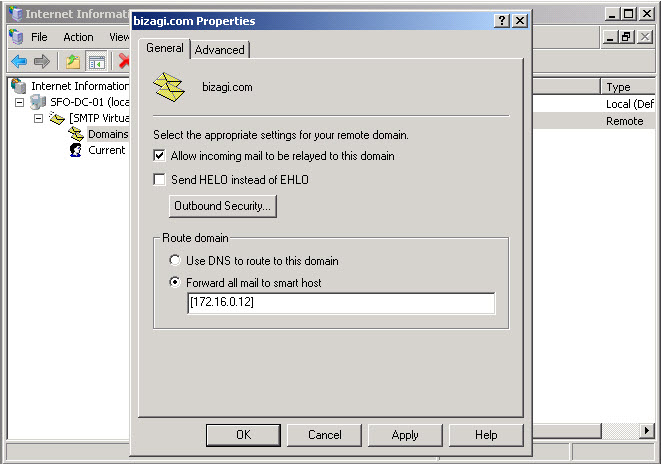
11.In the Route Domain box of the properties window, select Forward all mail to Smart Host and write, within square brackets "[ ]", the IP address of the SMTP server authorized to re-send mail to the specified domain.
Click on OK.
12. Check that the SMTP service in the server is initialized in the services console by clicking on Start > Programs > Administrative Tools > Services.
13. Check that in the server configured as the Smart Host, the server that is configured for the SMTP service is authorized to re-send mail.
<comments />
