Alarms
From Business Process Management, BPM and Workflow Automation Wiki | BizAgi BPMS
<keywords content="keywords"> Alarm, alarms, user notification, notify user, notify assignment </keywords>
Alarms
During the execution of the processes, the duration of the activities must be controlled to be able to comply with the metrics of the organization, control process times, and make decisions. In order to do so, Bizagi has a tool that allows you to generate warnings for different people when an activity is about to expire, expires or has expired.
Alarms are messages that are sent to different target groups in accordance with time criteria when an activity is about to expire, expires or has already expired. (How to set Duration of a shape)
The alarms are triggered in Bizagi as email notifications; if the default template is not used for the Bizagi alarms, then a new template can be created to use the alarm feature (How to Create a Notification). The configuration of these alarms is flexible in regards to time and recipients (Alarms Parameters).
The Bizagi scheduler service must be configured, so that the alarms can be executed.
Alarms can also be set-up from the Work Portal by end-users, using the Admin – Alarms option. Alarms can also be set-up in the production environment using the Admin/Alarms option in the Work Portal. Changes to alarms are local to the production environment. If you want those changes to be permanent, and become part of the process design, please make them on the development environment as well.
How to Set Up Alarms from the Web Application
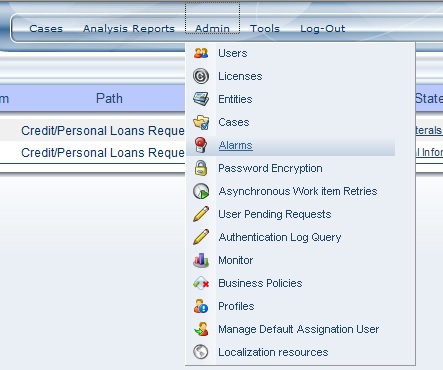
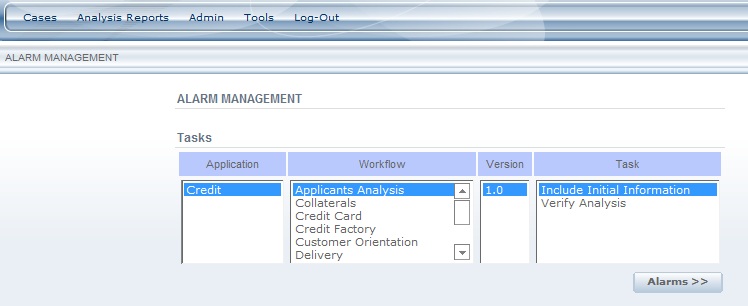
1. In the Web application, click on Admin, and then Alarms.2. Choose between the Applications and Processes the Task where you want to Create or Edit the Alarm; then click Alarms.
3. In the Alarm Editor Screen you can set up the time, recurrence, Lapse and target groups of the alarm. The Alarm Editor has the following features:
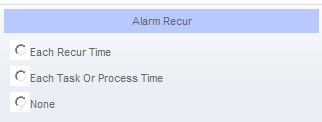
![]() Type: Type of Alarm is the recurrence of the alarm once it has been executed for the first time, that is, the number of repetitions.
Type: Type of Alarm is the recurrence of the alarm once it has been executed for the first time, that is, the number of repetitions.
The types of Recurrence offered by Bizagi are:
- None: the alarm will go off just once without repetition.
- Each Recurring Time: the alarm will go off every certain amount of time defined using the Interval feature.
- Each Task or Process Time: the alarm will go off and repeated each time the task duration runs out.
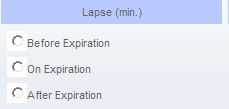
![]() Lapse: Lapse is used to define the time during which the alarm will be executed for the first time. This feature is always required regardless of the type of alarm selected.
Lapse: Lapse is used to define the time during which the alarm will be executed for the first time. This feature is always required regardless of the type of alarm selected.
The following options are available:
- Before Expiration: The alarm arwill be executed for the first time a certain time before the duration established for the task has run out.
- On Expiration: The alarm will be executed for the first time once the duration established for the task has run out.
- After Expiration: The alarm will be executed for the first time a certain time after the duration established for the task has run out.
Note: If you select the Before Expiration or After Expiration options, you must define the time before or after the expiration in the Timing property.
![]() Timing : is used to define the execution time of the first alarm taking the task expiration time as a point of reference. This time must be defined when the lapse selected for the alarm is “Before Expiration” or “After Expiration”. Recurring Time: allows you to define the alarm recurrence time when the type of alarm selected is Each Recurring Time.
Timing : is used to define the execution time of the first alarm taking the task expiration time as a point of reference. This time must be defined when the lapse selected for the alarm is “Before Expiration” or “After Expiration”. Recurring Time: allows you to define the alarm recurrence time when the type of alarm selected is Each Recurring Time.
You can select the measure unit of the combo: minutes, hours, days, weeks or months.
To choose the recipient, you can determine the recipient’s profile by selecting a role from the combo.
You can also set up the distribution of the alarm to the current user of the activity by checking the field Send to Current Assignee(s).
Delete or Edit an Alarm from the Web Application
Once the alarm is created the user can find a list with the Alarms for each Activity. There the user can decide to delete the Alarm or edit it. To do so press the Edit or Delete button. When done the Alarm List will update automatically.
<comments />


