Custom Replication
From Business Process Management, BPM and Workflow Automation Wiki | BizAgi BPMS
<keywords content="keywords"> </keywords>
|
Applies to ENTERPRISE .NET EDITION |
Custom Replication
Bizagi provides a function to access external sources such as SQL Server and Oracle. For any other data source it is necessary to create a custom replication library, after that, the replication is configured as follows (steps 2 to 8 described here are the same as those presented in the Custom Virtualization, If this has already been configured, and the same System and Provider is going to be used, they may be omitted):
1. Before configuring the replication, create the destination entity(ies) in Bizagi. It is not important if this is done in the Modules View, in an existing entity diagram or in the second step of the Process Wizard, the important thing is to create it as Parameter entity(ies) and that the structure (number and type of attributes) is as similar as possible to the source (external) entity.
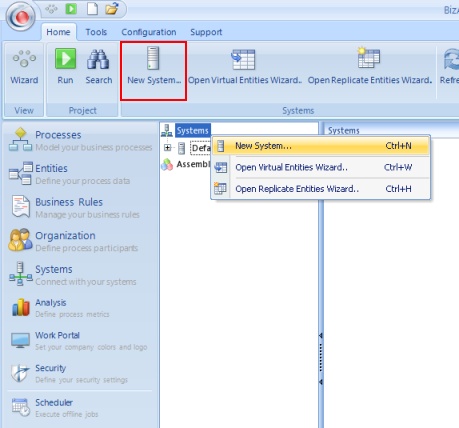
2. Click on Systems in the Modules View of Bizagi. Then either right click on the Systems element and select New System from the drop down menu or click on New System in the standard menu bar.
Enter a Name, Display name and Description for the new system and click the Enable Virtual Entities and Replication for this System. checkbox. Click Ok to save changes.
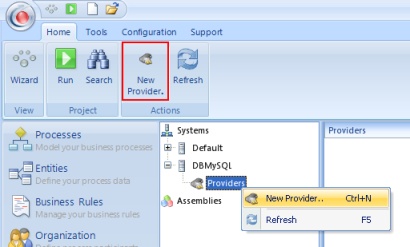
3. Click on the plus sign (+) beside the newly created system. Right click on the New Provider element.
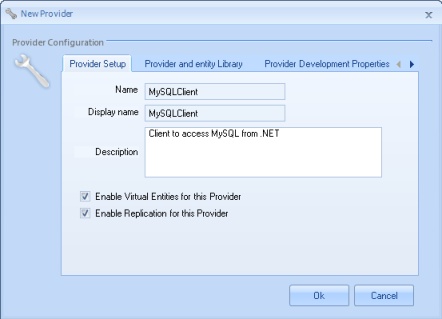
4. In the New Provider window enter a Name, Display name and Description in the Provider Setup tab. Tick the Enable Replication for this Provider option. Also click Enable Virtual Entities for this Provider (if applicable).
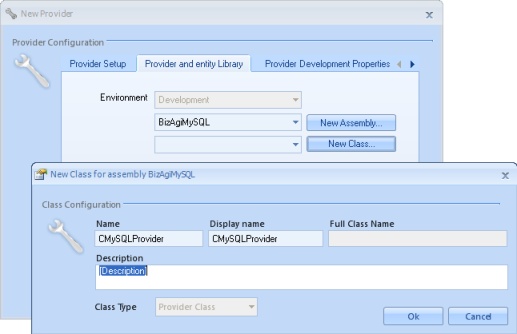
5. Select the Provider and entity Library tab and click on New Assembly.
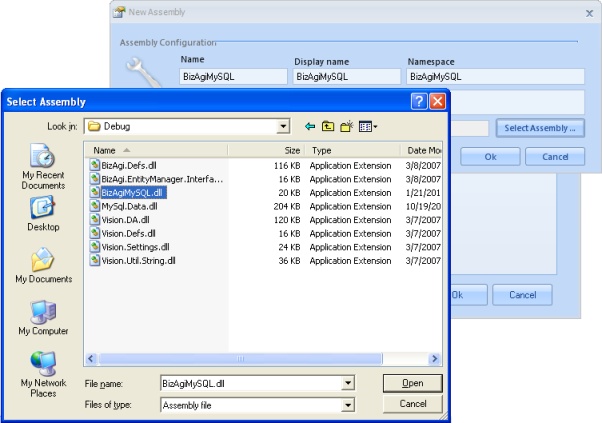
6. Enter a Name, Display name, Namespace and Description. Then click on Select Assembly to select the .dll of the custom replication library previously built. Click Ok in the New Assembly window.
7. Click the New Class button and in the New Class for Assembly window, enter the name of the class that implements the IProviderVirtualDA interface. Click on Ok.
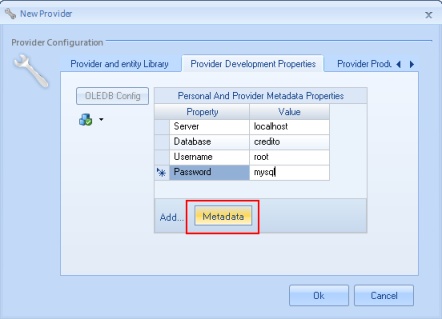
8. Now in the Provider Development Properties tab, include the connection properties by clicking the Metadata button to create a new Property-Value row. Click Ok on the New Provider window.
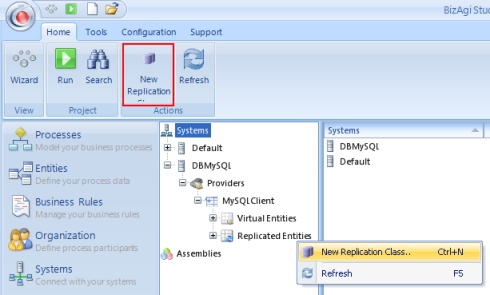
9. Expand the new provider element, select the Replicated Entities element and create a New Replication Class.
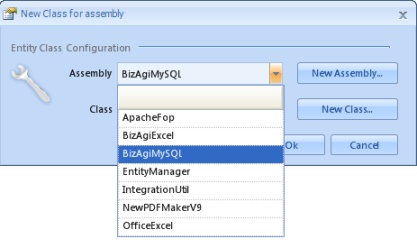
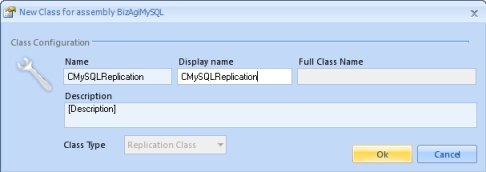
10. Select the assembly from the drop down list In the New Class for Assembly window (if the Entity class is in the same assembly as the Provider class) or include a new one by clicking on New Assembly.
Click on New Class and complete the necessary fields in the new window. Click Ok to complete the Entity Class Configuration.
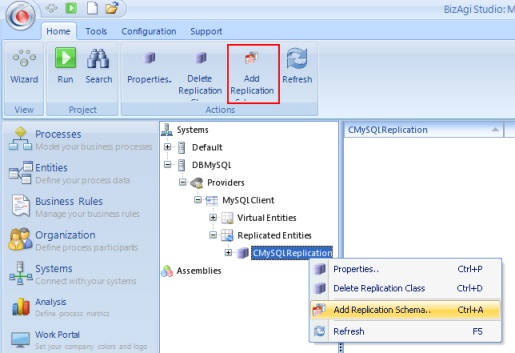
11. Right click on the new entity class element and select the Add Replication Schema option.
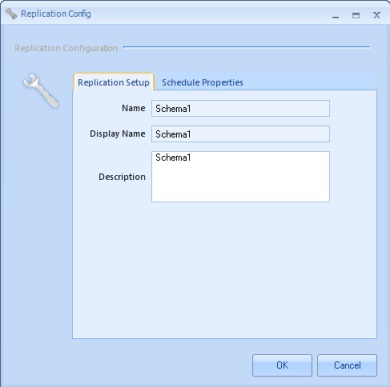
12. In the Replication config window enter a Name, Display Name and a meaningful Description for the replication schema.
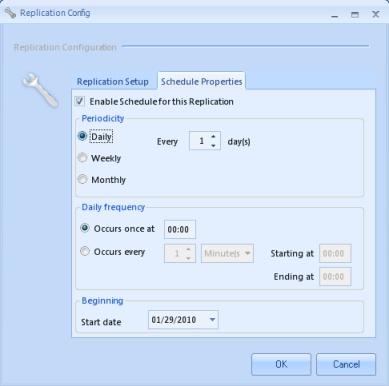
Select the Schedule Properties tab and configure the frequency with which the information will be replicated from the data source.
|
Enable Schedule for this Replication: This option must be checked in order to execute the data replication from the external source. It will then enable the options of Periodicity, Daily frequency and Beginning date. Periodicity: Daily: Check this option when the replication is to be executed every certain number of days. Every: This option is used when the above-mentioned Daily option is selected. In the Every field specify the number of days between repetitions of the execution. Its default value is 1. Weekly: If this option is chosen, the Every field will be the number of weeks between repetitions. Additionally, it is possible to select the day(s) of the week on which the replication schema is to be executed. Monthly: This option enables you to specify which day of the month the schema is to be programmed for execution and also determine if the replication is performed every month or every number of months. Daily Frequency: Occurs once at: Enables you to define the time of day for executing the replication schema when it is to be performed only once a day. Occurs every: Select this option If the replication is to be performed more than once a day indicating the frequency and the lapse of time between each one, expressed in minutes and hours. A start and end time can also be configured. Beginning: Start Date: Date on which the replication schema will begin. |
After configuring the start date of execution, click Ok.
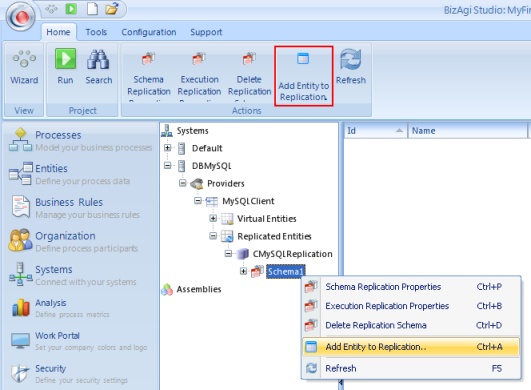
13. Right-click on the schema and select Add Entity to Replication.
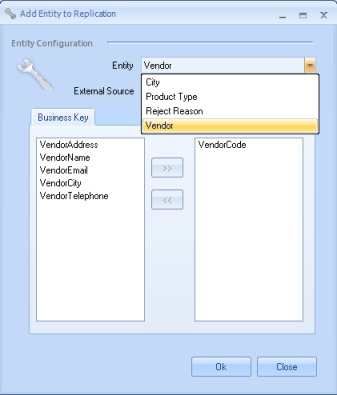
14. In the Add Entity to Replication window, select the desired entity from the Parameter entities dropdown list. Then, type the external entity name in the External Source field. Next, from the list of attributes of the Bizagi entity, select one (or more) to be the business key (an attribute that has a unique value so that it can be used to differentiate one register form another). Click Ok to save this changes.
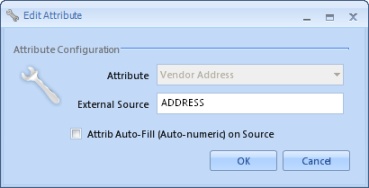
15. Select the replicated entity and for each attribute select the corresponding external attribute. This is done by right-clicking on the attribute and selecting Properties.
In the Edit Attribute window, write the external attribute name and click Ok.
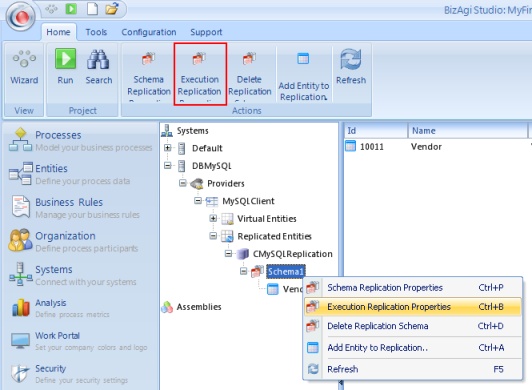
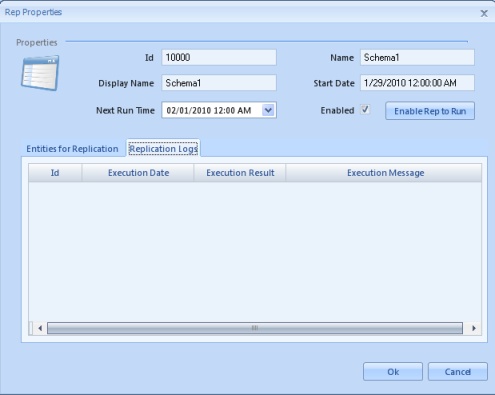
To verify if the replication was successful, right-click on the Schema and select Execution Replication Properties.
The Replication Logs tab shows how many times the replication has been executed and if it was successful. If the execution fails, the replication schema will be disabled, that is to say, the Enabled checkbox will not be ticked.
Here it is also possible to run the replication immediately by clicking on the Enable Rep to Run button and click Ok and finally, restart the Scheduler.
|
Alert: If your custom replication library has references to other assemblies, it is necessary to copy them to the Scheduler folder, usually it is: C:\Bizagi\Standard\Projects\$PROJECT_NAME$\Scheduler |
Related Articles
- View a replication class example for MySQL.
- Learn about Custom virtualization.
<comments />
