Grid Validation
From Business Process Management, BPM and Workflow Automation Wiki | BizAgi BPMS
<keywords content="keywords"> grid validation, grid validations, validation for grid, validation for grids, validation in grids, validation, validations </keywords>
Grid Validation
Grid validations are used on grids to verify if the conditions required by the process are met. As a result the user will see an alert message if something has to be corrected or will be allowed to continue otherwise.
It is important to remember that these validations will be executed when you click on the Next button of the activity, and not on the Edit or Add button inside of a grid.
The JoinGrid field has a Grid Validations tab where the user can indicate the condition and the corresponding error message that wants to be presented before the end user may continue.
How to Create Grid Validations
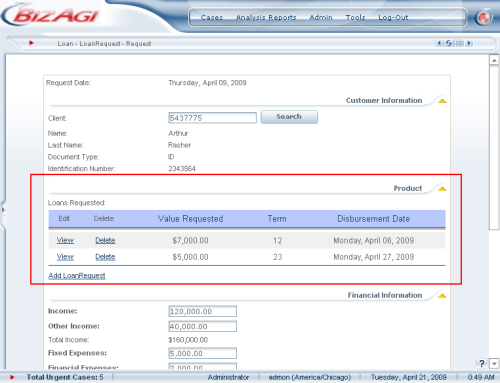
In the process of requesting a loan in a bank, the user first has to fill the Request form (shown below) where he will add the products that the customer needs. The grid validations that are going to be added are the following:
![]() Verify Disbursement Date: this validation will make sure that none of the listed requests with a requested value greater than $500, has a disbursement date that is before the date the loan is being requested.
Verify Disbursement Date: this validation will make sure that none of the listed requests with a requested value greater than $500, has a disbursement date that is before the date the loan is being requested.
![]() Verify Number of Records: will check that before continuing to the next activity, the user adds at least one record to the grid of requested products that has a requested value greater than $800.
Verify Number of Records: will check that before continuing to the next activity, the user adds at least one record to the grid of requested products that has a requested value greater than $800.
This is how the screen looks like.
To add the grid validations just mentioned above follow these steps:
1. Go to the form of the activity where the grid is located and add the grid validations.
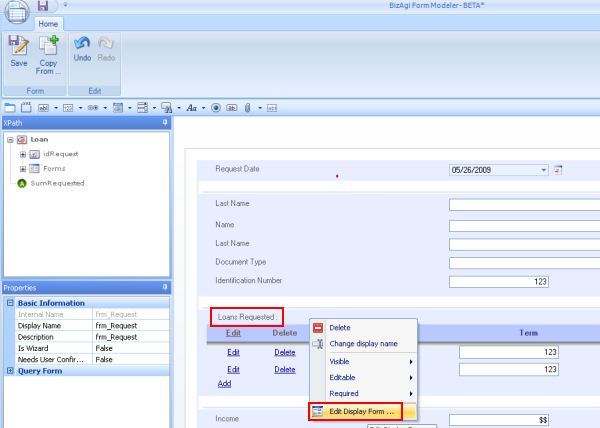
In the Bizagi Form Modeler, right click on the grid, and if the form is nested select Edit Display Form.
A second tab will open. Select the grid and in the Properties located on the left of the modeler search for the Adavanced section and then click on Grid Validations.
For more information on how to create a form or a grid go to:
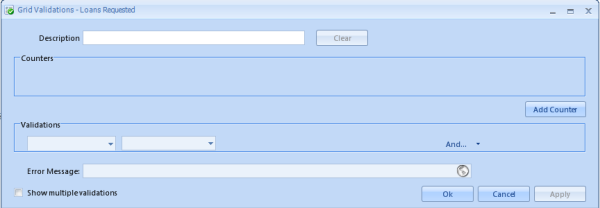
The Grid Validations window will pop up.
|
Description: Name of the validation you are going to create. Use a name that indicates the control being carried out. Counters: Name of the variable(s) used as a counter and condition to count the entries. See further details on how to create counters below. Validations: Condition that generates a message displayed by Bizagi's Assistant when the condition is met. Error Message: Message displayed by Bizagi's Assistant Check “Display Multiple Validations”: Button that allows you to add more than one condition in a form. |
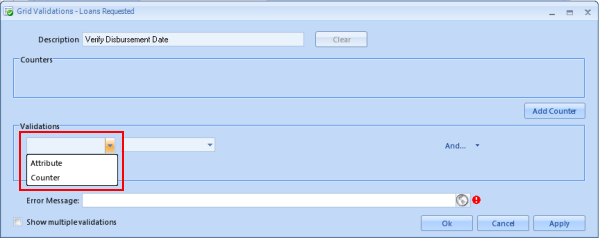
2. Complete the information in the Grid Validations window for the validation Verify Disbursement Date
For this validation only the data included in the fields of the grid is going to be verified and there is no need to count records in the grid. For this reason no counters are going to be added.
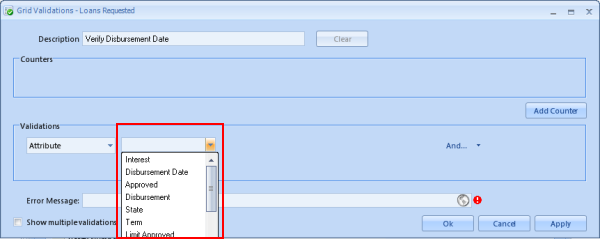
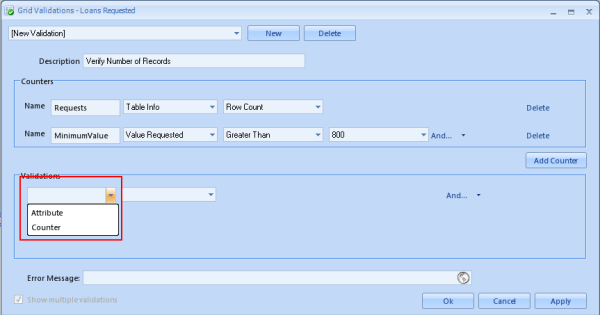
In the first drop down list select Attribute.
In the second drop down list select the attribute in the data model that is going to be validated. In this example the attribute is called Disbursement Date.
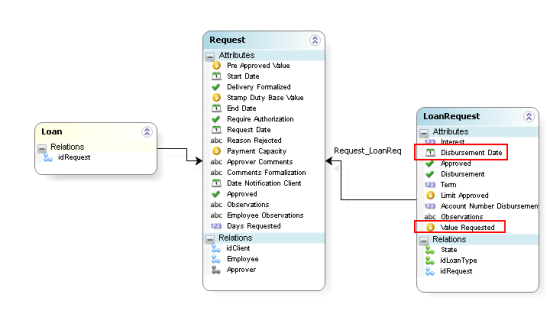
The only attributes that the user will find are in the table where all the loans of the request are going to be included (i.e. the N table in the 1-N relation) called LoanRequest as it can be seen in the data model. The attributes Disbursement Date and Value Requested are the attributes that are going to be used in this example.
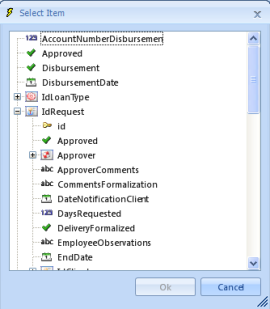
If a field from any other table is going to be validated, the user may select in the second drop down list the option Select Field, and the Select Item window will open for the user to select the attribute desired.
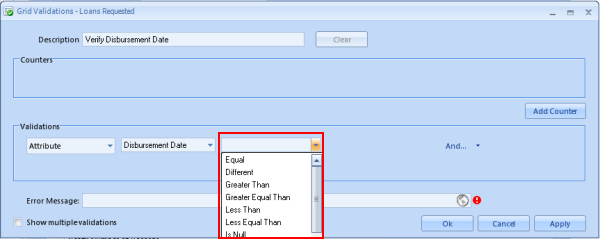
In the third drop down list the user will have to select the operator that will set the condition to present the error message in the web application. In this example the operator required is Less than.
The list of operators will vary according to the type of attribute selected in the previous drop down list. For a complete list of operators related to each of the possible types of attributes go to Operators in Grid Validations.
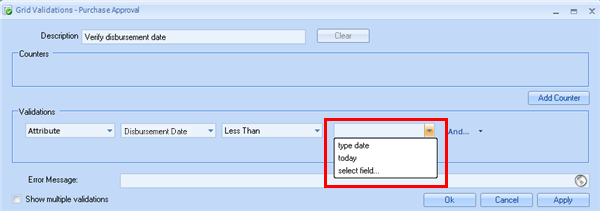
In the last drop down list select the value that will satisfy the condition to present the error message in the validation. In this example, the option Today will be selected to indicate that the disbursement date can not be less than the day it is being requested.
The values that can be selected may vary according to type of attribute that is going to be validated. For a complete list and explanation of each possibility go to Values in Grid Validations.
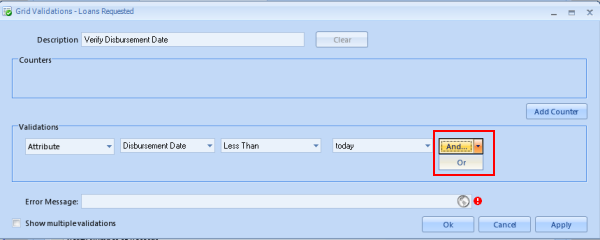
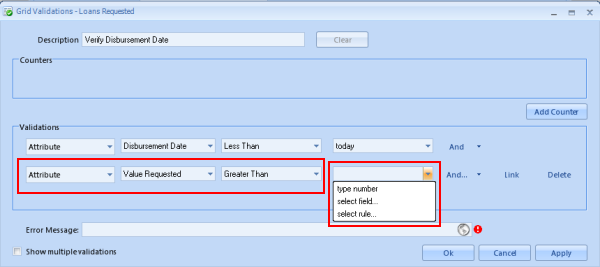
If the validation requires more than one condition, click on the logical operator, which can be AND or OR to complete the expression. For the example, it is needed that the loan requested has a date less than today AND the value requested is greater than $500.
In the last drop down the user will select the option Type Number and then directly will type 500.
To nest existing conditions with parentheses, use the Link button, which will allow you to nest the condition with the previous one. To delete a Condition, click on the Delete Button on the same line as the condition you want to delete.
Once you have established the business condition, enter the message that the assistant will display when the condition is met.
3. Create the second validation required Verify Number of Records.
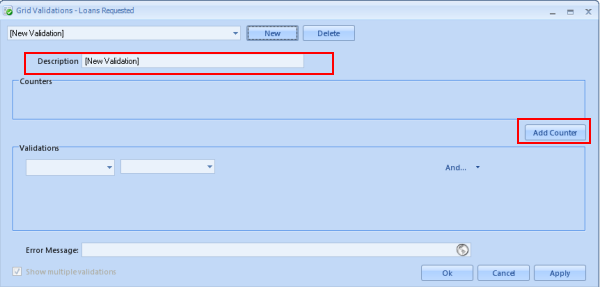
First check the box named Show multiple validations and then click on the button New.
4. Complete the information required for the validation Verify Number of Records
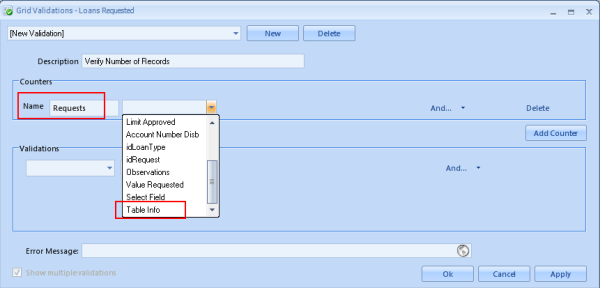
First, include the Description of the validation and then click on the button Add Counter.
Counters are meant to calculate the number of entries that satisfy a condition. In this example, the validation needs to count the number of loans requested and the number of loans requested with a requested value above $800.
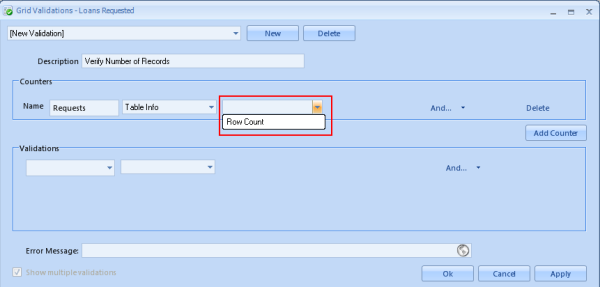
To create a condition based on the first counter, first the user should give the counter a name (in this case Requests) and then select in the drop down list Table Info to use the functionality that counts the existing rows. Note that the user will also be able to select an attribute.
In the next drop down select Row Count
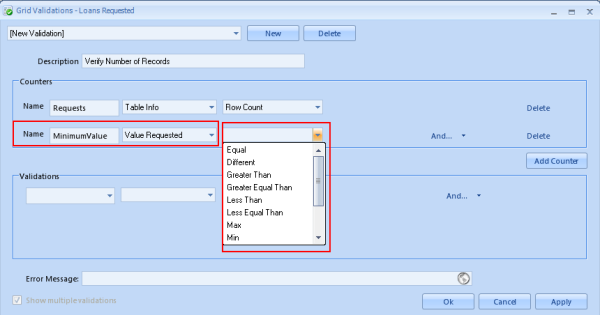
Create the second counter that is going to be required by clicking on the button Add Counter once again. Give this new counter a name, for this example it is going to be called Minimum Value, and then select the attribute that is going to be considered when counting the records. In this case, the Value Requested of the loans will be evaluated.
Note that the user will have available a list of operators to be able to set a condition for the counter. These operators will vary according to the type of attribute selected. For a complete list of possible operators go to Operators in Grid Validations.
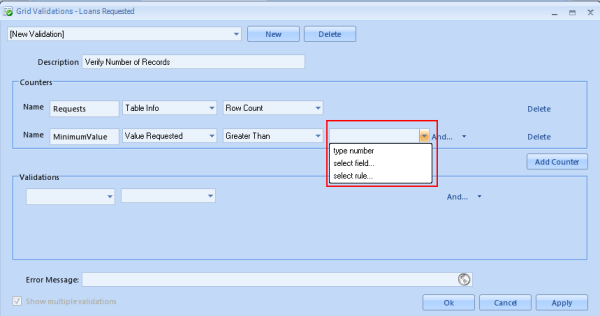
Now include the value that is required for the condition to be met. For this example we need a fixed value so the option Type Number will be selected and then 800 should be typed in.
Values will vary according to the type of attribute in the condition, to see a complete description go to Values in Grid Validations.
Now, using the counters created previously, create the validations that will use those counters as required. So, in the first drop down list select Counter.
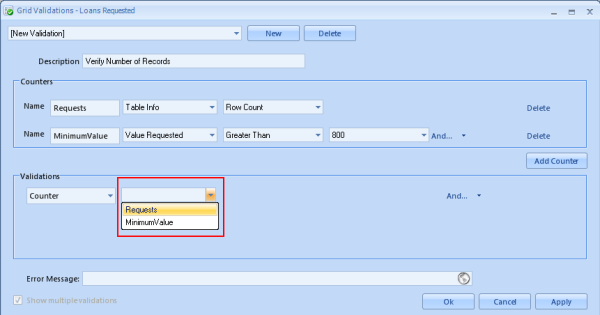
In the second drop down list the user will find the two counters created previously to establish the conditions required.
Then use the operators and values to establish the condition required to present the error message to the user. For this example the validation should end up looking as follows.
Click on the OK button to finish the Grid Validations.
5. Test the Grid Validations
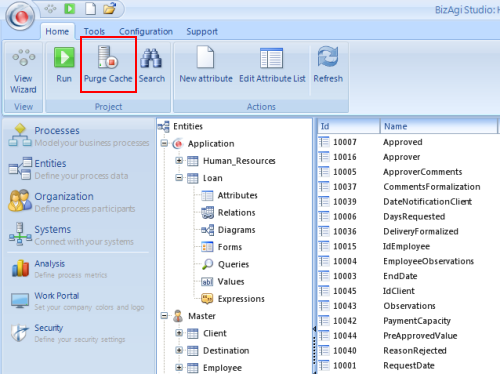
First, after clicking OK on the Grid Validations and on the form.
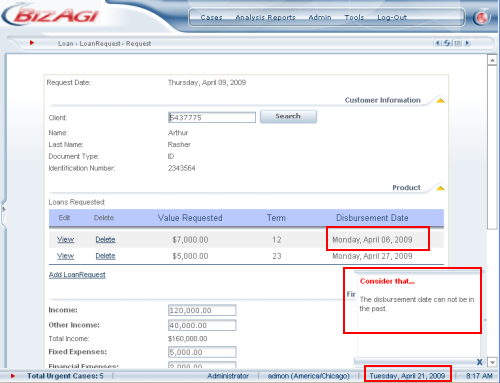
To test, the user may add to the grid records with disbursement dates that are less than the date the request is being worked. In the image you will notice that the record has a disbursement date of April 6, when the system at the bottom shows that it is actually April 21. The error message appears when the user clicks on the Next button to continue to the next activity.
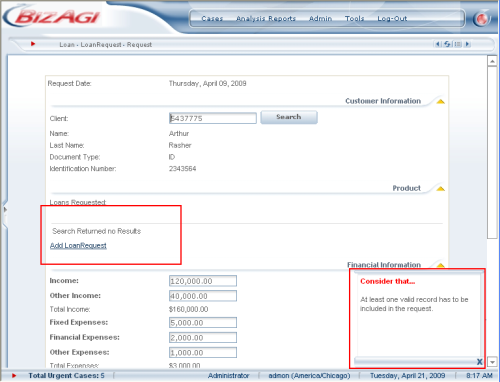
If the user tries to continue without adding any records, this is what will happen.
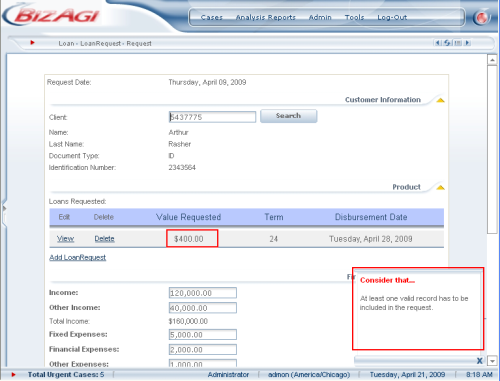
Or if the user has only one record with an amount that is too low to continue, this is what will happen.
|
Alert: It is important to point out that the counters take all the entries of the table into account, so even if the grid only displays a few entries (i.e. it is filtered on the web). For instance, if it is instructed to add up the payments, it will take all the entries and calculate their sum, even if the grid is filtered with just the approved payments. |
Related Information
- Grids
- How to Create a Form
- How to Create a Grid
- Operators in Grid Validations
- Values in Grid Validations
- How to Create Grid Validations with Rules
<comments />
