Creating Forms
From Business Process Management, BPM and Workflow Automation Wiki | BizAgi BPMS
<keywords content="keywords"> new, create, creating, form, forms, screen, screens, fields, build, activity </keywords>
Contents |
Creating Forms
After modeling the flowchart and including the data required for each activity or task in the process, the next step is to create the forms or screens that will be displayed in a Web application to the end user.
With Bizagi, each activity in the process is represented by a web form which displays its data (required and query information) so that the users of the process can interact with a user-friendly web application to carry out each of the activities of the process, recording the information required for its execution.
In this step, Bizagi arranges the data handled by the different activities of the flow in forms or screens, associating these forms with each of the activities that make up the process.
Below is the information required to properly create and modify the forms available in Bizagi.
Forms
A form is a set of associated data that is displayed on a screen of the application.
The main characteristics of a Form are:
![]() The form is built using a Forms Designer that helps the user see how it will look in the web application
The form is built using a Forms Designer that helps the user see how it will look in the web application
![]() The information required can be created from the Forms Designer
The information required can be created from the Forms Designer
![]() A Display name is always required
A Display name is always required
![]() Information on the forms can be organized in groups or tabs.
Information on the forms can be organized in groups or tabs.
Related Articles:
- General Properties of the Fields on the Form Configure and customize your form
- Field Types use text, numbers, dates, lists, configure searches, use created forms...
- Advanced Properties of a Form edit, delete, duplicate forms
- Tables (Grids) Learn how to build and configure tables in forms
- Tabs and Groups Organize your forms
- Global and Summary Forms Use forms for general information
- Wizard Forms Build a Wizard activity!!
- Parameter Entity Forms Create and edit forms to manage Parameter Entities
- Calculations on forms Learn how to perform calculations on activities
- Forms behavior in production Learn how forms behave when they are in production (they have been deployed)
How to Create a Form
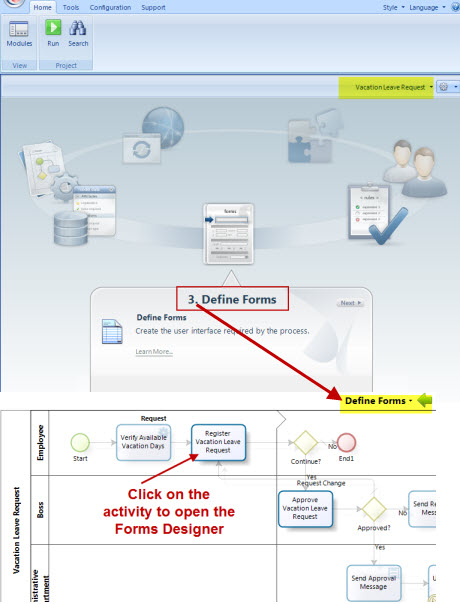
1. Forms are associated with the activities. Forms are created directly on the process making it easy to identify, create and edit them.
On the Process Wizard, go to the third step: Define Forms.
2. According to the design of the form selected, the information (or data) required in the form can be previously included or it can be created as the user creates the form using the Forms Designer.
3. Open the form to be created.
A new window will be opened; it contains everything the user needs to create the display of the activity. The way the Form is created is how it will be seen on the screen.
4. To include attributes to the form, drag and place them where required.
The attributes will have the Field Type that corresponds to the way they were created.
For example, if an attribute was created as a string it will be displayed as Text.
5. When the form is complete, click on SAVE and close the window.
|
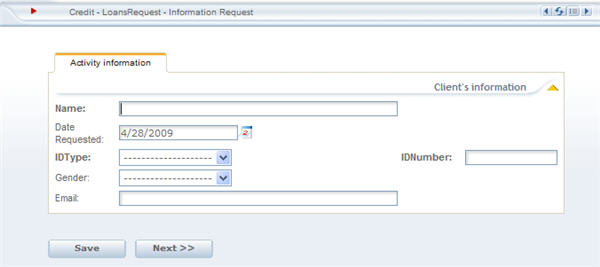
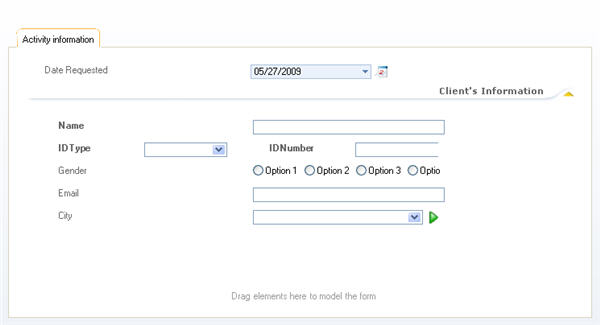
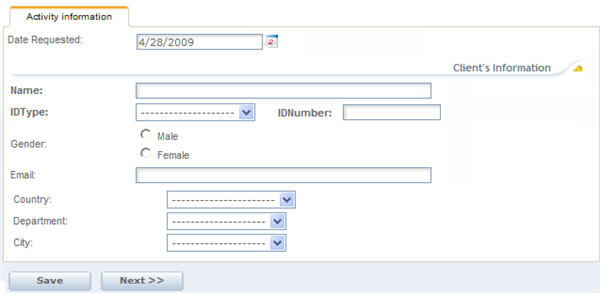
Example: A Credit Request Application process begins when the client declares an interest in obtaining credit with a bank. The client's information must be filled in: |
|
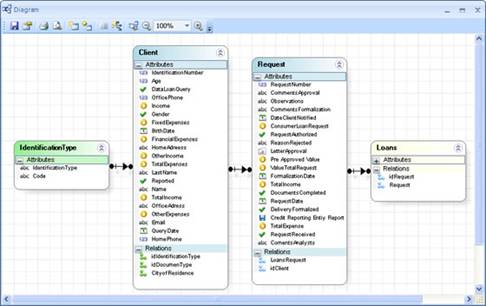
Below is the Suggestion Process Data Model. |
The next video will show: how to build a form, how to change the order of the attributes and make them required and editable (or not).
<videoflash>LNn9EUiP7nk|640|505|</videoflash>
Bizagi allows the user to include attributes one by one or several at a time. To include multiple attributes select them using CTRL + Click or SHIFT + Click.
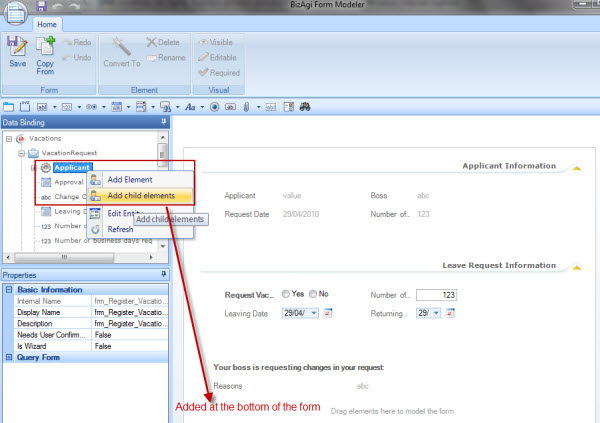
It is also possbile to include all the attributes of an entity at the same time. Right click the entity that contains the attributes that will be added to the form and select Add Child Elements. All the attributes contanied in the entity will be added at the bottom of the form.
To know where an attribute that has been added to the form is located in the data model, select the attribute on the Form and in the Data Binding box the attribute will be highlighted.
This video will show how to include new attributes to the data model in order to add them to the form.
<videoflash>DqrUoiIRhYA|640|505|</videoflash>
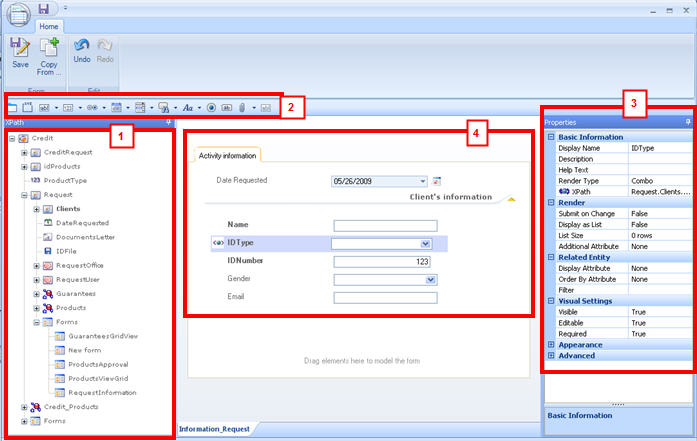
The Forms Designer
1. XPath
Contains the Data Model created for the project.
The entities and attributes can be created prior to the form's design or they can be added to the model as the user identifies the need for the information.
Drag the attribute to the Display to show it in the form.
2. Field Types
Every field has a certain data type that was chosen when the attribute was created.
In a form, each attribute can be displayed with different data types e.g. text, number, list, button, etc.
As soon as an attribute is dragged to the Display, it will take a default type, but it can be converted to another.
For further information go to Field Types
3. Properties
All the forms created using Bizagi Studio have special properties associated to each of the fields on the form. These properties vary depending on the type of the field selected. The basic properties for the fields on a form are represented by the following tabs:
Basic Information, Render, Related Entity, Visual Settings, Appearance and Advanced.
For further information go to Properties
4. Display
The Display Area shows the user how the form will look in the Web Application.
|
Note:It is possible to select and change several items of the form at the same time. Select them using CTRL + Click or SHIFT + Click. The changes over the fields that can be done are: deletion, editable, visible and required. Also, properties like name, display name and help text. |
<comments />
