How to dynamically manage templates and generate documents in Bizagi
From Business Process Management, BPM and Workflow Automation Wiki | BizAgi BPMS
<keywords content="keywords"> dynamic templates, templates, template management, reports, pdf, rtf, html, report files, letters. </keywords>
|
Applies to ENTERPRISE .NET EDITION |
Contents |
How to dynamically manage templates and generate documents in Bizagi
Overview
In this article we will describe how to include a design in any Bizagi process, so that the templates used for the generation of documents, can be managed directly in the production environment.
The mentioned templates will serve as input to generate documents which contain mainly business information of the process.
Generation of these type of documents is an option specially powerful for case reports, and for business scenarios in which there is the need to deliver a printed file with case information.
The steps to accomplish this how-to, require a custom component which is developed as the document generation service.
If you wish to use an out-of-the-box feature in Bizagi which automatically generates documents and doesn't require programming, please review Bizagi Letters feature.
How does it work?
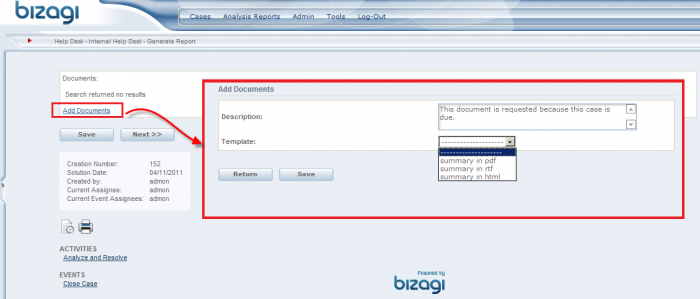
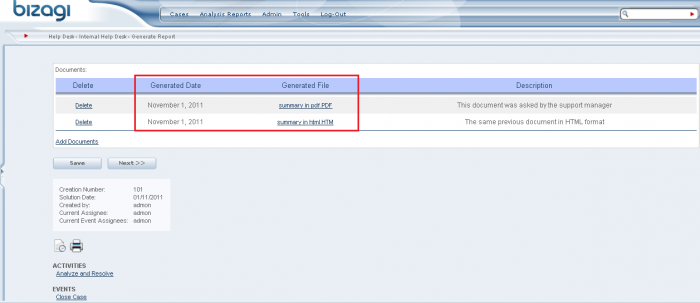
With the design presented in this example, an end user will be able to: select anytime a pre-defined template (which contains the set of information to be displayed in the case report and its design), and a pre-defined output type (i.e PDF, RTF or HTML).
Once this is selected, the output document will be generated automatically and attached to the case.
The documents generated through the custom component support a sophisticated design (such as rich formatting, extended layout options, or any other design possibility provided by PDF, RTF or HTML files).
The main advantage in this design is that provides an easy management of the templates used for the documents generation; allowing the definition of new templates or the edition of the existing ones at anytime directly in the Production environment (the documents' content and format listed in parameter entities).
How to do this?
To include support for dynamically generated documents in Bizagi processes, the following steps are needed:
1. Creating a custom component.
This involves developing a service that generates the PDF, RTF and/or HTML files.
The developed service will use a XLST transformation to create the document, parting from the XML-structured information.
This developed service can be then published as a web service, or it can also be created as a class library component (a .dll assembly).
2. Registering the custom component in the Component Library.
This means taking that output class library assembly from the previous step, and registering it in the Component Library feature of Bizagi as a custom "API". This registration allows your processes to invoke the methods in this component from within a Bizagi business rule.
3. Creating the entities in Bizagi's data model.
In Bizagi, we will create 4 entities for the design presented in this article. The created entities will both: store the documents (a "repository"), and provide the flexible management of for the documents content and format.
4. Designing the user interfaces to present and generate documents.
By defining the user interfaces (called forms in Bizagi), we will include a business rule to directly invoke the component's methods and generate the documents on-demand, and automatically attach them to the "repository" entity.
Once you have included this design for your process, you may manage the templates for the dynamic documents generation in the Development or Production environment (as described in the How to manage the dynamic documents generation? section).
Example
The following steps will be illustrated with the "Help Desk" process (as available from the free process templates in Bizagi's Process Central).
Creating a custom component
For this example, the custom component will be shown and developed in .Net technology and it will be created as a class library component.
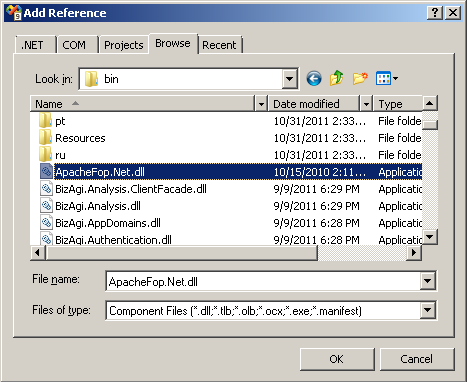
Given that we require PDF creation, we include the reference to the "ApacheFop.Net" assembly (this dll may be found at your project's bin path at "C:\Bizagi\Enterprise\Projects\HelpDesk\WebApplication\bin\").
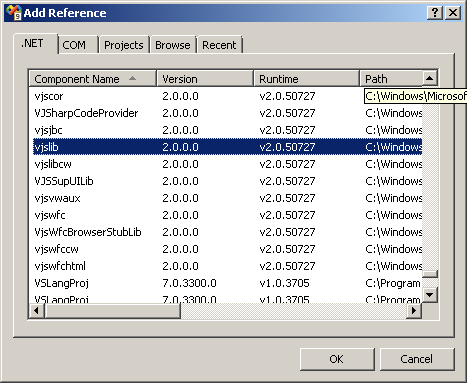
Adding the "Vsjlib" reference from the .Net Framework 2.0 is necessary as well for some of the file management methods used in the code in this example:
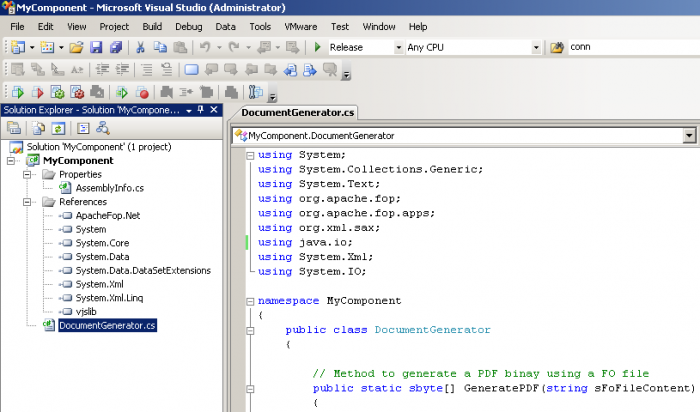
Our Visual Studio project has just one class which is called "DocumentGenerator". It belongs to the "MyComponent" Namespace, and it is coded as:
using System;
using System.Collections.Generic;
using System.Text;
using org.apache.fop;
using org.apache.fop.apps;
using org.xml.sax;
using java.io;
using System.Xml;
using System.IO;

namespace MyComponent
{
    public class DocumentGenerator
    {

        // Method to generate a PDF binay using a FO file
        public static sbyte[] GeneratePDF(string sFoFileContent)
        {
            sbyte[] buf;
            try
            {
                InputSource source = new InputSource(new java.io.StringReader(sFoFileContent));
                source.setEncoding("WINDOWS-1250");
                ByteArrayOutputStream stream = new ByteArrayOutputStream();
                Driver driver = new Driver(source, stream);
                driver.setRenderer(1);
                driver.run();
                buf = stream.buf;
            }
            catch (Exception exception)
            {
                throw new ApplicationException(exception.Message);
            }
            return buf;
        }

        // Generate an string from a binary file
        public static string ArrayConvertToString(sbyte[] oSBytes)
        {
            byte[] oBytes = new byte[oSBytes.Length];
            System.Buffer.BlockCopy(oSBytes, 0, oBytes, 0, oBytes.Length);
            UTF8Encoding utf = new UTF8Encoding();
            return utf.GetString(oBytes);
        }

        // Generate a binary array from an string
        public static sbyte[] GenerateBinary(string Content)
        {
            System.Text.UTF8Encoding encoding = new System.Text.UTF8Encoding();
            byte[] data = encoding.GetBytes(Content);
            sbyte[] salida = new sbyte[data.Length];
            System.Buffer.BlockCopy(data, 0, salida, 0, salida.Length);
            return salida;
        }

        // tranform XML using a tranformation XSLT
        public static string TransformXML(string xml, string xslt)
        {
            XmlDocument xdRes = new XmlDocument();
            xdRes.LoadXml(xml);
            XmlDocument xslResponse = new XmlDocument();
            xslResponse.InnerXml = xslt;

            // Get bytes for xml document
            byte[] oXml = System.Text.UTF8Encoding.UTF8.GetBytes(xdRes.OuterXml);
            byte[] oXsl = System.Text.UTF8Encoding.UTF8.GetBytes(xslResponse.OuterXml);

            // Build the memory stream with xml and xsl contents
            MemoryStream xslMemStream = new MemoryStream(oXsl);
            MemoryStream xmlMemStream = new MemoryStream(oXml);

            // Build the xml reader with the XSL and the XPath doc with the XML
            XmlTextReader xslReader = new XmlTextReader(xslMemStream);
            System.Xml.XPath.XPathDocument xPathDocXml = new System.Xml.XPath.XPathDocument(xmlMemStream);

            System.Xml.Xsl.XslCompiledTransform xslTransformer = new System.Xml.Xsl.XslCompiledTransform(true);
            xslTransformer.Load(xslReader);

            Stream resultStream = new MemoryStream();
            XmlWriter xmlWriter = new XmlTextWriter(resultStream, System.Text.Encoding.UTF8);

            xslTransformer.Transform(xPathDocXml, xmlWriter);
            xmlWriter.Flush();
            resultStream.Position = 0;

            // Get the result
            XmlDocument resultXmlDoc = new XmlDocument();
            try
            {
                resultXmlDoc.Load(resultStream);
            }
            catch
            {
                resultStream.Position = 0;
                StreamReader resultReader = new StreamReader(resultStream);
                string sResultText = resultReader.ReadToEnd();
            }
            return resultXmlDoc.OuterXml;
        }
    }
}
Our "GeneratePDF" method will be used to generate PDF files, while the "GenerateBinary" method will be used to generate both RTF and HTML files.
Finally, we build the project and produce the "MyComponent.dll" output.
You may download the Visual Studio project here.
Registering the custom component in the Component Library
We now take the "MyComponent.dll" output assembly of our previous step, and register it in our project through Bizagi Studio's Component Library feature:This component library's methods can now be invoked from a business rule to create the report files!
Creating the entities in Bizagi's data model
To create the entities, we go to the Process Wizard Step 2 (Model data).
The entities presented below complement the design and approach presented at the How to include documents management in Bizagi article.
For the dynamic document management we require 4 new entities.
Manageable in Production:
Its attributes are:
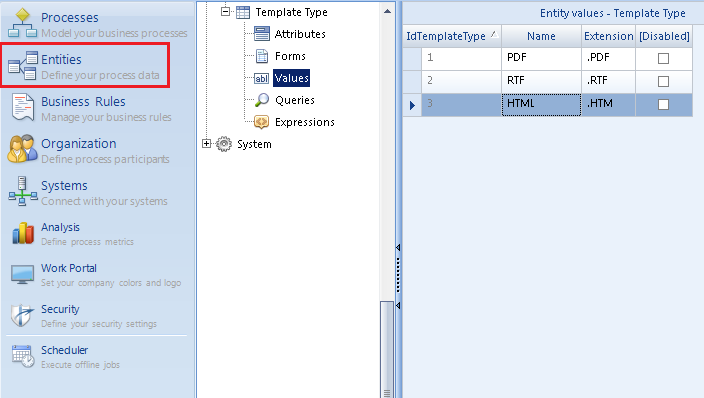
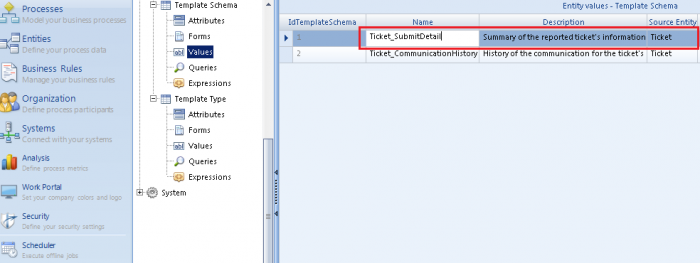
The values for this entity are added as shown below:
Notice that these values will be managed in the Production environment, even though they may not change as much.
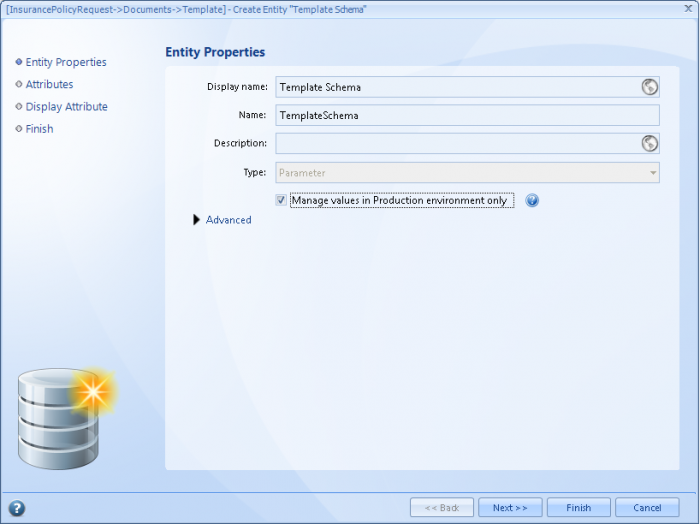
Administration of the other parameter entities (addition or edition of their values) is described in the How to manage the dynamic documents generation? section. + A parameter entity called "TemplatesSchema" with the following characteristics:
Manageable in Production:
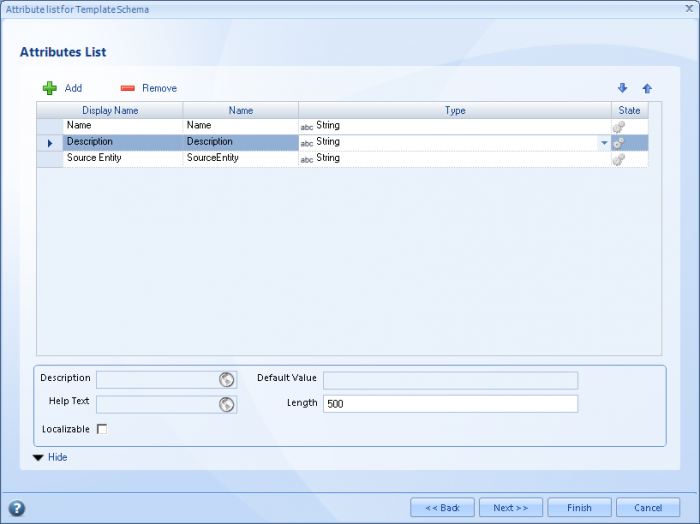
Its attributes are:
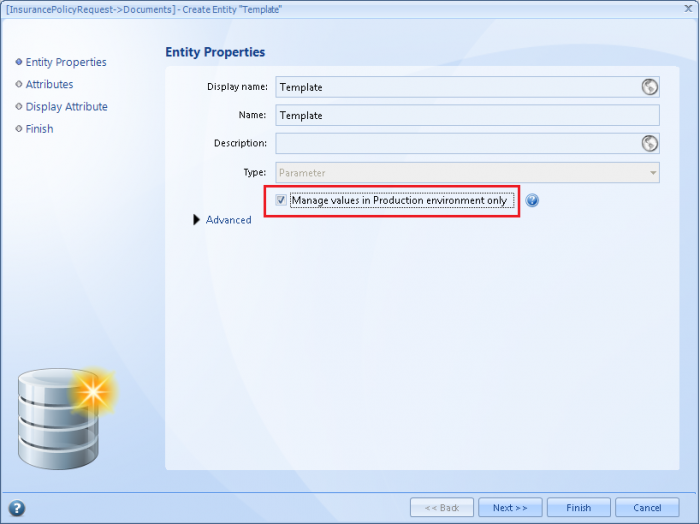
+ A parameter entity called "Templates", which has a reference attribute of TemplateSchema and TemplateType entities.
Manageable in Production:
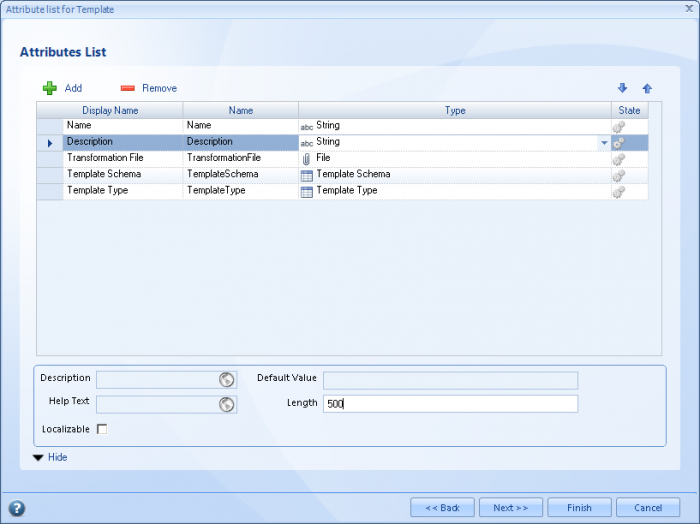
Its attributes are:
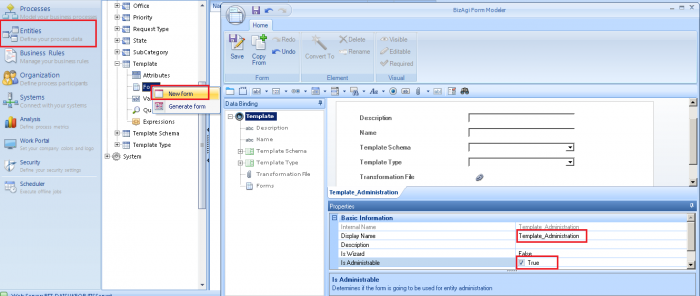
For this Template entity, we need to customize its administration form.
To do so, create a new form for the Template entity:
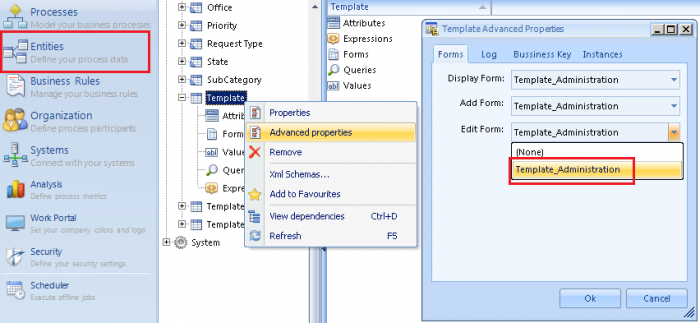
And then, assign this form for this entity's administration in the advanced properties' Forms tab:
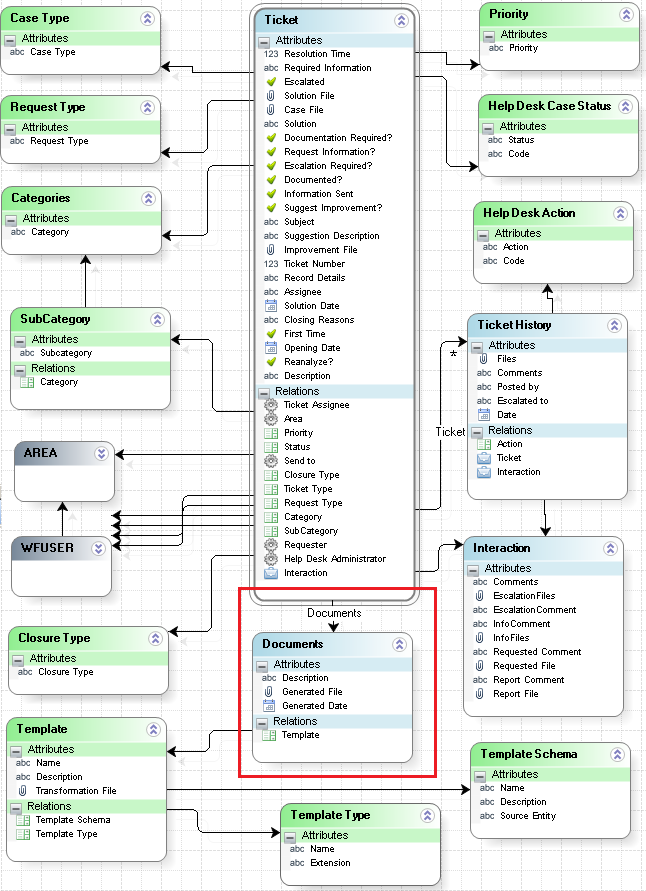
+ A master entity called "Documents", which has a reference attribute of the Templates entity.
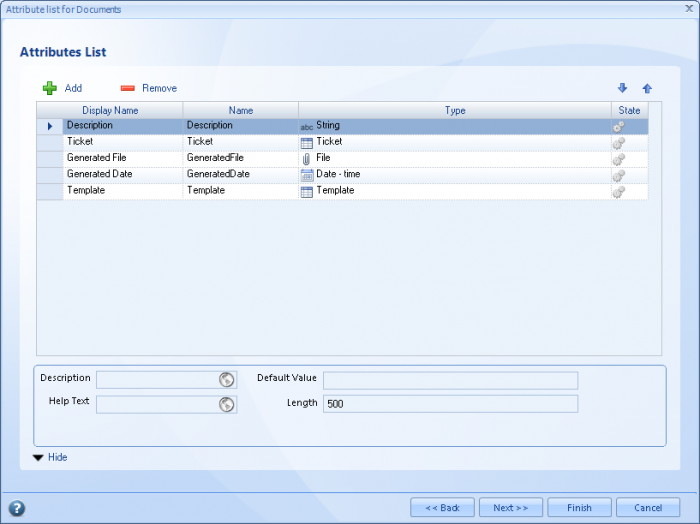
Its attributes are:
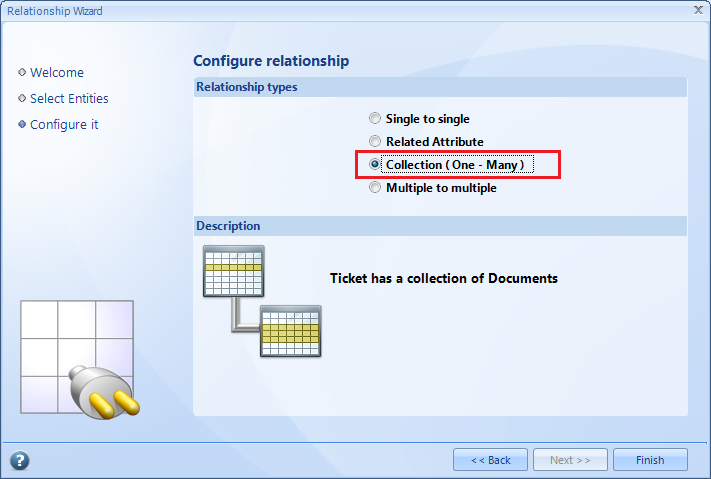
Finally, we need to include a collection of "Documents" in our main Process Entity. This means that we need to create a relationship between our process entity and the Documents entity:
We specify that it is a collection (a ticket case may have 1 or more document records):
For this example, we illustrate the Help Desk process entity (which is "Ticket") having a collection of Documents:
Designing the user interfaces to present and generate documents
In this step, we design the forms to allow end users to choose and generate the documents.
We do this, by going to the Process Wizard Step 3 (Define Forms).
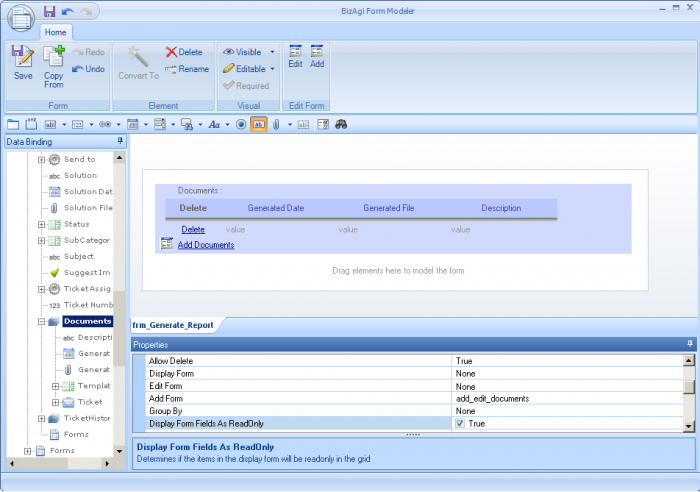
We include the grid and rule to generate documentation in any activity form of our process.We also include in the forms of our choice, a "Documents" grid to display the documents. The grid is included with the following characteristics:
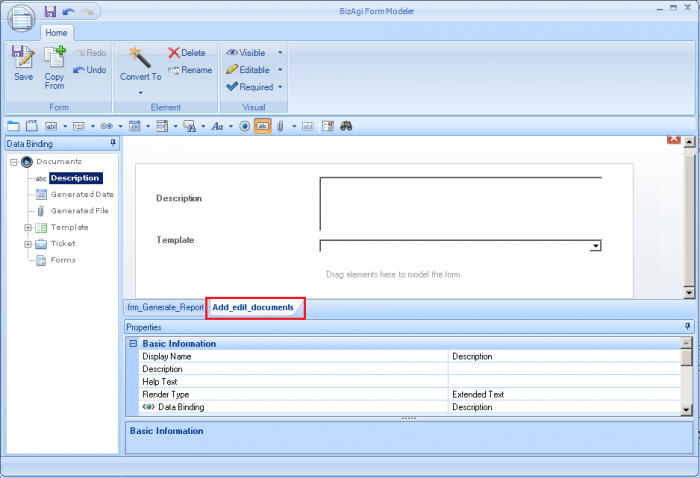
The AddForm form is created as shown:
We save the "Add_edit_documents" form and return to our main activity form.
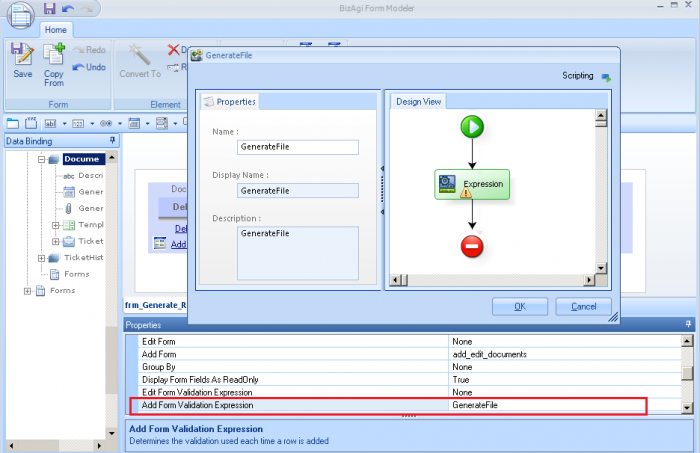
In the AddFormValidationExpression property, we create the business rule for the documents' generation:
The rule called "GenerateFile" has the following lines:
if (<Template.TemplateType.Extension>==".PDF"){
	// Load XSD schema information from parameterization
	var sEntitySchema = <Template.TemplateSchema.SourceEntity>;
	var sSchemaName = <Template.TemplateSchema.Name>;
	// Load the schema from the entity
	var sSchema = CHelper.getXSD(sEntitySchema, sSchemaName);
	// Load the parameterized template name for the generated file
	var sFileName = <Template.Name>;
	// Load the Altova transformation file parameterized in "Template" entity.
	var TransformationFile = <Template.TransformationFile>;
	var oTransformationData = TransformationFile.get(0).getXPath("Data");
	// Convert the binary object to string
	var sXSLT = MyComponent.DocumentGenerator.ArrayConvertToString(oTransformationData);
	// Extract the data from Bizagi and transform it using the parameterized XSLT
	var info = CEntityXmlHelper.entityToStringXmlWithScopes(Me, sSchema, sXSLT);
	// Generate a binary file for the PDF using ApacheFOP library
	var bytesDoc = MyComponent.DocumentGenerator.GeneratePDF(info);
	// Add the binary to Bizagi
	var Doc = <GeneratedFile>;
	if (Doc.size() != 0)
		Me.Context.removeRelation("GeneratedFile", true);
	var newDoc = Me.Context.addRelation("GeneratedFile");
	// Set the generated file name
	newDoc.setXPath("fileName", sFileName + <Template.TemplateType.Extension>);
	newDoc.setXPath("data", bytesDoc);
}
else if(<Template.TemplateType.Extension>==".RTF" || <Template.TemplateType.Extension>==".HTML"){
	// in case to generate RTF or HTML template
	// Load XSD schema information from parameterization
	var sEntitySchema = <Template.TemplateSchema.SourceEntity>;
	var sSchemaName = <Template.TemplateSchema.Name>;
	// Load the schema from the entity
	var sSchema = CHelper.getXSD(sEntitySchema, sSchemaName);
	// Load the parameterized template name for the generated file
	var sFileName = <Template.Name>;
	// Load the Altova transformation file parameterized in "Template" entity.
	var TransformationFile = <Template.TransformationFile>;
	var oTransformationData = TransformationFile.get(0).getXPath("Data");
	// Convert the binary object to string
	var sXSLT = MyComponent.DocumentGenerator.ArrayConvertToString(oTransformationData);
	// Extract the data from Bizagi (XML)
	var info = CEntityXmlHelper.entityToStringXmlWithScopes(Me, sSchema, "");
	// Transform  the it using the parameterized XSLT
	info=MyComponent.DocumentGenerator.TransformXML(info, sXSLT);
	// Generate a binary file for the template
	var bytesDoc = MyComponent.DocumentGenerator.GenerateBinary(info);
	// Add the binary to Bizagi
	var Doc = <GeneratedFile>;
	if (Doc.size() != 0)
		Me.Context.removeRelation("GeneratedFile", true);
	var newDoc = Me.Context.addRelation("GeneratedFile");
	// Set the generated file name
	newDoc.setXPath("fileName", sFileName + <Template.TemplateType.Extension>);
	newDoc.setXPath("data", bytesDoc);
}
<GeneratedDate> = DateTime.Now;
Notice that we call on directly our component's method as: Namespace.Class.Method().
How to manage the dynamic documents generation ?
Management of the dynamic templates is done by pre-defining a template for each output document we want to list.
This concept includes: inserting values for the 3 parameter entities (which correspond to Template, TemplateSchema and TemplateType) for new documents definition (content and format); and being able to edit the values for these entities anytime.
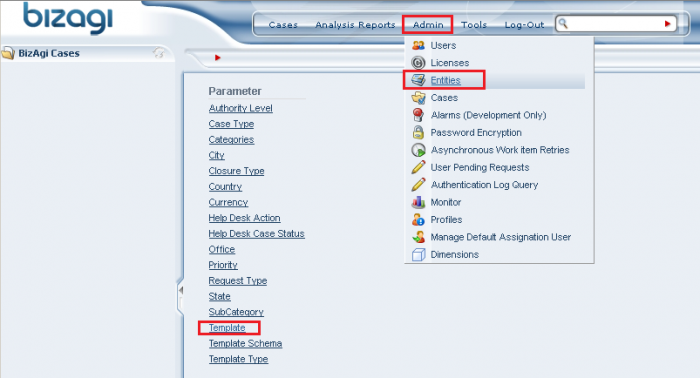
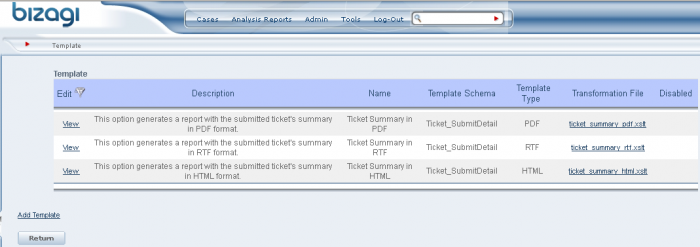
For the "Help Desk" process we will illustrate how to define the templates (and insert this information in the parameter entity values), in order to have the possibility to generate a report with the summary of the reported ticket.
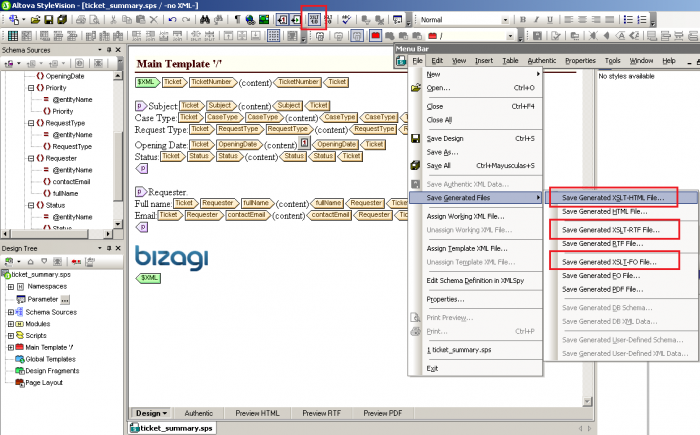
The information to generate a summary report is obtained as Xpath parting from our main "Ticket" process entity. We will describe the steps to prepare the information for the summary of the reported ticket (creating a new template follows the same steps as described at the How to create PDF files' Creating the transformation file section.
This means that for our TicketSchema we will have to necessarilly add a record with the XML schema we just created:
Further information on this can be reviewed at the main How to create PDF files article.
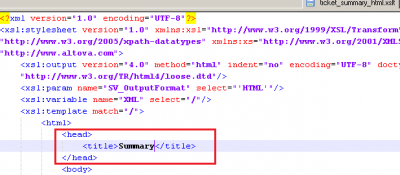
We add a record for each corresponding output type and upload the corresponding Transformation files:
For this process and example, we could have an additional template to generate a document with the history of the help desk support communication. This would be done similar to the case summary report.
At this point, the Help Desk process in Bizagi is set to use the dynamic templates feature!
Related Articles
<comments />
