Letters
From Business Process Management, BPM and Workflow Automation Wiki | BizAgi BPMS
<keywords content="keywords"> Letter, format, document, documents, templates, template </keywords>
Contents |
Letters
Letters are documents generated by Bizagi, where the user can define standard information to be included. The information to be shown has to be a part of the process data model. These documents are generated in the application and they can be edited, printed or sent by e-mail, as required in the process.
It is important to bear the following suggestions in mind when you create and use letters:
![]() The attributes created to show letters or documents are attributes that store the number (id) of the document that will be published in the form.
The attributes created to show letters or documents are attributes that store the number (id) of the document that will be published in the form.
![]() The attributes that will be used as letters must be created as “Template” attributes and must belong to any entity of the process data model.
The attributes that will be used as letters must be created as “Template” attributes and must belong to any entity of the process data model.
![]() When creating forms, the data type will be Letter for these attributes.
When creating forms, the data type will be Letter for these attributes.
![]() Letters may or may not be editable.
Letters may or may not be editable.
How to Create Letters
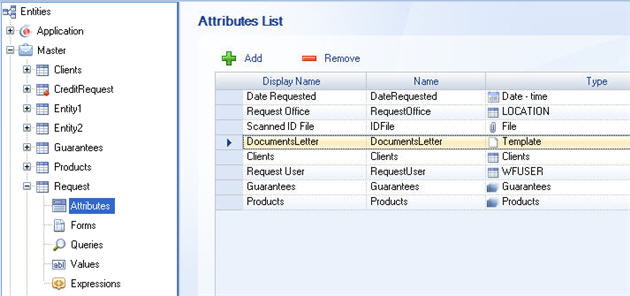
1. Create the attribute as "Template" in the desired entity.
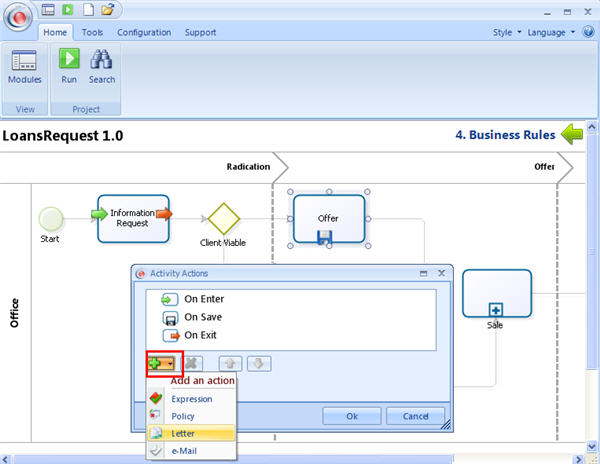
2. Using the Process Wizard go to the Step 4 and select Activity Actions. A new window will display the process.
Click the shape in the process where the Letter should be shown. In the Actions tab click on the PLUS sign at the bottom of the window and select the Letter option.
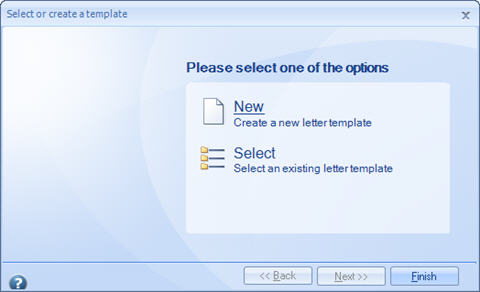
3.The following window will be displayed. Select the NEW option.
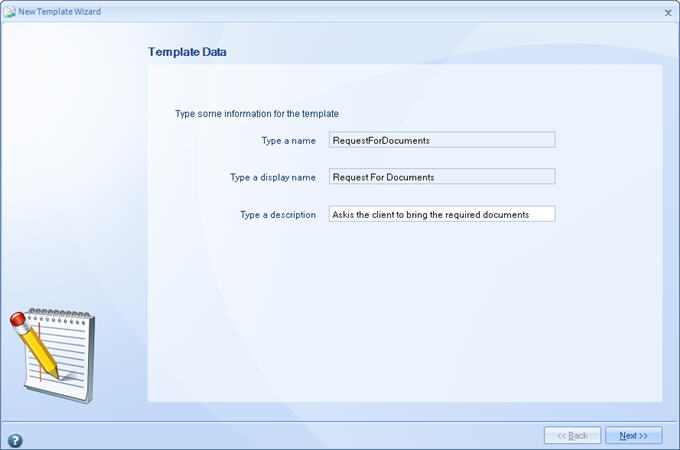
4. Type the name of the letter, the display name and a short description
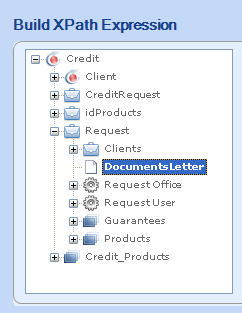
5. Select the path where the Template attribute was created
6. A window to write the message will be opened.
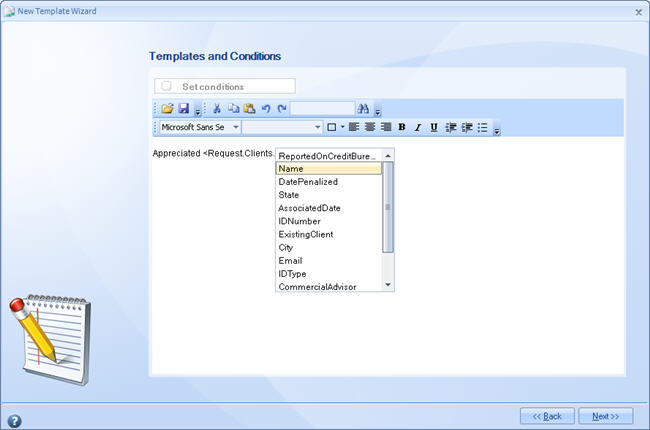
To include values of attributes, indicate the path to reach the attribute between diamond brackets.
As soon as '<' is typed, a new window will show the information available:
The options available are:
![]() A link to the Case <CaseLink>
A link to the Case <CaseLink>![]() Today's date: <TodayDate>
Today's date: <TodayDate>
Attributes' values: to include values of attributes previously obtained it is necessary to type the XPath of the desired attribute starting from the Application entity.
Type the open bracket '<' and select the first Attribute. Then, type a period '.' to continue navigating until the attribute is reached.
![]() How to include tables in a letter
How to include tables in a letter
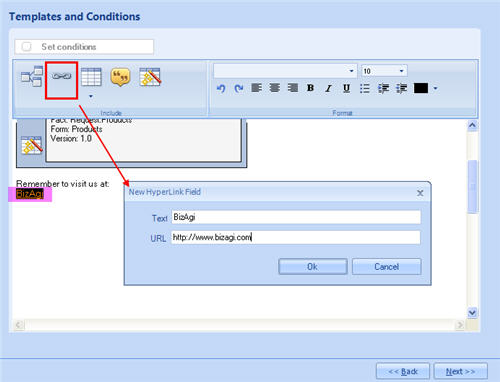
![]() To include a Hiperlink select the Link button on the top of the window. Write the display name of the link and then its address.
To include a Hiperlink select the Link button on the top of the window. Write the display name of the link and then its address.
Hiperlinks will be available to click on them ONLY when the letter is NOT editable.
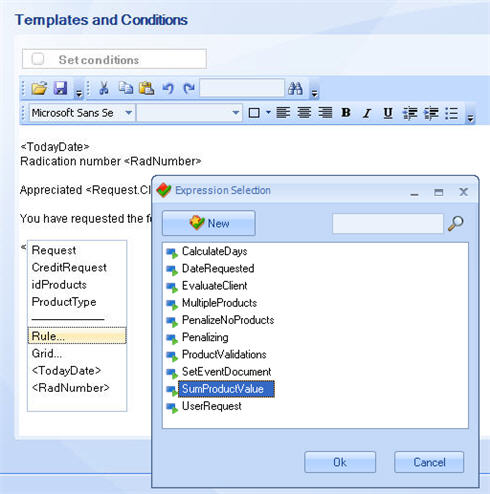
![]() To call on a rule in a letter that returns a value, enter the “<” symbol, and click on the Rule option for the system to open up a screen from which you can select the rule.
To call on a rule in a letter that returns a value, enter the “<” symbol, and click on the Rule option for the system to open up a screen from which you can select the rule.
Click on Ok to save the changes made in the letter.
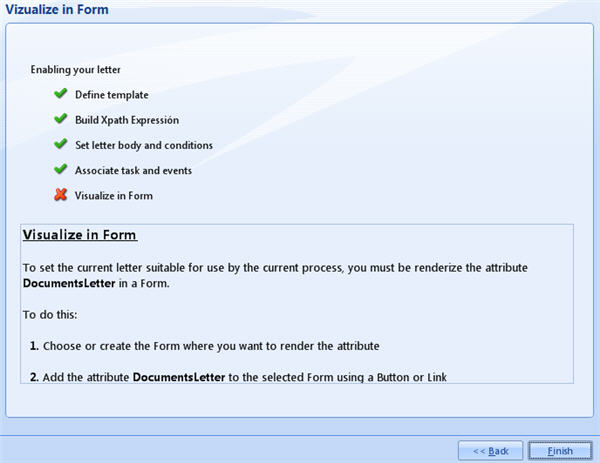
7. If the attribute has not been included in the corresponding form of the Activity, the following message will be shown.
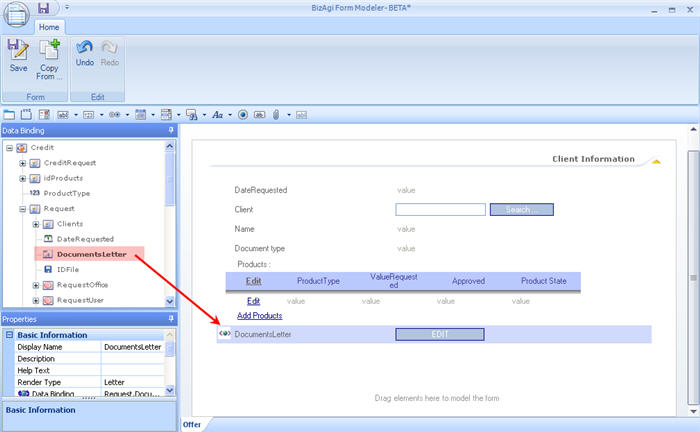
If this is the case, go to the form of the activity and include the Template attribute
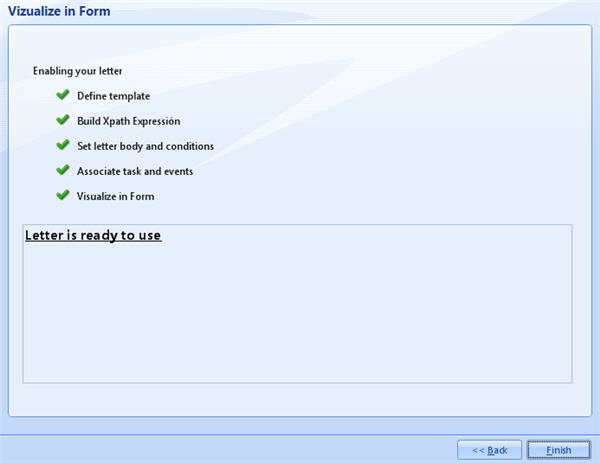
Once everything is correct, when clicking OK on the Letter Wizard, the following message will be shown.
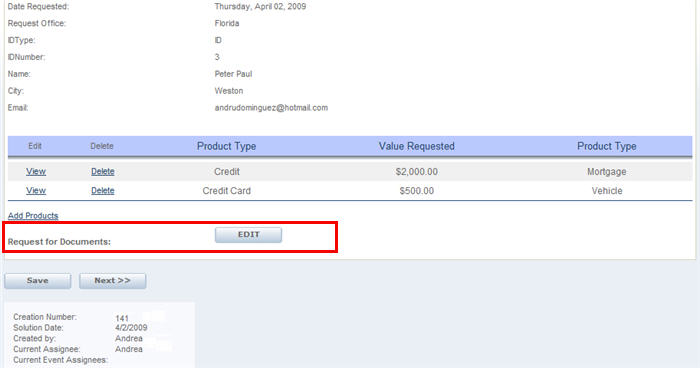
8. On the web application, the user will be able to edit the letter if the attribute in the form is Editable, or just view it if it is not.
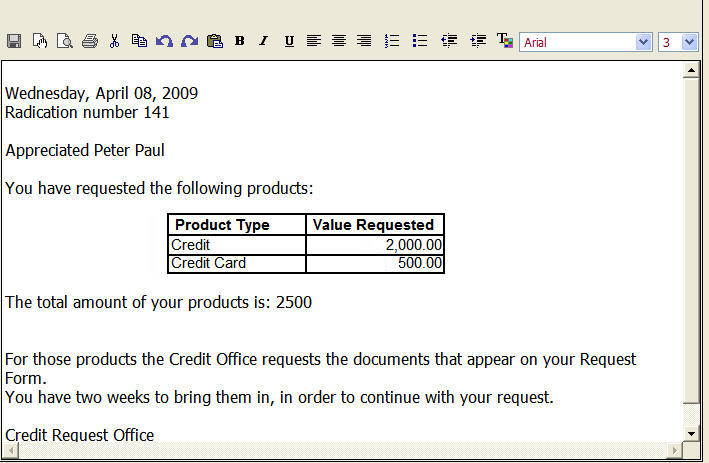
The result will be:
Observations Regarding Letters
- The letters are generated when they are shown for the first time in a form. if they are not displayed in a form of the process they are NOT generated.
- If the letter needs to be updated through out the case beacuse information (attributes in the letter) might have changed, the attribute Generate Always must me checked. This way, when the values of the attributes of a letter are changed the information will be updated.
Using Conditions
It is possible to condition wether a letter is created or not, using a boolean expression. According to the case information, the user can determine is a letter should be created or not and thus, shown in the web application.
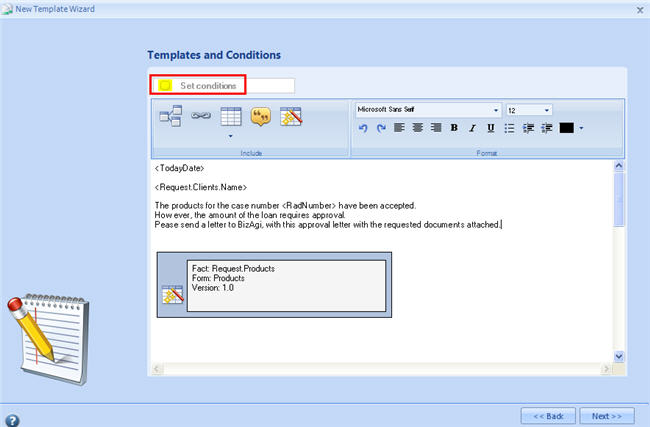
1. If the letter needs conditions, click on the Conditions check-box on the upper left corner of the Letters window.
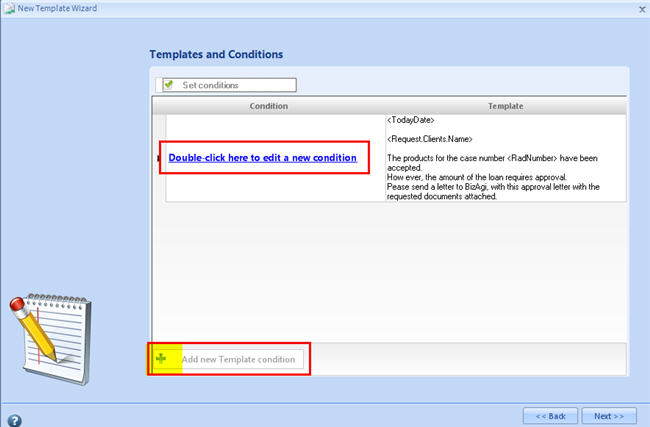
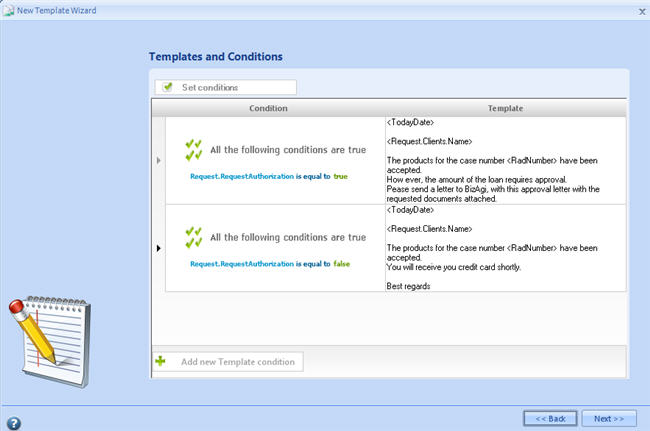
2. A new window will be opened. In it, the conditions are defined on the left, and the templates on the right.
Double click on the conditions link to configure them
Click on the Add button to create a new condition.
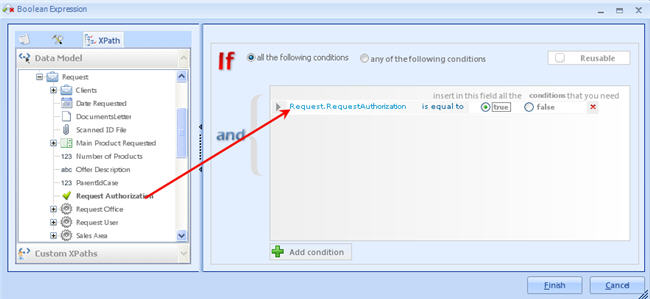
3. In the conditions window drag and drop the attributes to the right and create the condition.
E-mail conditions are built in the same way. Watch a video and learn more about conditions. Please go to Conditions in e-mails
4. Create as many conditions as desired. The letter will only be generated when a condition is fulfilled.
How to include Tables in a Letter
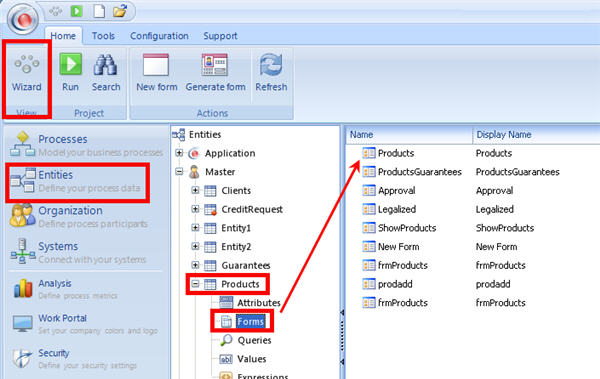
1. To add tables it has to be previously created. For example, to add the table of all the products requested in a Credit Request process, a form with the attributes that want to be shown, must be previously created in the Products Entity.
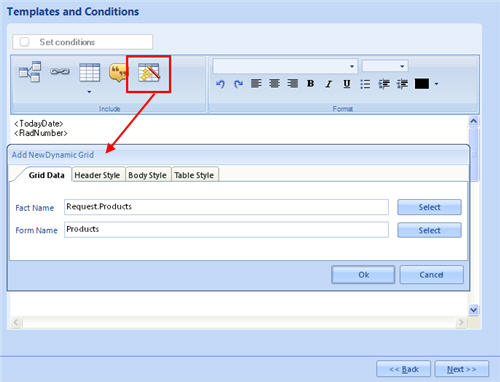
2. To relate it to the letter click on the Dynamic Grid icon on the top of the screen
3. A new window will display the options to build the desired table
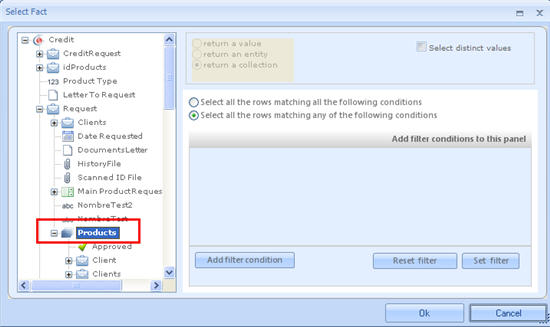
The Fact Name is the name of the 1:N relationship that can be selected from the Data Model:
In this case, the table is Products.
Then, select the form that was created in the first step, in the Products entity.
Click to learn how to include Tables in Messages (notifications)
4. The same window will allow the user to customize the table with the desired Font, Color and Table Style.
Table Style
This tab contains the following properties:
![]() Table Alignment: indicates whether the tab will be aligned to the left, in the middle or to the right.
Table Alignment: indicates whether the tab will be aligned to the left, in the middle or to the right.
![]() Use Headers: shows the field names at the top of the table displayed in the letter.
Use Headers: shows the field names at the top of the table displayed in the letter.
Header Style
In this section, the user can configure the table header. These values will be taken into consideration only if Use Headers has been enabled in the table properties tab.
The following properties can be configured:
![]() Back Color: color of the background of the body of the table.
Back Color: color of the background of the body of the table.
![]() Align: alignment of the values of each of the columns of the body of the table.
Align: alignment of the values of each of the columns of the body of the table.
![]() Font: Choose the font color, name and size, and indicate whether it will be displayed in bold print and/or italics
Font: Choose the font color, name and size, and indicate whether it will be displayed in bold print and/or italics
Body Style
In this section, the user can configure the color, alignment and font of the body of the table.
The following properties can be configured:
![]() Back Color: color of the background of the body of the table.
Back Color: color of the background of the body of the table.
![]() Align: alignment of the values of each of the columns of the body of the table.
Align: alignment of the values of each of the columns of the body of the table.
![]() Font: Choose the font color, name and size, and indicate whether it will be displayed in bold print and/or italics.
Font: Choose the font color, name and size, and indicate whether it will be displayed in bold print and/or italics.
The table that has been created can be edited. In order to do so, double click on it and change the style.
To delete it, just delete the icon shown using backspace.
|
Note: This way of including tables in Letters does not allow filters in the entries of the table. It shows all the entries that belong to the relation. |
Manage Letters in Bizagi Studio
Letters can be managed in the Processes menu in Bizagi studio: they can be created, modified, deleted and related to an activity:
Look at the video to learn how:
<videoflash>IXt7Ht1VujU|640|505|</videoflash>
Where does Bizagi stores the Letters?
The letters that are generated by Bizagi are stored in the base directory specified in the environment configuration. By Default, the base directory is the Docs folder inside the Bizagi project Folder (for example C:\Bizagi\Enterprise\Projects\MySecondProcess\Docs where the project is called MySecondProcess). In running time, a set of subfolders is created inside the Docs folder previously mentioned. The hierarchy of subfolders depends on the number of the case, the template attribute id, and the entity where that attribute can be found. Therefore, each letter for a particular case would be found in: Base_Directory\Entity_ID\Consecutive\Case_ID\Attribute_ID\
The Consecutive number is generated using the following number: (Case_ID - (Case_ID % 1000)) / 1000
Example:
C:\Bizagi\Enterprise\Projects\MySecondProcess\Docs\10002\0\251\10031\
Related Articles
<comments />
