Servers Management
From Business Process Management, BPM and Workflow Automation Wiki | BizAgi BPMS
<keywords content="keywords"> cluster, clustering, server management, admin server, server administration, servers administration, move server, change server, move production server, change production server, new production server, move master node, change master node </keywords>
Contents |
Servers Management
The Server Management menu makes it possible to create and manage a cluster for the web application and to change the web server from one machine to another one (including the licenses).This module in Bizagi Management Console is available only for projects that had been deployed to Production and is the reason why it is not included in Bizagi Studio.
In this article is also explained how to recreate a Production project from a database or a database backup. This is convenient if the Production server was damaged and the Move option cannot be used.
The following operations described require having a user that is a member of the Bizagi and Administrators groups in all involved servers. Additional requirements may be needed for each operation.
Clustering (Applies to Enterprise .NET Edition)
For projects with many users, that expect a high volume of requests through the Work Portal, or for those that need to improve performance, it is a good idea to have more than one server to function as a single web server. Configure this in Bizagi, through the Servers Management module in the Management Console.
Every server in the cluster will be called a node but the one selected as the web server when the first Deployment was executed, will be the master node because it will be used to configure the cluster.
Adding a Server
1. To add a new server, first install Bizagi Enterprise .NET Edition (in Setup Type select the Server option) on a server that has visibility to the server(s) that will be included in the cluster. Then ensure that it has Internet Information Services (IIS 5.0 or higher) installed.
Open the Bizagi Management Console; in the Welcome to Bizagi window select Open Existing Project. Select the project’s server from the first drop-down list, and then select the project for which the cluster will be created in the second drop-down list. Click on Finish to open the project.
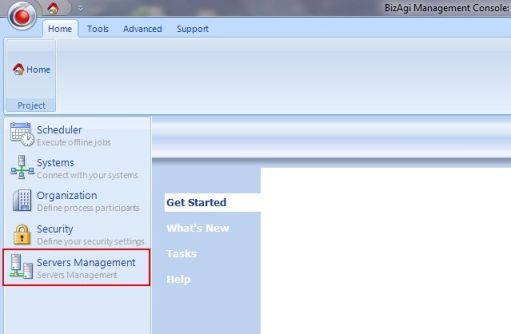
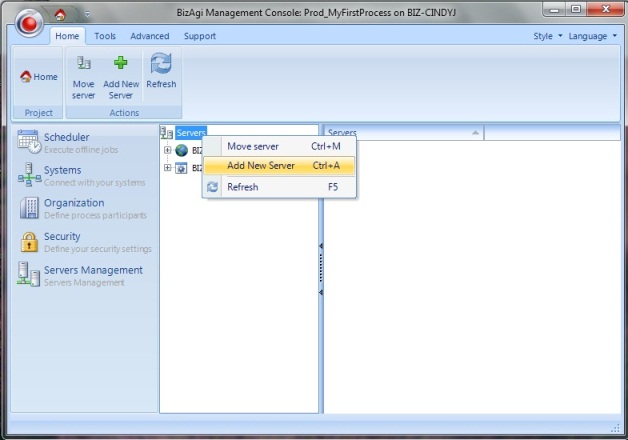
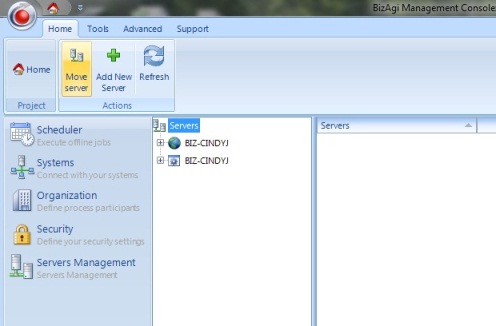
When the project opens, go to the Servers Management module. Click on the Add New Server button or right-click the Servers item and select the corresponding option.
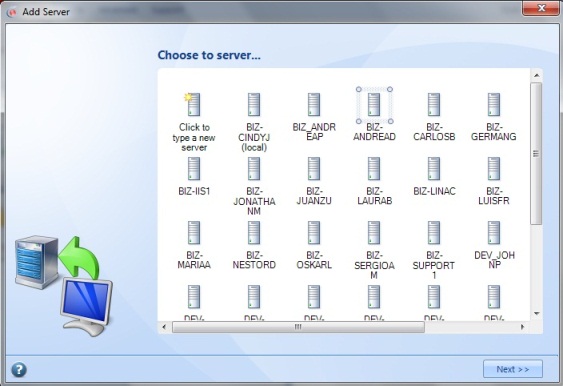
2. As with the Deployment, a window will open with the list of visible servers with a Bizagi installation. Select the server to be included in the cluster and click Next.
If the server you wish to include as a cluster does not appear in this icon list, you may manually type the server’s name or IP address.
|
Alert: Take into account that while using IP addresses directly, it is necessary to ensure that the IP addresses are not dynamic. In other words, the clusters’ IP addresses must not change. |
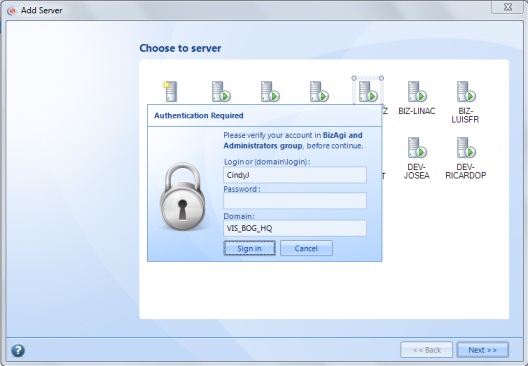
3. To perform this task it is necessary to have a user that is a member of the Bizagi and Administrators groups in the selected server. If the same user is used in the master node, and everything is correct, the server will be added. If the user in the master node is not in the specified groups of the selected server, the system will ask for valid credentials.
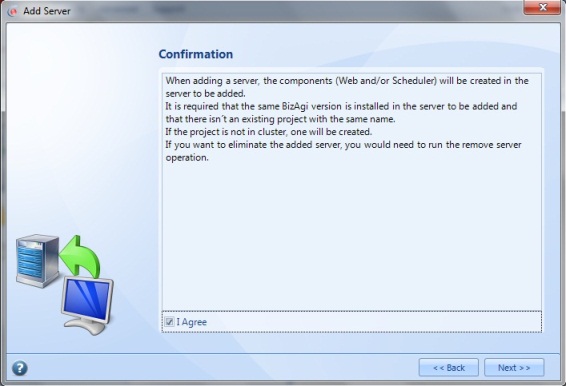
A confirmation message is shown, agree to this by marking the checkbox and then click Next.
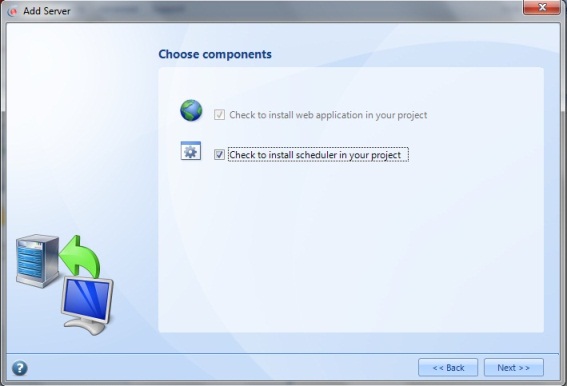
The installation of the Scheduler is optional, check the option to install it only if you want to have this service in the new node. Click Next to continue.
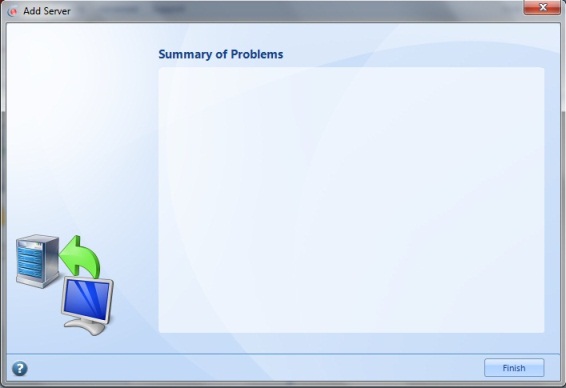
On the last window you will see the summary of problems, if any occurred during the procedure. The new server was added successfully if there is no message here. Click Finish to close the window.
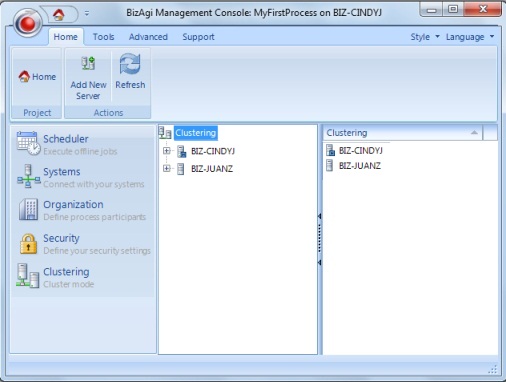
When the process is finished, a list of the participant servers will appear.
Removing a Server
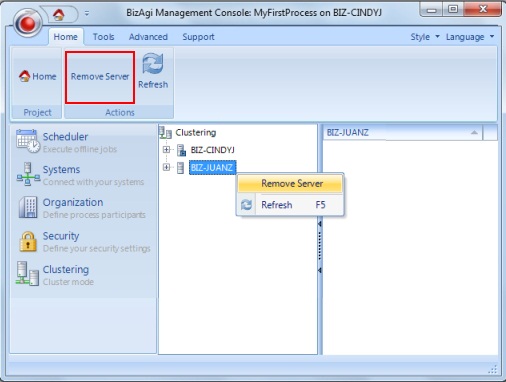
To remove a node from the cluster, just select it from the list, right-click on it and choose the option Remove Server; or click on the button in the Standard Menu. Confirm this action to completely remove the chosen node.
This choice will not delete the files from the server. So, even if it is no longer part of the cluster, in that server a Bizagi application will exist with the same name as in the master node and using the same database.
Move Server or Move Master Node
If for any reason is necessary to change the Production web application server to another machine, for example if the deployment was executed into a test server, is possible afterwards to "move" the Bizagi project from one server to the other. This operation allows moving mostly all Bizagi components of a project: the licenses, web application, scheduler and files. The only thing that will remain in its original server is the database; to also move the database read the Recreate from Database section.
Important recommendations and constraints
Before you copy a Project to another server it is necessary to review this recommendations carefully to avoid problems.
The first recommendation that needs to be taken into consideration is that a general set of tests needs to be done since the movement implies a complex set of tasks.
It is also important to have security copies of the environments, including database and website backups. If, in addition, there are special directories configured for the documents, they need to have a backup as well.
To be able to make a backup it is necessary to have the SQL Server Management Studio. The SQL Server Express Edition installer does not include this tool, but it can be downloaded here.
Please keep in mind that once the Bizagi installation process is finished, the fixes sent to the project to correct bugs need to be updated. The easiest way to do this is to overwrite the bin folder with the files from the original environment.
If the processes interact with interphases, these systems need to have a backup if their platform is going to be changed.
Do not forget that the licenses may need some changes or movements that can apply. You should contact the support deppartment of Bizagi in such a case.
For a project which has a cluster configuration, this operation can only be performed on the master node. This is, to move the master node from one machine to another one that does not belongs to the cluster. To change the other nodes just use the Remove Server and Add Server operations.
There are some constraints to be able to move a server or a master node. These are:
- Perform this procedure with a user that is a member of the Bizagi and Administrators groups on both, the original and the new server.
- The original server must have visibility to the new server (like when a Deployment is performed).
- The new server must have visibility to the Development server and Test server, this last one only if the project was deployed to a Test environment.
- The new server must not have a Bizagi license.
- The server where the operation is performed must have Internet connection (access to www.Bizagi.com).
- The new server must comply with Bizagi technical requirements for a Production environment.
- Before the operation begins install the same version of Bizagi in the new server (just the Server setup).
Moving a Server
1. To move to a new server, install Bizagi Enterprise .NET Edition (in Setup Type select the Server option) on any machine that has visibility to all involved servers. This option is also available for Bizagi Xpress Edition.
Open the Bizagi Management Console; in the Welcome to Bizagi window select Open Existing Project. Select the project’s original server from the first drop-down list, and then select the project that wants to be move in the second drop-down list. Click on Finish to open the project.
When the project opens, go to the Servers Management module. Click on the Move Server button or right-click the Servers item and select the corresponding option.
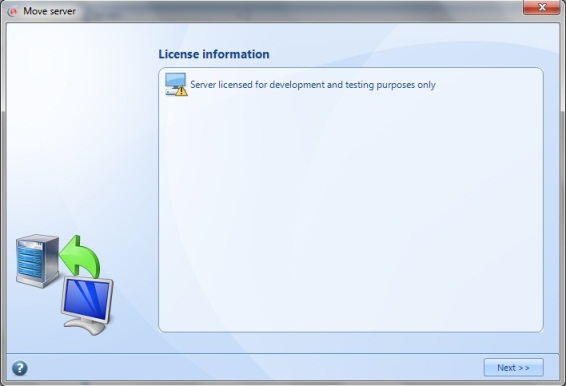
2. Since this procedure also moves the license information, this is shown before the operation begins. Click Next to continue.
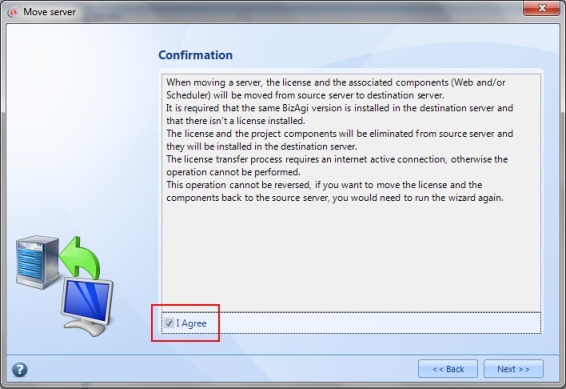
3. On the next window is the explanation of what is going to be done and a checkbox to confirm this procedure. Agree to this and click Next.
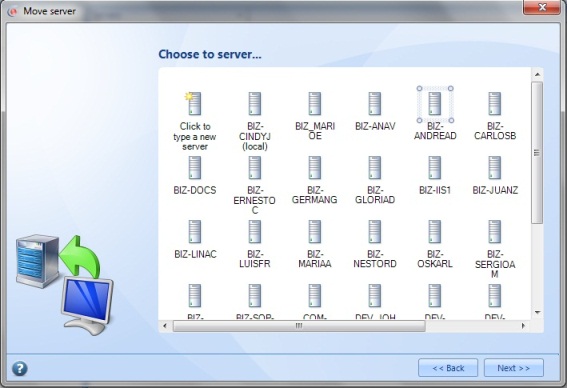
4. As with the Deployment, a window will open with the list of visible servers with a Bizagi installation. Select the new server and click Next.
It is possible that, even though the new server is reachable, it does not appear in this list. If this is the case, select Click to type a new server and enter the server's name or IP address.
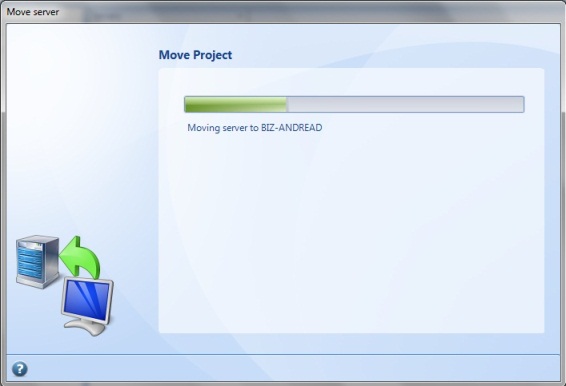
To perform this task it is necessary to have a user that is a member of the Bizagi and Administrators groups in the new server. If the same user is used in the machine where Bizagi Management Console was opened, and everything is correct, the moving process will begin. If not, the system will ask for valid credentials.
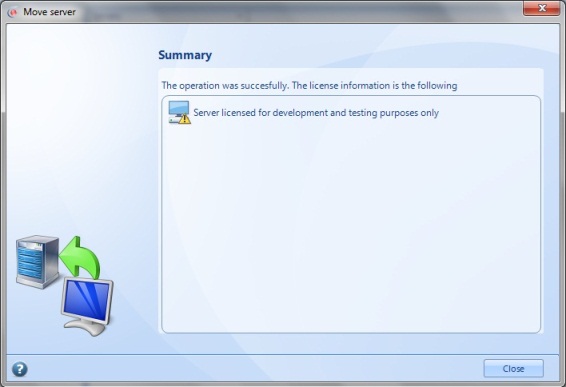
5. When finished, the licenses, the project’s web application, scheduler and files, will now exist in the new server and erased from the original server. A summary of the license information is shown in the last window; close it by clicking on Close.
Recreate from Database
Recreating an environment from a Database is useful when:
- A project that is in Production needs to move the database server, as well as the web application server (this last requirement can be done using the Move operation described above).
- Only the database (or a backup of the database) of a project in Production is available.
To be able to complete this operation first review the following conditions:
- Perform this procedure with a user that is a member of the Bizagi and Administrators groups on both, the original and the new server.
- The operation has to be executed directly on the server that will be used as application server (where the web application will be created).
- The source database (or backup) has to be of a project in Production environment. Additionally, it has to correspond to the files of the database at any time after the last deployment was executed. For example, if the project was deployed three times to Production, the backup used cannot be from before the third deployment was executed.
- The new server must comply with Bizagi technical requirements for a Production environment.
- This procedure requires some technical knowledge, so seek for advice if needed.
Recreating from Database
1. If a backup of the database is going to be used, first restore the database into the desire database server. Find here the steps for restoring a Bizagi database, skip the step where the Scheduler service must be stopped or started. If instead, what is available are the database files, it is necessary to "attach" the database in the database server, read here how to do this.
The database must be in the same version of Bizagi used to perform this operation, if not, then execute the DBBuildUpgrade-*.sql script that can be found in Bizagi installation files in the DBBuildUpgrade folder. The script must be executed using the database sa login.
2. Install Bizagi Enterprise .NET Edition (in Setup Type select the Server option), or Bizagi Xpress Edition, on the chosen web application server.
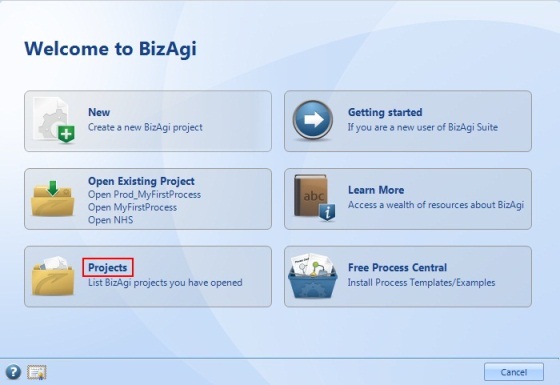
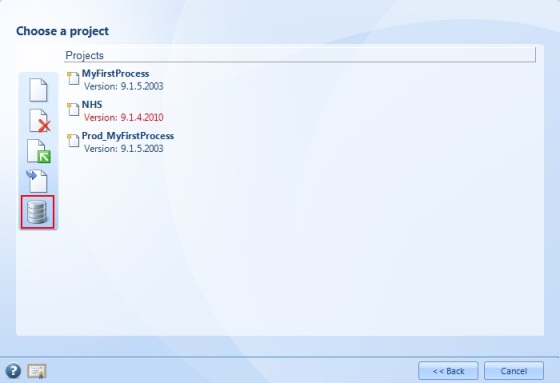
Open Bizagi Management Console; unlike the other two operations, this one is found in the Welcome to Bizagi window, selecting Projects.
Click on the Recreate from database icon.
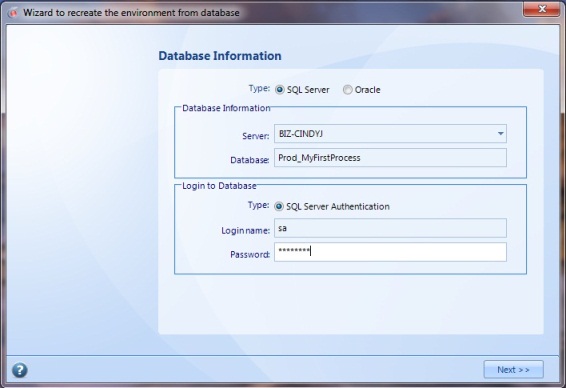
3. This opens a window, just like the one when creating a new project, where the database information is introduced. Select the Type of database being used, SQL or Oracle; type the name of the Database (this will be the same name of the project); also enter the authentication information for the database (Login name and Password). Click on Next to continue.
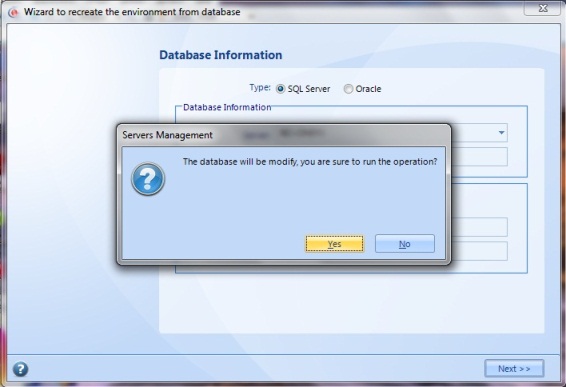
Click Yes in the confirmation window that appears.
A message informing that the operation ended is shown. Close it to finish. <comments />
