Organization
From Business Process Management, BPM and Workflow Automation Wiki | BizAgi BPMS
<keywords content="keywords">
assign, assignation, assignee, perform, performers, activity, owner, user property, assigned, user properties
</keywords>
Contents |
Organization
An organization in Bizagi is where the user can define the hierarchical structure of the company and the association between the different people or areas that it consists of.
An organization in Bizagi stores the information related not only to the organizational structure of the members of a company and the definition of their characteristics (position, areas), but also the characteristics that make them unique on a team and allow them to be active members in the processes of the application or applications (roles, skills, geographic location).
This chapter provides the information necessary to properly create and modify each of the variables that compose the organization and the association or their relation in the activities of the process.
Tutorial Video to use Organization Wizard
![]() Areas: Department of an organization.
Areas: Department of an organization.
![]() Location: Geographic location. This section also defines offices or branches, if applicable. In Bizagi, a user can only belong to one location.
Location: Geographic location. This section also defines offices or branches, if applicable. In Bizagi, a user can only belong to one location.
![]() Position: Organization structure. It indicates the positions and their chain of command. In Bizagi, a user can have one or more positions.
Position: Organization structure. It indicates the positions and their chain of command. In Bizagi, a user can have one or more positions.
![]() Roles: Conduct or role carried out by a person in the organization. In Bizagi, a user can have one or more roles.
Roles: Conduct or role carried out by a person in the organization. In Bizagi, a user can have one or more roles.
![]() Skills: Ability or aptitude for an action. A person’s special skills allow him/her to carry out an activity. In Bizagi, a user can have one or more skills.
Skills: Ability or aptitude for an action. A person’s special skills allow him/her to carry out an activity. In Bizagi, a user can have one or more skills.
![]() User Properties: A set of user characteristics. Bizagi contains a set of properties such as name, e-mail, immediate superior, etc. However, you can define additional user properties required for processes or assignations, or simply as additional user information.
User Properties: A set of user characteristics. Bizagi contains a set of properties such as name, e-mail, immediate superior, etc. However, you can define additional user properties required for processes or assignations, or simply as additional user information.
![]() Time Zone: The 24 main regions that allow a user to identify the LOCAL TIME according to the position of the City or Country in the World.
Time Zone: The 24 main regions that allow a user to identify the LOCAL TIME according to the position of the City or Country in the World.
![]() User Groups: User profiles or a set of characteristics of an employee of the organization.
User Groups: User profiles or a set of characteristics of an employee of the organization.
![]() Holiday Schema: Contains the calendars of nonworking days that apply for the organization. You can define different schema, because each country, region or city normally has different nonworking day calendars. In Bizagi, a geographic location has one nonworking day schema.
Holiday Schema: Contains the calendars of nonworking days that apply for the organization. You can define different schema, because each country, region or city normally has different nonworking day calendars. In Bizagi, a geographic location has one nonworking day schema.
In the Management Console these objects (Areas, Skills, Positions, Roles) cannot be modified. This is so because these objects are used for assignment rules in the workflow's tasks. It is considered a high risk changing the initial configuration done with Bizagi Studio (these type of modifications will most likely result in workflow's path changes or errors if there are inconsistences).
In order to manage them include them in the development design and perform deployment to test/production.
|
Note: The first time a project is deployed, user's information is taken to production. Henceforth, when new properties from the ones mentioned above are included, a new deployment must be performed and the information for all Users must be configured in the production environment. To guarantee the correct performance of all environments once deployed, those properties can not be deleted. |
How to Create an Area, Role or Skill
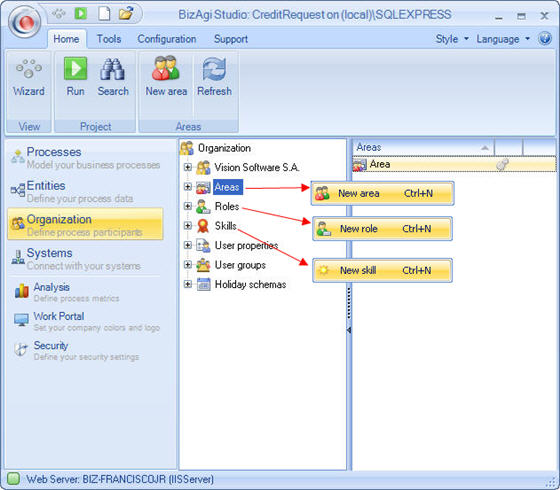
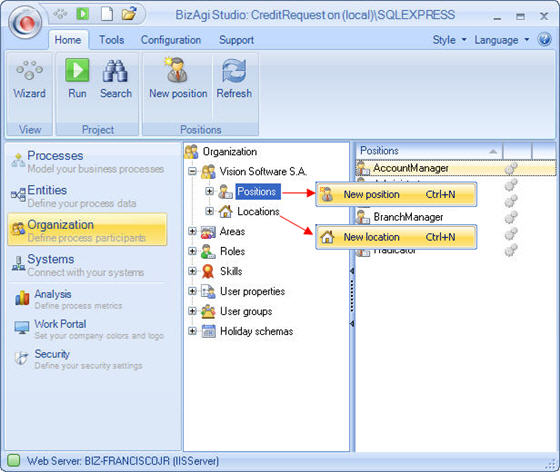
1.In the Bizagi menu, click on the Organization component, select the element you would like to create (Area, role or skill) Right click on the element and select the New Area, New Role or New Skill option, or access it through the contextual menu of areas, roles or skills.
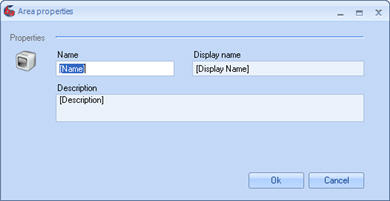
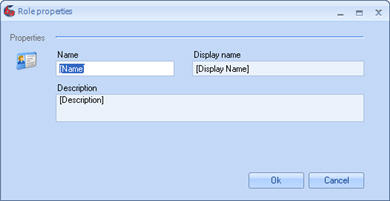
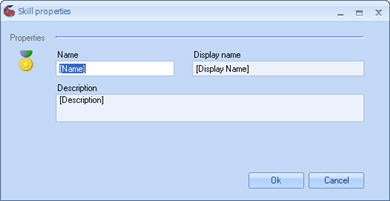
2. At this point, the Area Property, Role Property or Skill Property screen will pop up. Fill in the fields Name, Display Name and Description on this screen.
3.Click on the Apply button to save the records created for Area, Role or Skill.
This can also be done using the Organization Wizard, click to learn more about Organization Wizard
How to Create a Location or a Position
In these components, you can create new locations and positions, as shown at the top for areas, skills and roles. However, you can create dependencies between locations or positions
1.In the Bizagi menu, click on the Organization component, select the element you would like to create (Location or Position). Right click on the element and select the New Location or New Position option, or access it through the contextual menu of areas, roles or skills.
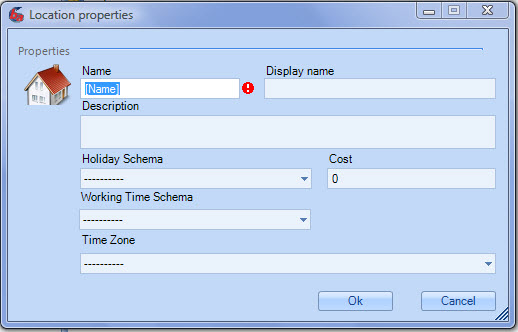
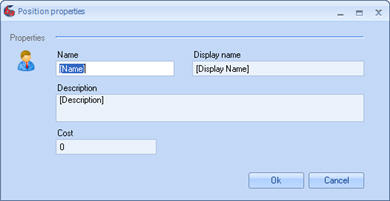
2. At that point, the Location Property or Position Property screen will pop up, where the following fields will be completed: Name, Display Name, Description and Cost. For Localization, also include the holiday schema, the Working Time Schema and the Time Zone.
This can also be done using the Organization Wizard, click to learn more about Organization Wizard
New Dependency for Locations and Positions
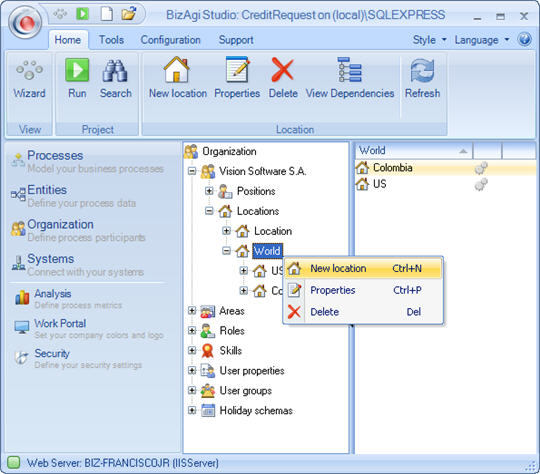
After creating a location or a position within the organization, you can create new dependencies for each location or position generated.
Select the element on which you would like to create the dependency (Location or Position), right click and select the option New Location or New Position o access through Bizagi Contextual Menu.
|
Example: for the Location component, you can create the country Spain. In this country create provinces, and then, for each province create towns or cities. Finally for each city create the different offices where the company works. It works exactly the same way for positions: it shows the organizational structure, the dependencies of each position and the positions at the same level. The information required when creating the location is Name, Display Name, Description, Cost, holiday schema, Working Time Schema and Time Zone. The time zone is important the company has offices located in several countries with different local times. |
3.Click on the OK button to save the records created for Location or Position.
How to Create User Properties
The organization section also contains a set of User Properties, user data, such as: Full name, e-mail address, domain, roles, positions, delegated user, among others, which can be seen in the organizational chart.
In a Bizagi project, you can add additional properties, such as date of birth or marital status, or any other property required for a process of the project or for the project in general.
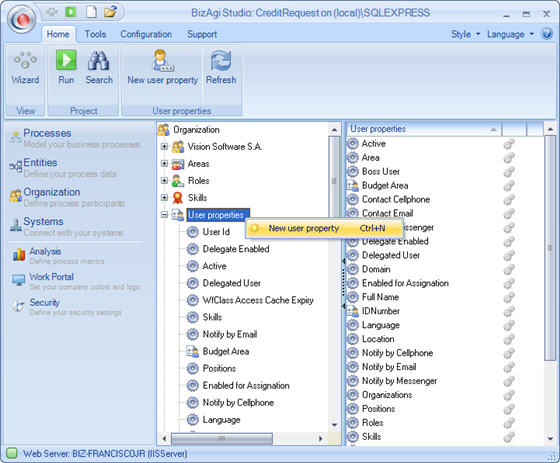
1.In the Bizagi menu, identify the Organization component. Right click on user properties and click on New User Property or access it through the User properties contextual menu.
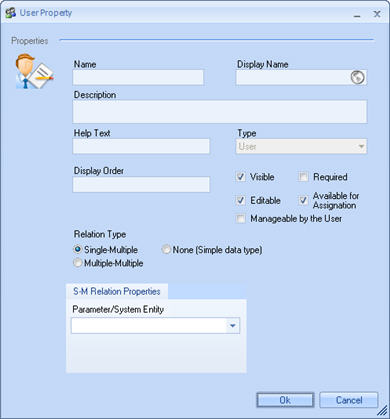
2.At this point, the User Property screen will pop up, where you will fill in the corresponding fields including name, display name, visual order or type of relation. In addition to creating an attribute for the user, you can create relations with other entities.
This can also be done using the Organization Wizard, click to learn more about Organization Wizard
|
Name: User properties are attributes of the user entity called WFUSER in Bizagi. Therefore, the name of the user properties must be clear, indicating the object to which they are referring. They have a maximum length of 25 characters and should not contain any spaces or special characters such as accents, commas and others (#!&%$()/*+:). As a standard, the words used to name user properties begin with a capital letter, as well as the attribute that indicates the data type. For example, iNumberIdentification. If the user property is related to another entity, the id+Name of the Attribute should be named, example, idCityBirth. Display Name: User properties should be named in a clear, understandable manner, indicating the object to which they are referring. It is the name that is displayed in the user administration of the web application. Spaces and accents are allowed. It has a maximum length of 40 characters. For instance, Identification Number, City of Birth. Description: Include a description of the field for the effects of documentation. Help Text:The help text will appear when you click on the field in the user administration form of the web application. Display Order: Indicates the position in which this property will be displayed in the user administration form of the web application. This field receives a positive or negative number. If you include position number 1, the user property you have created will be displayed right after the last user property created by default. Relation Type: Indicates the type of relation of the user property, as mentioned earlier, there can be simple user properties, such as age, date of birth, number of children, etc., or there can be 1:N or N:N relations with parameterization or system entities. Data Type:Applies only for user properties that do not represent a relation, that is to say, they are simple properties. Data type indicates the type of attribute. Attribute types are:
Max Length: Length is indicated only for string-type fields. Length must be between 1 and 4000 characters. Parameter System Entity: If the user property is related to another entity with a 1:N or N:N relation, this field should indicate the entity with which the attribute is associated. Visible: Indicates whether this property should be visible or not in the user administration of the Web Application. Editable: Indicates whether this property should be editable or not in the user administration of the Web Application. Required: Indicates whether this property should be mandatory or not in the user administration of the Web Application. Available for assignation: Indicates whether this property is enabled to assign an activity. If this property is enabled, it is displayed in the user property combo on the activity assignations tab of the process editor. Manageable by the user: When a user property is selected to be managed by the administrator, this property will appear on the Preferences page of the Web Application. |
Use the Organization Wizard
The organization menu has a Wizard in which all changes to the organization´s characteristics, previously described, can be made.
To learn how to work with the Organization´s wizard, watch the video.
<videoflash>18z9cNAFoLo|640|505|</videoflash>
|
Note: To guarantee the correct performance of all environments once deployed, users will be able to create new properties (areas, roles, skills, etc) but it will not be possible to delete them. Display names will always be available for edition. |
Related Articles
Select Performers using the Process Wizard
How to assign activities to people
<comments />
