Advanced File Management
From Business Process Management, BPM and Workflow Automation Wiki | BizAgi BPMS
<keywords content="keywords"> file, files, upload, document, documents, upload file, upload with xpath, upload xpath files, upload xpath </keywords>
Contents |
Advanced Management of File Attributes
Bizagi allows to easily upload files to a process such as word processor files, data from spreadsheets, audio and video files.
These files will be associated directly to a specific business case. Users then can access and edit them during the execution of the process and track the files at any time.
Since files are part of the case, they must also be associated to an attribute in the business data model.
For this reason in order to attach files to a case, a File type attribute must be created in the data model Bizagi.
It is important to take into account that in a single attribute there can be many files uploaded, and that they can have more information related to each document, such as Date of Receipt, Date of Revision, whether it has been approved or not, whether it is required, etc.
Bizagi allows the parameterization of the documents of a process in accordance with its processing.
Basic file configuration applies for the entire application and it is setup in the Configuration Tab in Bizagi Studio´s Standard Menu -> Options -> Advanced-> Options Uploads.
For instance, by default, the maximum size of uploads is 1 MB.
Increasing the allowed file size of uploads has other variables, involving the server's capabilities and memory, and security issues. It is recommended that the maximum size does not exceed 10 MB, but this can vary depending on specific needs. To change this configuration uses the Advance tab of Environment Configuration and take into account additional server parameters (in the IIS or in your specific JEE Application server, for the JEE edition).
Examples
In Bizagi, you may upload any file or document in an attribute in an automatic manner (that is, without an end user's intervention). For example, through an interface invocation you may create the file and attach it to the process instance by handling the returned file's bytes (as a Byte Array).
Remember that for this, it is required that the attribute in which the file will be uploaded, is a File-Type attribute.
Upload a File to an Attribute using an Expression
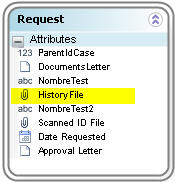
In this example, in a Loans Request Process the business main entity is called Request. Assume in this entity there is an attribute called HistoryFile that will store a letter uploaded via Web service.
The Web Service has to return a Bytes Array that contains the data of the file. Assume this array is saved in the variable FileData.
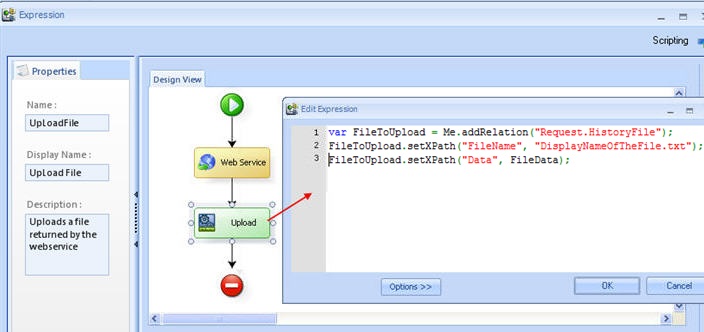
To upload a file in a Rule, THE CORRECT SYNTAX for the expression is:
var FileToUpload = Me.addRelation("Request.HistoryFile");
FileToUpload.setXPath("FileName", "DisplayNameOfTheFile.txt");
FileToUpload.setXPath("Data", FileData);
FileName and Data in red should NOT change. They are part of the code.
The uploaded file will look like this:
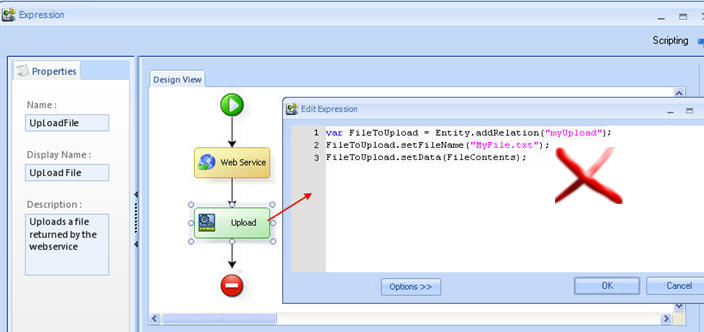
The syntax used in prior versions is no longer available. DO NOT USE the following:
var FileToUpload = Entity.addRelation("myUpload");
FileToUpload.setFileName("MyFile.txt");
FileToUpload.setData(FileContents);
If you need to know how to obtain the Path of a Bizagi uploaded file, you can follow this link
Copy several files from one attribute into another
It is possible to upload several files through an expression by copying from a file attribute with one or several uploads associated to another.
In this example, the attached files in the FileProcess1 file attribute will be copied unto the FileProcess2 file attribute.
var FileProcess1 = Me.getXPath("InsurancePolicyRequest.FileProcess1");

for(var i=0; i < FileProcess1.size(); i++)

{

       var FileProcess2 = FileProcess1.get(i);

       var Name = FileProcess2.getXPath("FileName");

       var Data = FileProcess2.getXPath("Data");

       var NewFile = Me.addRelation("InsurancePolicyRequest.FileProcess2");

       NewFile.setXPath("FileName", Name);

       NewFile.setXPath("Data", Data);

}
FileProcess1 and FileProcess2 are file attributes associated to the process entity (called InsurancePolicyRequest). Notice that file attributes are handled as collections, mainly because each file attribute can contain more than 1 file.
Count the number of uploaded files
Since Bizagi creates a collection when working with a File attribute, if the user wants to count how many uploaded files are associated to this attribute, the best way to do so is by using the size property instead of other properties such as CHelper.IsNull or CHelper.IsEmpty that don't give information about the existence of files associated to the File Attribute. The Data Collection created between two Master Entities has a similar behaviour to the File Attribute, and that is why the size property applies to both, collections and upload attributes.
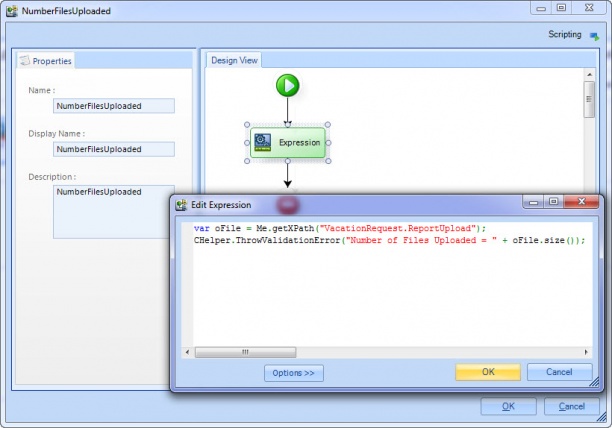
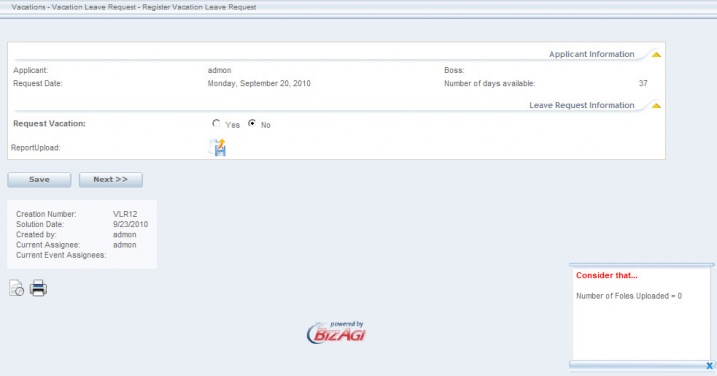
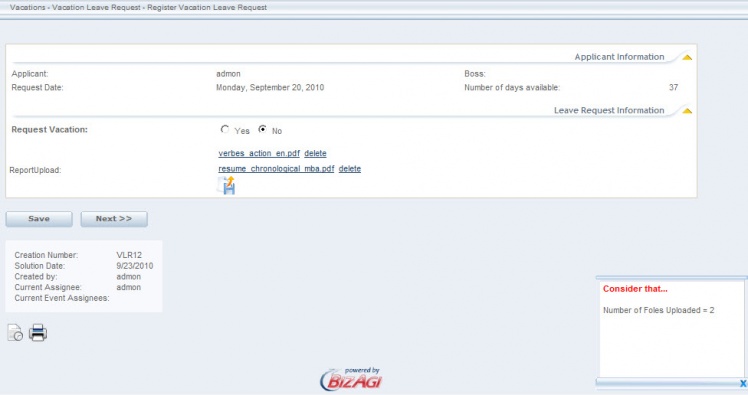
In the image below, an expression is created in order to count the number of uploaded files associated to the ReportUpload attribute in the VacationRequest Entity. The size property of the object is used in order to return the expected result through a ThrowValidationError. The expression is excecuted in the Save Event for testing purposes.
When there are no files uploaded, the number of Files Uploaded returned in the message must be 0.
On the other hand, when there are two or n files uploaded, it has to be reflected in the message returned. This behaviour is shown in the image below.
Obtain the filename of an upload
In the following example, within a Bizagi Expression, we will obtain the filename of an uploaded file.
Notice that obtaining the filename includes the file extension and could also be useful to perform additional validations.
var UploadedFile = Me.getXPath("ProcessA.ServiceLevelAgreement");
if(UploadedFile.size() > 0){
     var Filename = UploadedFile.get(0).getXPath("fileName");
     // Store the filename in the attribute set aside for this purpose
     Me.setXPath("ProcessA.SLAFilename", Filename);
}
Notice here we get the Filename of the ServiceLevelAgreement file attribute, and then store it in the data model, in our SLAFilename attribute.
Validate File Name
It is possible that a user needs to validate the name of a file when it is being uploaded.
Suppose that a company is being audited. Each of the company areas must submit several reports to the audit company. In order to keep order in the reception and query of the information submitted in file format, the names of these files have to be predefined.
For example, the FinanciaLArea must attach the financial balance in a excel file with the name Company Balance.xls
In order to pre-define the names of the files to be attached we can use vocabularies. For more information about vocabularies please refer to http://wiki.bizagi.com/en/index.php?title=Vocabularies
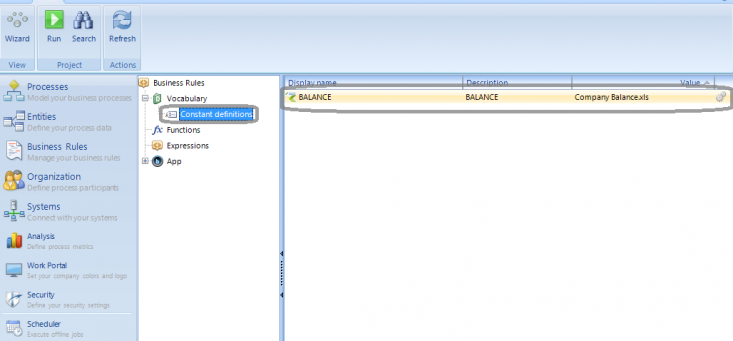
In this case we define a string vocabulary. Its name will be Balance and its value will be Company Balance.xls (the desired file name).
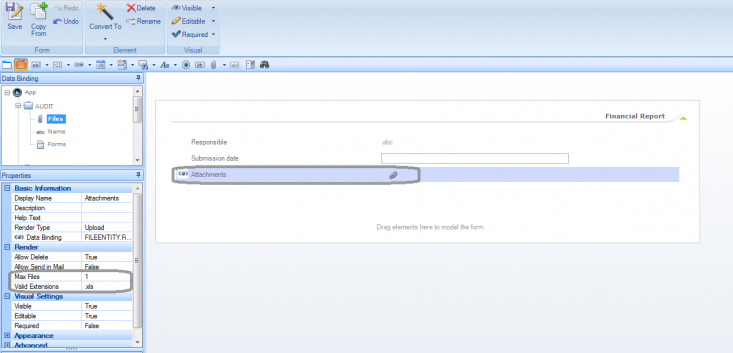
In the activity form where the file is uploaded we can define the desired properties to the file. For this, click on the file attribute and then, in the properties menu, define the maximum number of files allowed and the valid file extensions. In this case we only allow one file to be uploaded. Only Microsoft Excel files will be able to be attached so we type xls in the valid extensions field.
For validating that the name of the uploaded file is the same of the pre-defined name, a business rule is executed on the exit of the activity.
// Store the vocabulary definition
var DesiredFileName=CHelper.resolveVocabulary(Me,"BALANCE")
var UploadedFile = Me.getXPath("Audit.Files");
// Store the filename in the attribute set aside for this purpose
var TargetFile = UploadedFile.get(0); var FileName = TargetFile.getXPath("FileName");
// Validate real versus desired file name
if (FileName!=DesiredFileName)
{
 CHelper.ThrowValidationError("The file must have the same name of the vocabulary")
 }
In the previous example we store the vocabulary definition (pre.defined name of the file) in the "DesiredFileName" variable. Then we get the name of the uploaded file in the activity and we store it in the “FileName” variable. Finally we compare the values of both “DesiredFileName” and “FileName” variables and if they are not equal a message error is thrown.
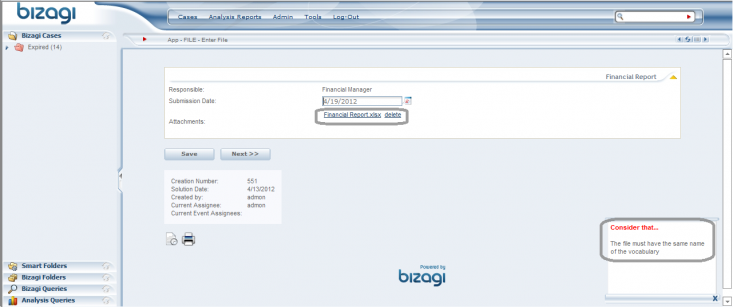
This way if you attach a file with a no valid name, a message will be displayed and you will have to update a new file with the correct name.
Related Articles
<comments />
