Deployment to Test
From Business Process Management, BPM and Workflow Automation Wiki | BizAgi BPMS
<keywords content="keywords"> deploy to test, deployment to test, test server, test environment, environment, test, release candidate, apply to test, deployment, testing, deploy, execute, unit test, unit tests, certification </keywords>
Contents |
How to Make a Deployment to Test
Before reading this document and launching a deployment to the Test environment, make sure you have read the previous considerations and requirements for a Deployment.
Take into account that the steps and options for a deployment to Test differ if the deployment is the first deployment of the project to the Test environment or not.
First Deployment to Test
For the first deployment of a project to the Test environment, the procedure is as follows:
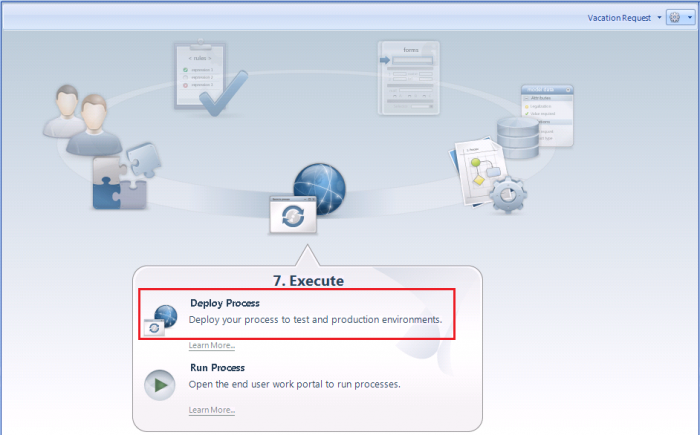
1. Go to the seventh step of the Wizard (Execute) and click on "Deploy Process".
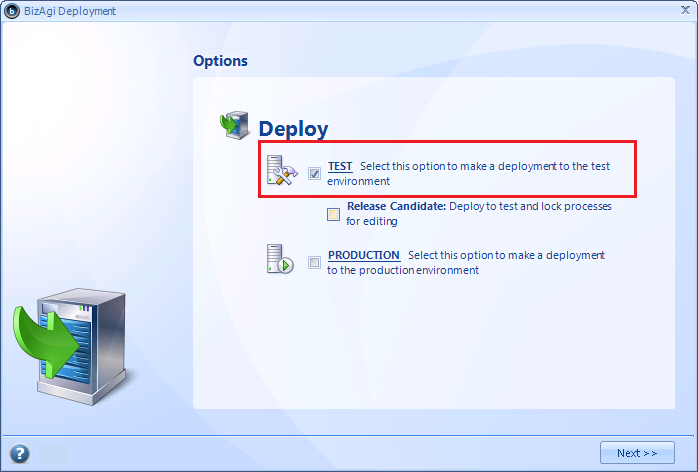
2. A Bizagi Deployment window appears in which you select the target environment.
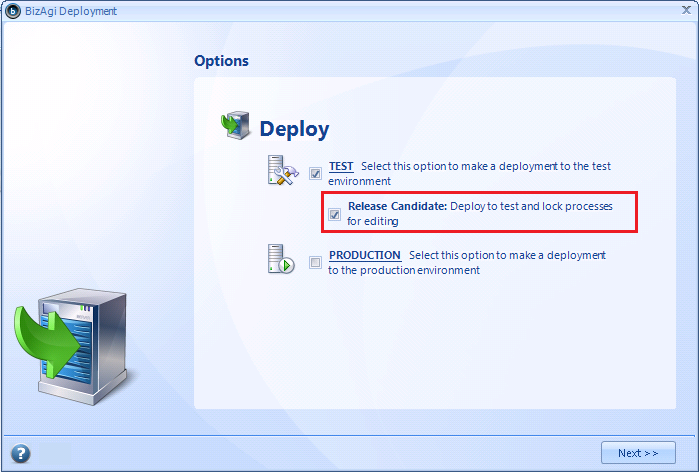
If the chosen environment is Test, you may mark the Release Candidate option to lock the processes versions in the Development environment (so that no changes are allowed to them).
If you are uncertain about this option, take a look at the Release Candidate section below.
Mark the Test environment checkbox.
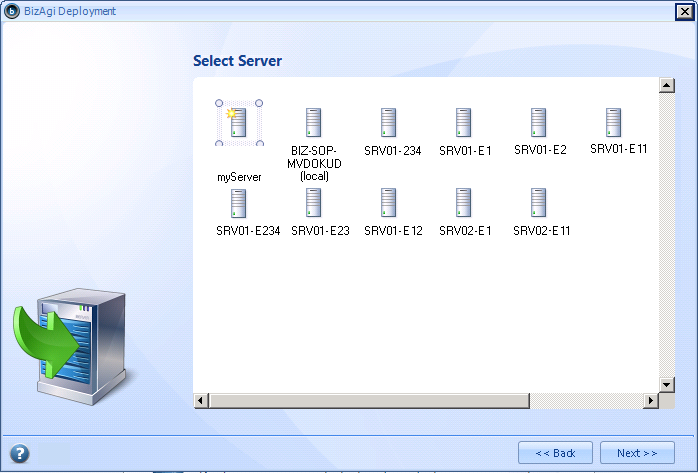
3. A list of available servers with Bizagi Server Components installed will appear (those which are visible to the Development server's network).
Select the target Test server and click on Next.
Notice that you may choose as the Test server the same Development server (although for proper user acceptance tests it is recommended to have different servers), or you may input directly the name of the server in the first server icon or its IP address.
|
Alert: Take into account that while using IP addresses directly, it is necessary to ensure that the IP addresses are not dynamic. In other words, the IP address of the servers must not change. |
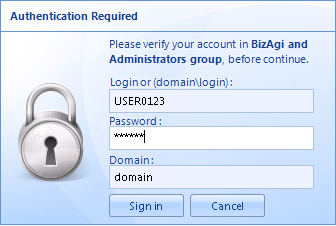
4. Take into account that if the selected server is not the same Development server (the local one), authorization to create the new environment in that server is required.
This means that the Windows user performing the deployment must be a member of the Administrators and Bizagi groups of the selected server.
If this user is not a member of both these groups, then you may enter the login, password and domain of an authorized Windows user for that server.
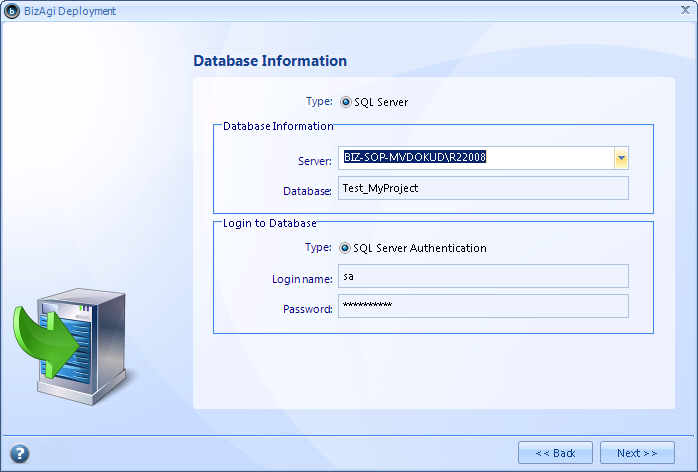
5. After choosing the server, Bizagi will search for installed databases instances.
The Server field will list the instances so that the desired one can be selected. You may also type directly the database instance.
Notice that the Database name is given and cannot be changed. For the test environment, the project is named as "Test_[myProject]".
For a project using a SQL Server database, the type of authentication used is necessarilly SQL Server.
For these projects, type the SQL Server login and its password (review here the database login requirements), then click Next.
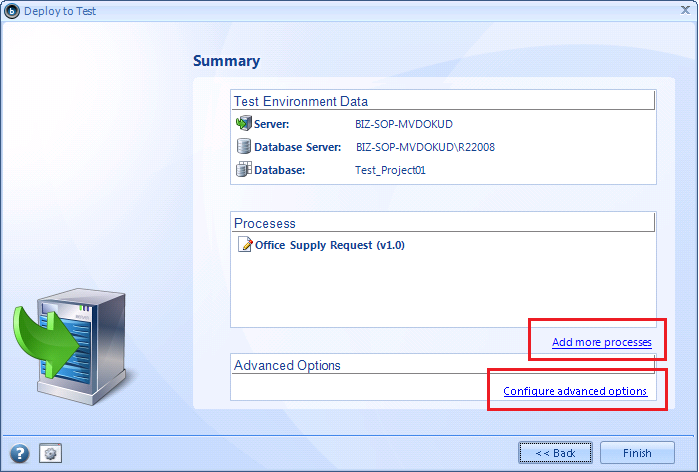
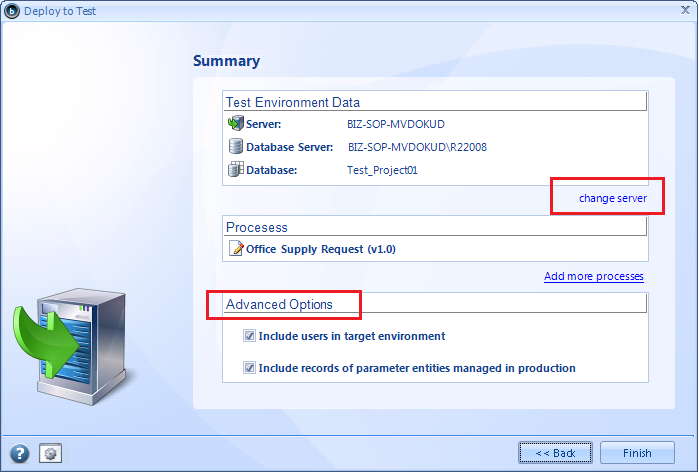
6. A summary window will appear showing the information related to this deployment.
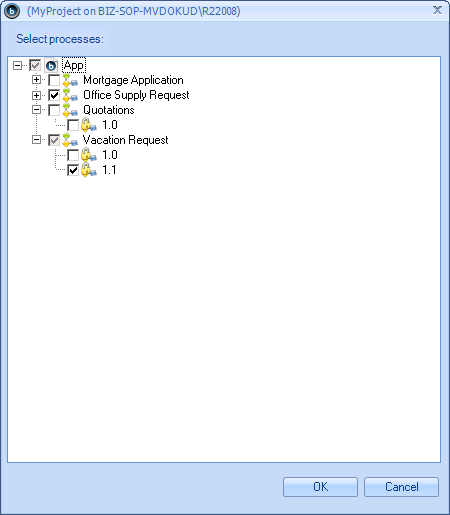
Notice that you may select more processes versions to include in the same deployment.
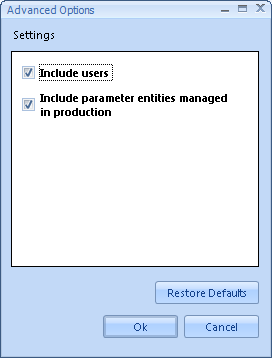
You may also define the Advanced Options settings so that you deploy into Test: the users created in the Development environment, and the possibility of administration of parameter entities set as "Manageable in Production".
|
Alert: If users are not included for the Deployment to Test (the "Include users" is left unmarked), then only the domain\admon user will be created in the Test environment. |
To start the deployment click on Finish.
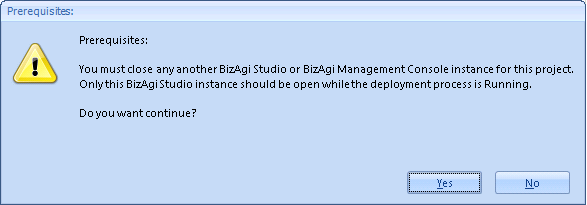
7. The wizard will prompt you to close any Bizagi Studio or Management Console that has this same project loaded.
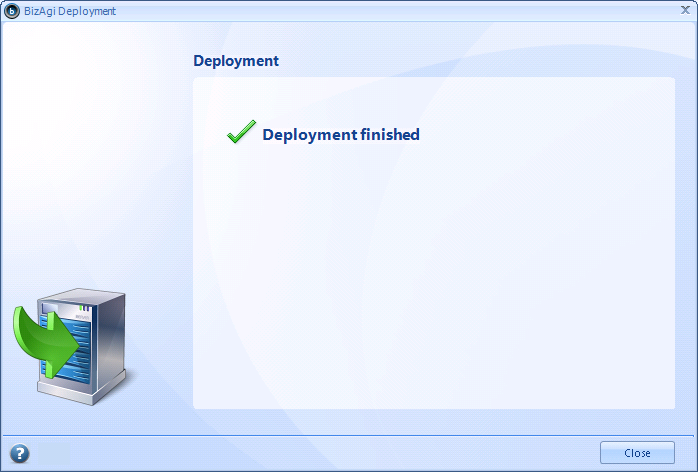
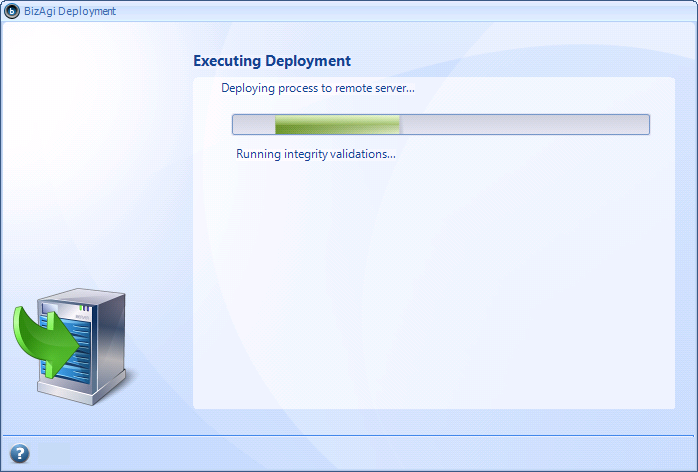
Then it will notify you once the deployment procedure is completed.
When this window is shown, click on Close.
|
Alert: For the Enterprise JEE Edition, in addition to the procedure described previously, a deployment to the Test environment requires also a deployment of the web application. |
Additional Information
Once the Test environment has been created, it is possible to run its work portal.
View further information about running the work portal for an environment.
Subsequent Deployments to Test
The concept of "Subsequent deployments" to the Test environment apply to all those deployments after the first one to that environment.
This procedure is as follows:
1. Go to the seventh step of the Wizard (Execute) and click on "Deploy Process".
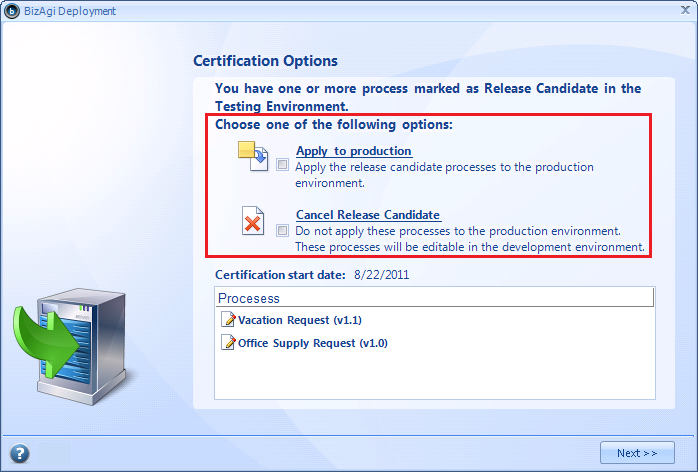
Remember that if your latest deployment was made to the Test environment and the deployed processes versions were marked as Release Candidate, then you will be prompted to either apply the Release Candidate or to cancel it. To review information about this feature, read the Release Candidate section below.
2. A Bizagi Deployment window appears in which you select the target environment.
If the chosen environment is Test, you may mark the Release Candidate option.
Mark the Test environment checkbox.
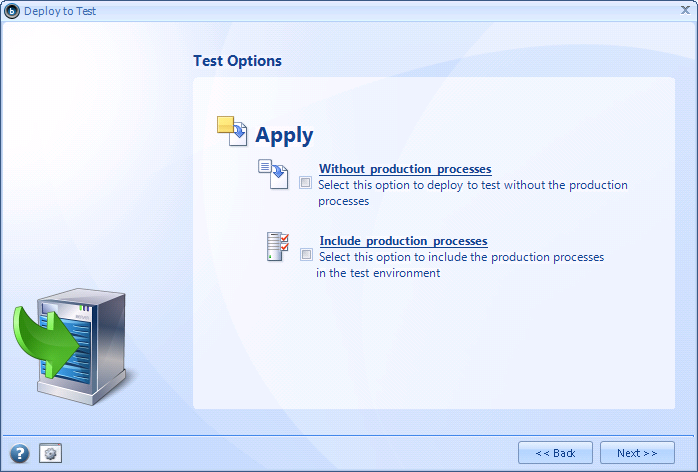
3. At this point Bizagi will show an additional option if there is already a running Production environment.
If so, you may choose to either: deploy the processes versions to the Test environment in an isolated manner, or to include as well in the Test environment the existing processes versions from Production.
Without production processes: The Test environment will be created with only the processes versions selected for this deployment.
Include production processes: The Test environment will be created with the processes versions selected for this deployment, and those which already exist in the Production environment.
With any of the above options, there will be no existing cases in the Test environment.
4. A summary window will appear showing the information related to this deployment.
Notice that you may change the target server for this environment through the "Change Server option". This option to change the server will present the same windows as presented when selecting the server for the first deployment).
|
Alert: Changing the Test environment server will set the project to continue working with the new specified server, however the "old" Test environment will not be deleted from the previous server. |
Remember that you may also select more processes versions to include in the same deployment (with the "Add more processes" link), and that you may configure the Advanced Options settings (by clicking in the second icon at the bottom left corner).
To start the deployment click on Finish.
5. The wizard will prompt you to close any Bizagi Studio or Management Console that has this same project loaded.
Then it will notify you once the deployment procedure is completed.
When this window is shown, click on Close.
What happens with the existing cases in the Test environment ?
Whenever a deployment to the Test environment is carried out, previous Test cases are deleted (this does not happen in the Production environment).
Amongst expected user acceptance tests for the Test environment, it is advised to test the deployed processes with new cases.
When to Mark your processes as Release Candidate
Deployment to the Test environment presents an option to mark your processes versions as Release Candidate.
Processes deployed to Test without being marked as Release Candidate are useful to: run unit tests and detect possible requirements tweakings, or for demos purposes.
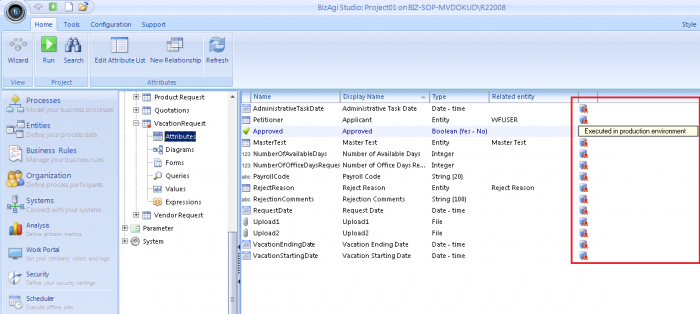
When processes versions are marked as Release Candidate, they are automatically locked in the Development environment (in other words, the workflow, and other objects such as attributes, forms, etc. used by those processes versions cannot be edited).
More so, the Release Candidate will contain the necessary information of the processes' objects which will be deployed to Production.
IMPORTANT: if you need to do any adjustments in the processes, cancelling the Release Candidate is required. Then, repeat the Test deployment with Release Candidate after the adjustments are done.
View detail about the edition possibilities for objects marked with the Release Candidate option (or objects in Production as well).
Once the deployment to the Test environment is done, users of the Test environment should carry out their tests to approve those processes versions and certify that they can be deployed to the Production environment.
Within the user acceptance tests, any flaws detected in the processes version or additional requirements in them, will need to be adjusted in the Development environment.
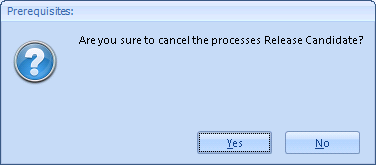
Therefore, to carry out this modifications and adjustments it will be necessary to go to Bizagi Studio's Deploy Process option and Cancel the current Release Candidate.
Cancelling the current Release Candidate will prompt for confirmation:
Once the necessary modifications are made in the Development environment, a new deployment to Test environment should be carried out again as Release Candidate.
This procedure should be repeated until the user acceptance test are completed and no modifications or adjustments are required for these processes versions.
This way by going into Bizagi Studio's deployment option once again, you may choose to apply the current Release Candidate in the Production environment.
Summarizing this concept, when there is a current Release Candidate in the Test environment, the Deploy Process option of the Process Wizard's step 7 (Execute) will prompt to either: apply the Release Candidate (that is, to deploy those processes version to Production), or to cancel it (in which case you could make changes in the Development environment for those processes, and a new deployment to Test would be required afterwards).
Related Articles
- How to make a Deployment to Production
- Bizagi Deployment
- Previous considerations and requirements for a Deployment
- Recommendations for continuous improvement and development after a deployment
<comments />
