How to Associate a Rule
From Business Process Management, BPM and Workflow Automation Wiki | BizAgi BPMS
<keywords content="keywords">transition condition, required, visible, visibility, editable, event, action, include rule, how to associate rules</keywords>
Contents |
How to Associate a Rule (Examples)
There are several ways that a rule may be associated to a process. These are:
![]() Rules Associated to Transitions
Rules Associated to Transitions
![]() Rules for Conditions of Visibility, Mandatory Nature or Editing Fields of a Form
Rules for Conditions of Visibility, Mandatory Nature or Editing Fields of a Form
![]() Rules Used in Actions (events) within a Shape
Rules Used in Actions (events) within a Shape
Rules Associated to Transitions
Transition Conditions are expressions that allow the user to verify if a specific condition is true at a certain point during the process, to determine the path that must be followed.
Expressions in transition conditions are always going to be Boolean. Remember that Bizagi has two types of boolean expressions: Boolean and Scripting Boolean. They both return True or False, but scripting booleans are advanced rules in which some scripting code is required before the returning value.
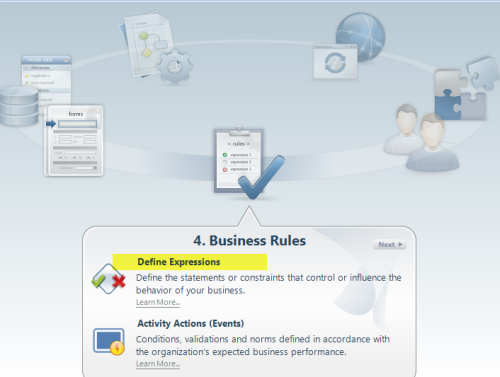
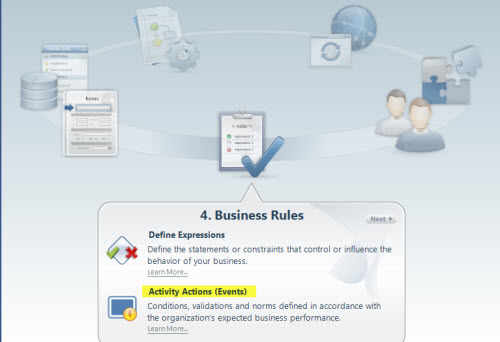
Rules can be associated in the Fourth step of the process Wizard: Define Expressions. The following are the shapes they can be associated to:
![]() Inclusive Gateway (divergent element)
Inclusive Gateway (divergent element)
![]() Exclusive Gateway (divergent element)
Exclusive Gateway (divergent element)
How to Associate Rules with Transitions Using Bizagi Modeler
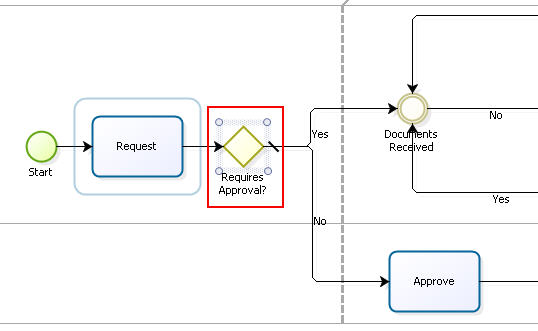
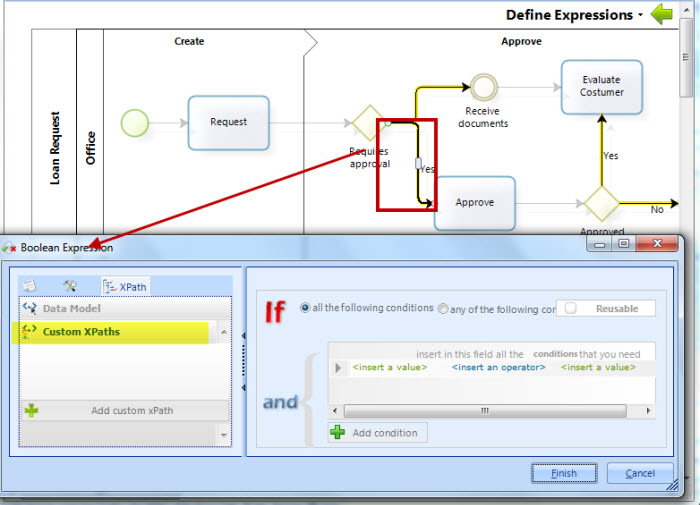
This is an example of the Boolean Expression: the following steps are going to describe an example for a loan request process that uses an exclusive gateway to determine when the process requires to be approved by the risk management department.
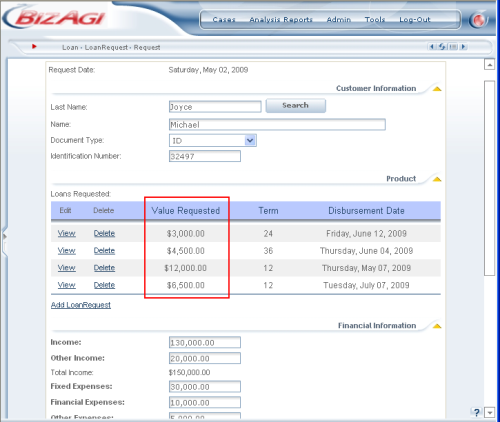
The rule will have to determine if the sum of the loans requested is greater than $5,000 to route the process to the approval activity.
1. Once the Process has been diagrammed, has a Data Model and has shapes for the activities (Step one, two and three in the Process Wizard), go to the Fourth Step: Define Expressions.
2. Select the Sequence flow where the rule is going to be created in this case is the Yes sequence flow. This will open a new window where the Expression will be created.
See the conditions the user has to have in mind for each type of gateway in Gateway Considerations in Transition Conditions.
The rules the user will be able to select will be the rules that are Boolean (i.e. returns True or False). If a rule is already associated, click on it to edit it.
3. Create the rule.
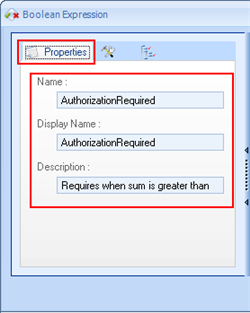
When the rule is created, first the user has to complete the basic information in the Properties tab.
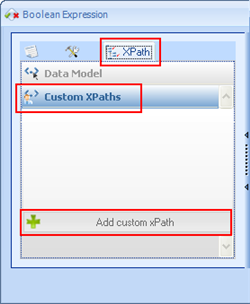
Click in the XPath tab, then click on Custom Xpaths, and finally on the Add custom Xpath button.
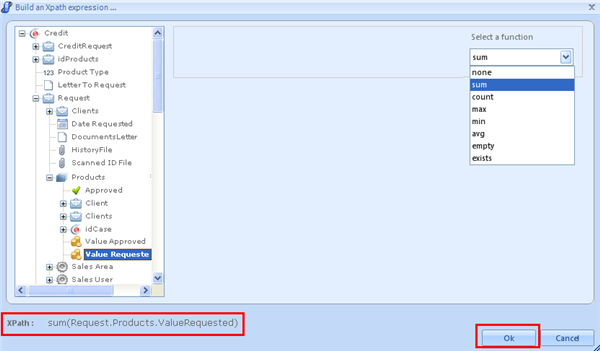
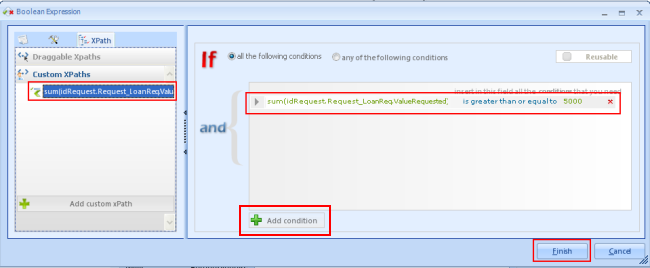
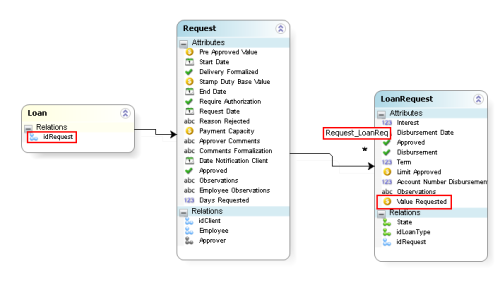
4. The Build an Xpath expression window will open, and the custom Xpath should be selected. In this case the user will select the collection of Loans (called Request_LoanReq) requested and select the field ValueRequested. Then on the drop down list on the right the option Sum is selected so that all the values are added and the sum can be compared. Finally click on OK.
First, click on the Add Condition button. Then drag the custom Xpath just created from the box on the left to the box on the right. Then select the operator required and type the value that you need to compare it with (in this case $5,000).Finally click on Finish.
5. Below the data model is presented. In this example a custom Xpath is required because a collection of values is required and those have to be added. If the attribute to be compared is a value that is not in a collection the user may drag the Xpath from the Draggable Xpath option instead of the Custom Xpath.
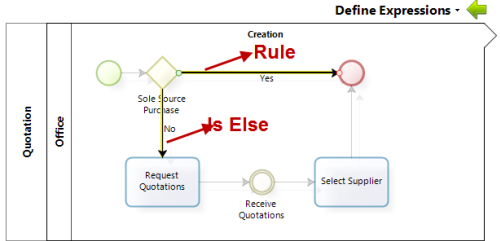
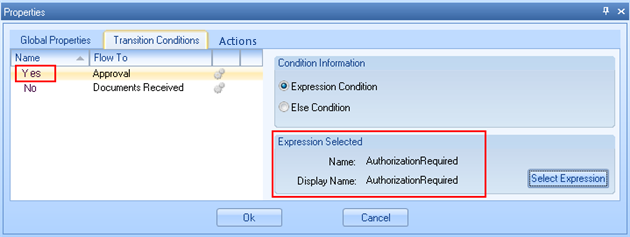
Once the rule is finished and selected for the transition, the result should look as follows:
|
Note:It is important to know that in exclusive gateways, there must always be at least one transition with the ELSE selected. |
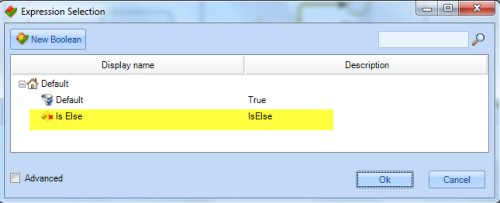
6. The No transition should have the Else condition associated. Select the Sequence Flow and click on Cancel when the Expression comes up. Then, select Is Else.
Expressions for Conditions of Visibility, Mandatory Nature or Editing Attributes of a Form
These Expressions make an attribute visible, required or editable in a form depending on a given condition. The expressions used for this purpose return a value of true or false (Boolean).
How to associate the rules to a Form
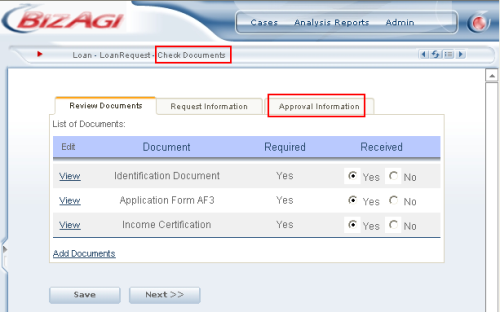
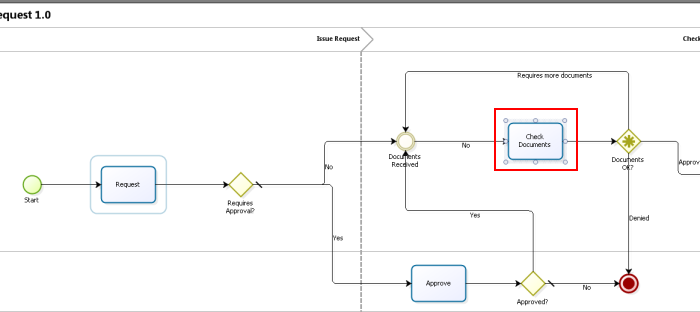
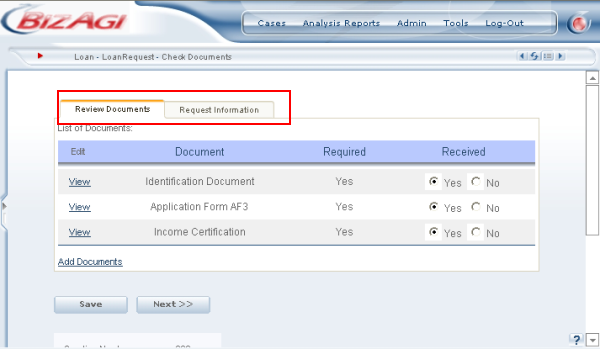
This example will illustrate how to associate a rule to determine if a tab should be shown or not. In the Loan Request process all of the cases go through the activity Check Documents, but not all of them go through the Approve activity. This means that the Approval Information tab has to be shown only when a case has gone through an approval.
This is how the process looks like.
To achieve this objective follow these steps.
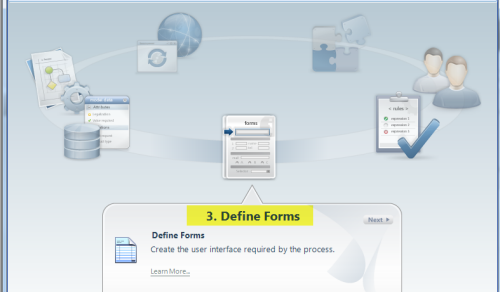
1. On the Process Wizard, go to the Third Step: Define Forms
In the process, click on the activity that contains the fields where you would like to use the visibility rule. Keep in mind that it works the same to determine if the process requires a field to be editable or required.
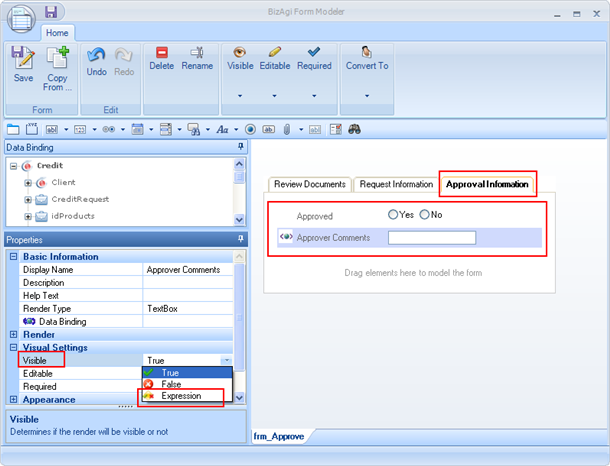
Click on the tab of the form where the rule is going to be included (in this case Approval Information).
Then click once on the form where the fields of the tab are included. The whole area of the form will turn blue as shown below.
After seeing the blue area, on the left of the modeler the properties of the tab will appear. Open the drop down list of the option Visible and click on the option Rule.
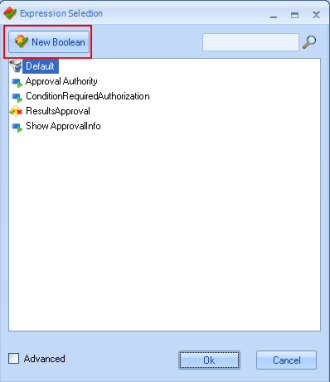
An Expression Selection window will open. Click on the button New Boolean, if a new rule is going to be created or just select the desired rule if it already exists.
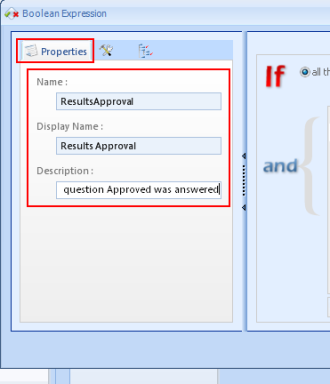
Once the rule is created, first go to the Properties tab a complete the required information.
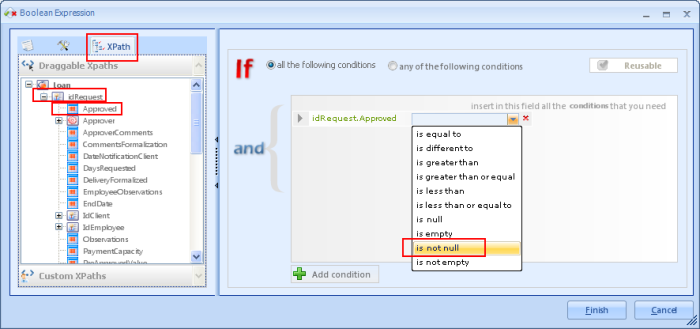
Then go to the Xpath tab and select the desired attribute to determine the condition. In this case, to determine if the case went through an approval, the field Approved has to have some type of information. That is why the operator selected should be is not null.
Then click on Finish.
The Approval Information tab is not going to be visible if it does not have any information on it.
Rules Used in Actions within a Shape
These rules allow you to carry out an action before starting an activity (On Enter), when storing the information from an activity (On Save), or when an activity is finiched (On Exit).
How to Associate a rule as an Action of an Activity
In this example, the rule that is going to be associated is one that adds the fields that include the financial information of the customer in the Loan Request process. This action is going to be done on exit of the first activity of the process, where the information is entered.
To accomplish this goal, follow these steps.
1. In the Process Wizard, go to the Fourth Step: Activity Actions.
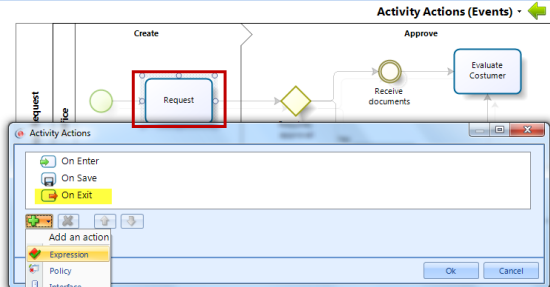
2. In the Process, select the Shape of the process where you would like the action to be carried out. On the Activity Actions window, then select On Exit, and finally click on the green addition sign to add the expression.
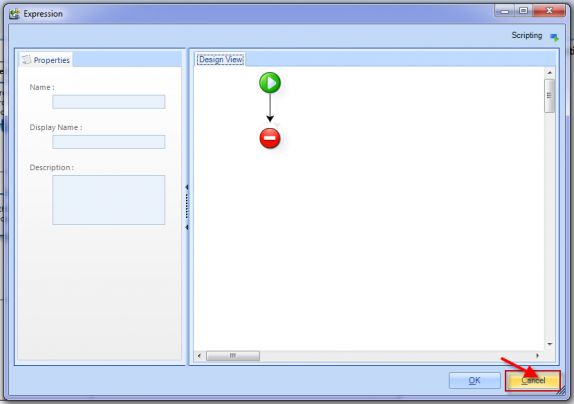
3. A new window will be displayed to create the rule. The user has the option to define a new expression in this window, or press Cancel and select an existing expression in the new window that appears.
In this window, the user can select a Process Expression previously defined.
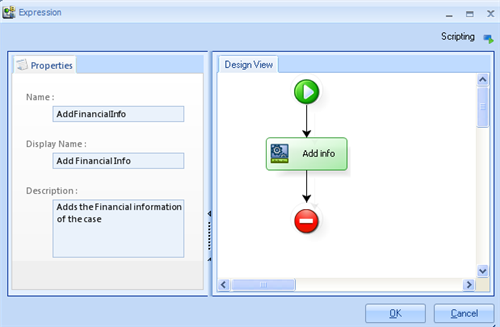
Whether the user created a new expression, or associated an existing one, at the end, the user should have something similar to what is displayed in the image below, and then click ok.
In this example, the expression called AddFinancialInfo should include the following. This will add up the total income and the total expenses of the customer.
6. After adding the rule click on the OK button.
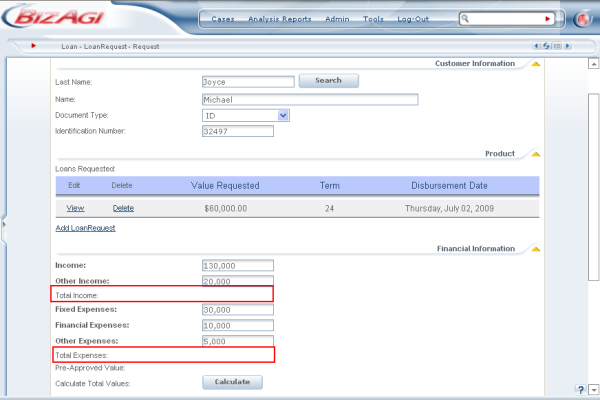
This is how the information will look like in the first activity before the rule is executed.
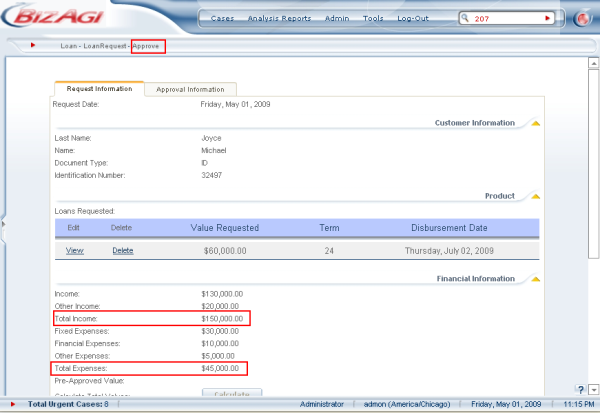
Once the activity ends and the process arrive to the approval, the information will be added and this is how it will look.
Related Information
- Gateway Considerations in Transition Conditions
- Example: Add On Enter Action
- Example: Add On Save Action
- Example: Add On Exit Action
<comments />
