How to Customize the Work Portal
From Business Process Management, BPM and Workflow Automation Wiki | BizAgi BPMS
<keywords content="keywords"> work portal, customize, customization, theme, color configuration, change image, assistant, change texts, customize texts, change language </keywords>
|
Applies to .NET EDITION |
Contents |
How to Customize the Work Portal
Originally Bizagi's web application comes with a default "look and feel".
Things like color, company's image, language and columns on the pending cases table can be changed to suit your organization.
Basic Configuration
To learn the basics of the work portal configuration please go to this page.
The following example gives a "step by step" guide to change the color, image, assistant and texts of the application.
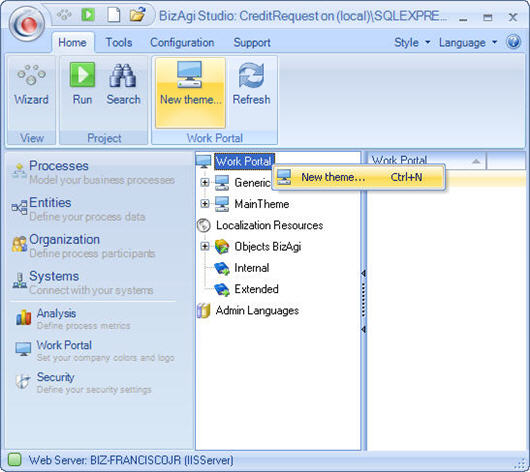
1. From Bizagi Menu right click on the Work Portal component and select the New theme option.
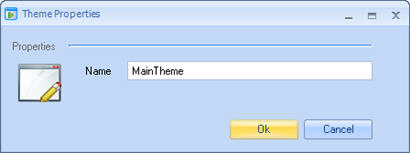
2. In the Theme Properties window, type a name for your theme. Click OK.
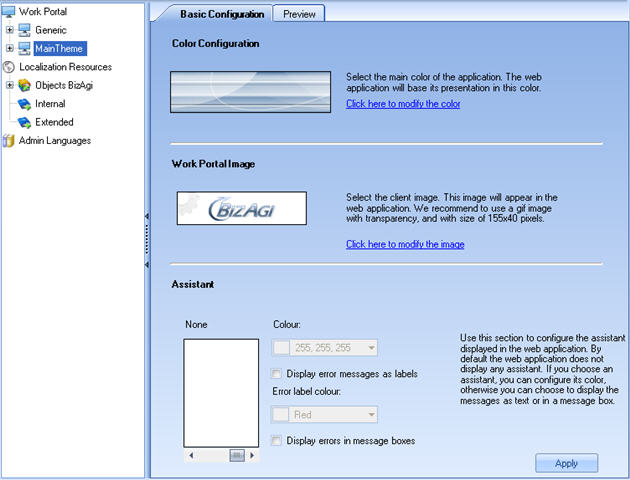
3. Select the recently created theme under Work Portal and the Basic Configuration panel will appear.
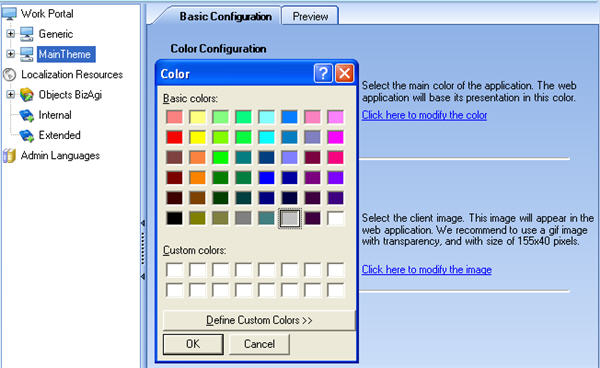
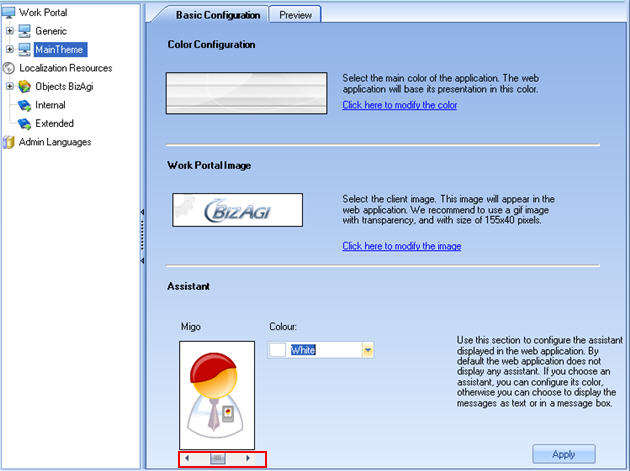
4. In the Color Configuration section, click on the link Click here to modify the color. The color palette opens where a basic color or can be selected or custom color defined. Select, for example, the dark grey and click on OK.
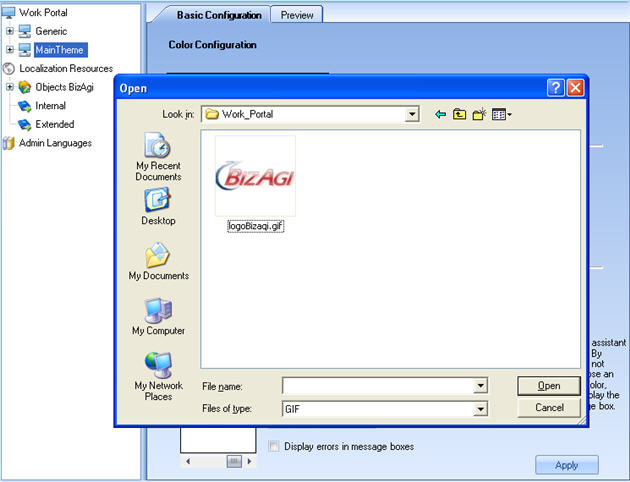
5. To change the application's image click on the Click here to modify the image link in the Basic Configuration panel. A window to browse the file opens, find the image to be used and click on Open.
6. The application has no Assistant by default. For this example, move the horizontal bar on the Assistant's frame to the left; select the Migo Assistant and the color gray.
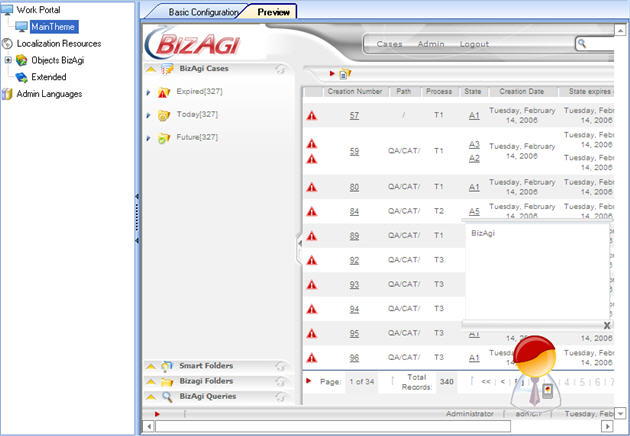
7. Go to the Preview tab and see how the application will be displayed.
Update the Web Application
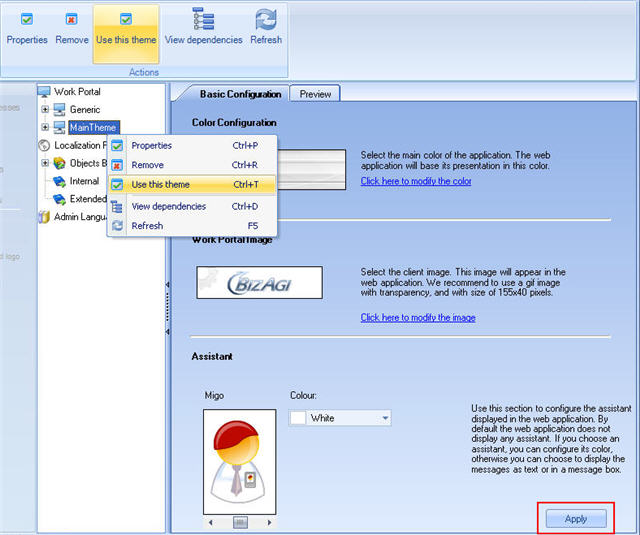
8. Return to the Basic Configuration panel and click on Apply to save the changes. In order apply this configuration to the application, right click on MainTheme and select Use this theme.
Customize Texts
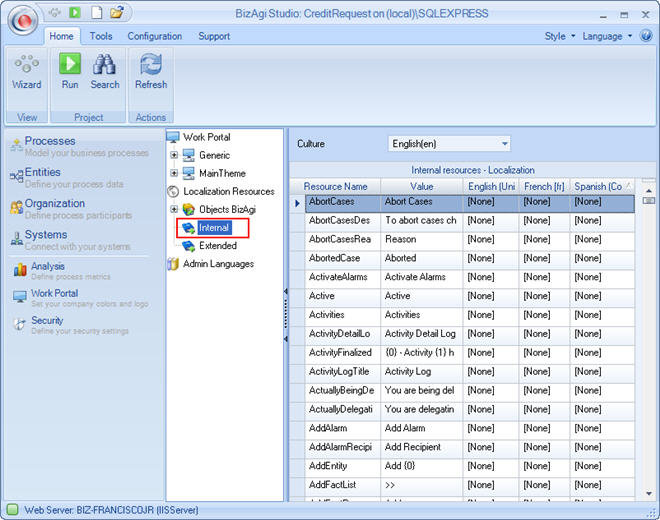
9. The following explains how to modify text in the application. The texts to be customized in this example are from the Main Menu, Case Area and Work Area. Identify theWork Portal menu to create and customize Internal Resources; Go to the Internal option. Here, internal resources can be customized.
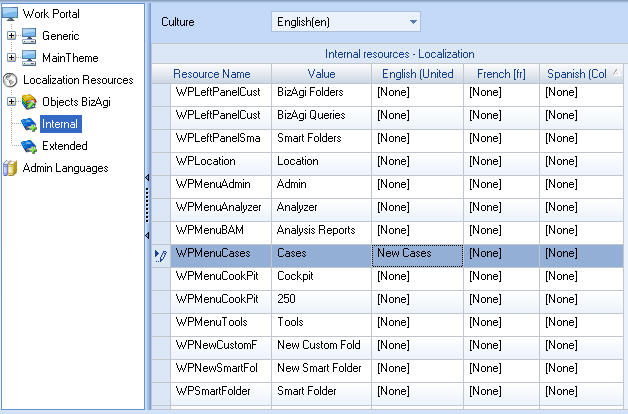
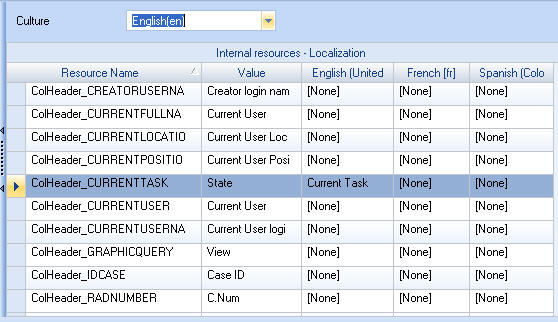
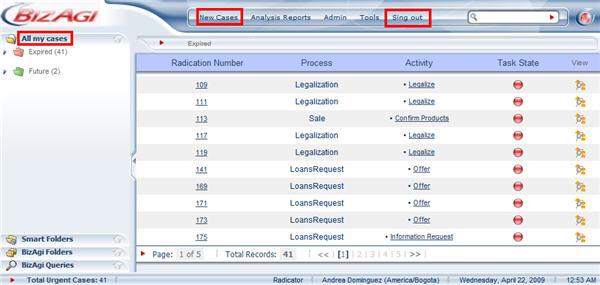
10. In the Internal resources option search for texts in accordance with the Culture - English. The changes to be made are in the Main Menu where the word "Cases" will be replaced by "New cases" and "Log-Out" will be replaced by "Sign out". Search using the word "cases", identify the resource WPMenuCases and in the Customized Value column type "New cases". Click on Ok.
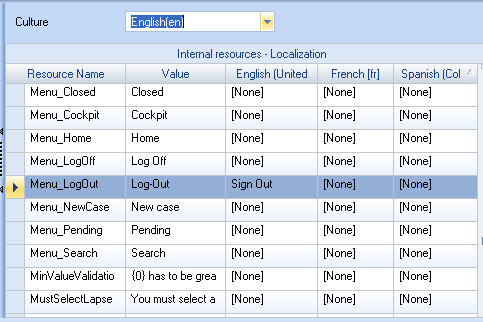
Follow the same process to search for "log-out" and type "Sign out" in the English language, and for the Menu_LogOut resource. Click on Ok. Do the same thing for each language.
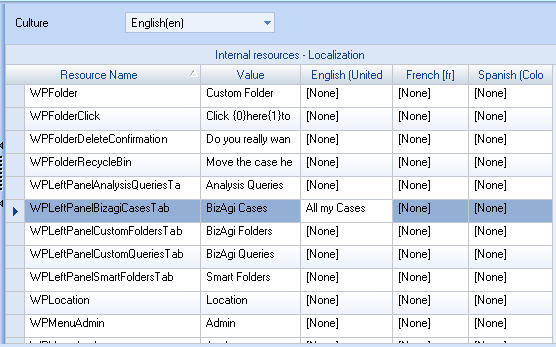
Similarly, in the Case Area change "Bizagi Cases" for "All my cases". (Search word: Bizagi, resource: WPLeftPanelBizagiCasesTab). Click on Apply. Finally, from the Work Area we are going to use "Current task" instead of "state" (Search word: state, resource: ColHeader_CURRENTTASK). Then click on Ok.
11. Run the application and see the differences:
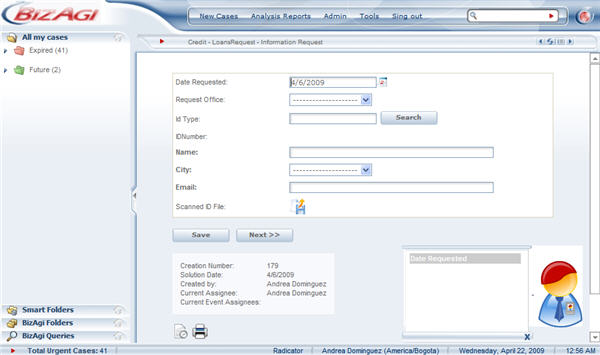
Select a case to be able to view the assistant:
Related Article: Export and Import languages between projects
Change the Assistant
Bizagi Studio allows changing the color or the image of the Assistant. To change the color, select from the color combo. Bizagi offers three options to change the Assistant: Merlin, Migo, or None. To select one of them, go to the image with the sliding bar underneath the box containing the assistant.
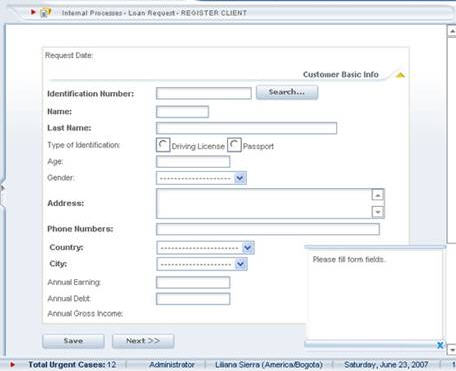
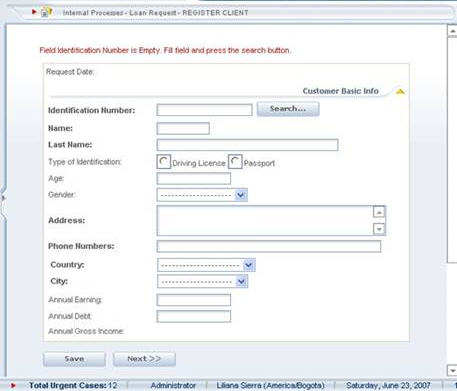
If no Assistant is selected, Bizagi offers three options to present the help messages of the application and the errors made by the user. When this option is selected, there are two additional, although exclusive, options.
![]() Show the Dialog Balloon without an Assistant, is the option by default when you choose not to have an Assistant.
Show the Dialog Balloon without an Assistant, is the option by default when you choose not to have an Assistant.
![]() Show Messages as Labels at the Beginning of the Form, to enable this option, check “Display Errors as Labels”. You can also choose the color of the Label in the combo underneath the option.
Show Messages as Labels at the Beginning of the Form, to enable this option, check “Display Errors as Labels”. You can also choose the color of the Label in the combo underneath the option.
|
Note:For this option, the error messages are shown as labels at the top of the form underneath the task header and the help messages of the application are shown on the bottom Bar of the Browser. |
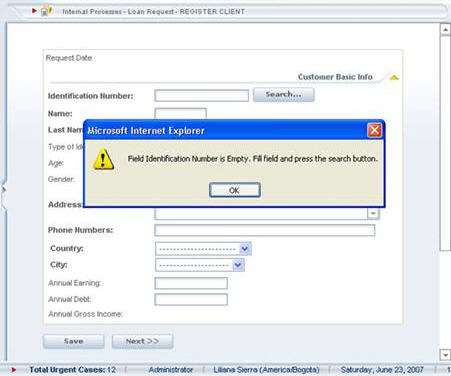
![]() Show Messages in Windows, to use this option, check “Display errors in Windows”.
Show Messages in Windows, to use this option, check “Display errors in Windows”.
|
Note: With this option, the error messages are displayed in the dialog box and the help messages of the application are displayed on the bottom Bar of the Browser. |
Once the work configuration is finished, select a them and the option Use This Theme to generate the changes made.
Language Configuration
The web application can be configured in different languages. For English, Spanish or German, it is only necessary to change the Regional Settings. For any other language, in addition to changing the Regional Settings (for the date and currency format), the texts of the application, as explained from step 9 above, must also be modified.
Additional considerations
Keep in mind that the work portal's customization requires IIS (Internet Information services) as the web server set for Bizagi's project.
To view a technical guide on the recommended settings in Bizagi's web application at the IIS, please review: Bizagi's IIS web site configuration.
Related Articles
- For information on how to change the language, date and currency format, please refer to How to Change Regional Settings.
- To display the information in different languages for the same process, according to the user's preferences follow this link.
- If you want to customize the pending cases columns go here.
<comments />

