Welcome to Bizagi
From Business Process Management, BPM and Workflow Automation Wiki | BizAgi BPMS
<keywords content="keywords"> register, register project, registered, registered projects, dependency, dependencies, project dependencies, upgrade project, update project, parallel working, work in a single server, delete project, new project, upgrade project, open project, create project, share project, opend shared project, find project in another machine, process central, free process central, process templates, free process templates </keywords>
Contents |
Welcome to Bizagi
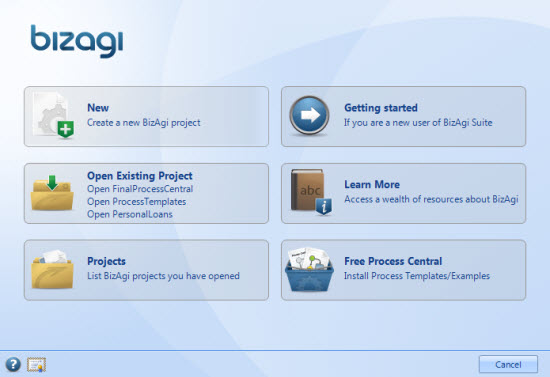
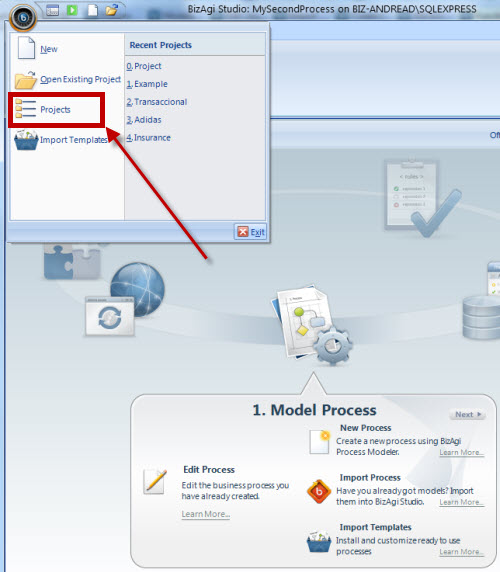
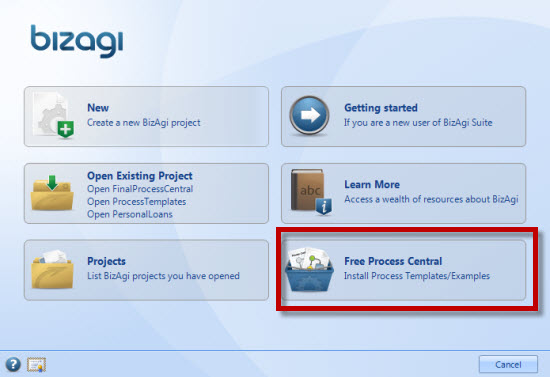
Whenever a user opens Bizagi Studio, the first this that is going to be displayed is the Welcome to Bizagi Window. In it, users can create and open projects, access the Process Central and Learn more about Bizagi.
It has six different options:
- New: Create a whole NEW project
- Open Existing Projects: Opens an existing project from the local computer or from a server
- Projects: Access all Projects that have been opened
- Get Started: takes the user to Bizagi's web site
- Learn More: takes the user to Bizagi Documentation's Main Page
- Free Process Central: gives the user access to several Free Ready to use Projects.
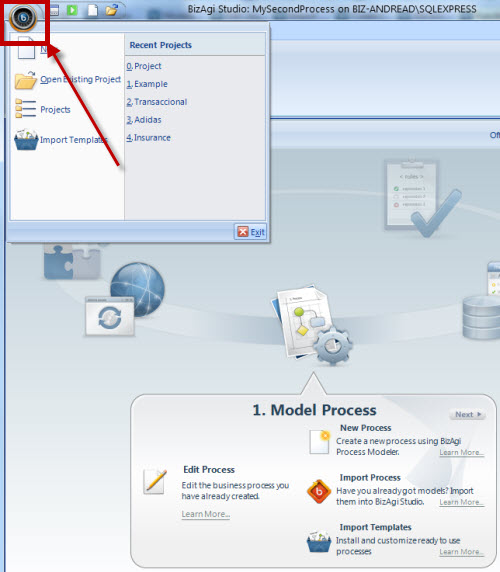
![]() It is important to know that some of these options can also be accessed when Bizagi Studio is already opened:
It is important to know that some of these options can also be accessed when Bizagi Studio is already opened:
New
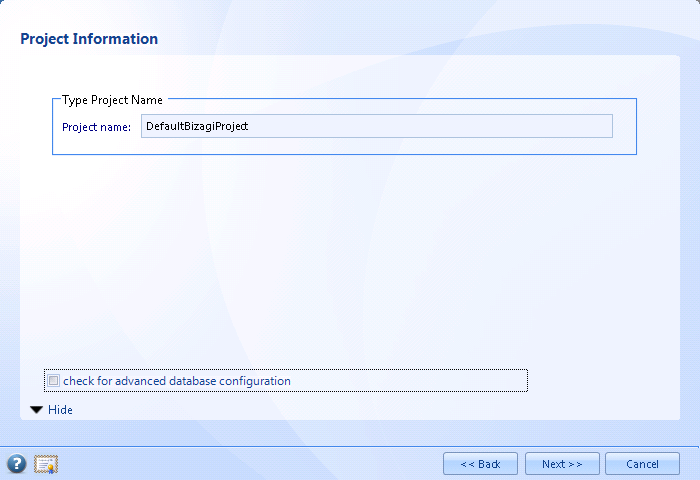
This option is used to create a NEW project. 1. When New is selected, a new window will request a name for the new project. Fill the information and click Next. Bizagi will create all the necessary components, and as soon as the wizard is finished, the user will be ready to start a new project.
|
Alert: It is very important that Bizagi is INSTALLED ON THE SERVER. New projects can only be created locally. |
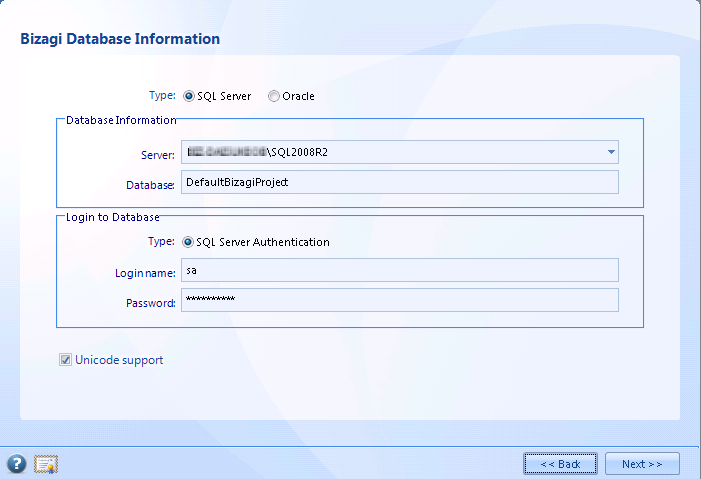
This window has the option check for advanced configuration. If this option is checked, before the project's creation starts a window is shown, where the SQL Server or Oracle instance can be selected.
If the selected database instance is the one installed by Bizagi Xpress by default (SQL Server), then the connection is set with the following information:
- Login/user: sa
- Password: Bizagi2009
If you do not wish to use the sa login for your SQL Server connection, you may configure and use another SQL Server login.
View how to create a new Bizagi project in an Oracle database (applies for the Enterprise JEE and Enterprise .Net editions).
Open Existing Project
This option is used to open an Existing Project. The Project can be local (that is, the project is located in the same computer that is trying to open it) or it can be opened from some other computer, or server. This way every project can be accessed from any computer, that is connected to the same network and same domain, giving the users the possibility of a collaborative and team work.
1. On the Main Menu, select the Open Existing Project option.
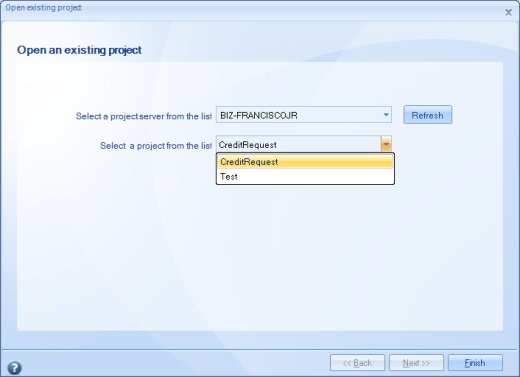
2. Enter the details in the Open Existing Project window:
|
Select a Project Server from the list: Select the name of the server where the database is located. Select a Project form the list: Select the name of a Bizagi project in that server. |
3. Click on Finish for the new project to be registered.
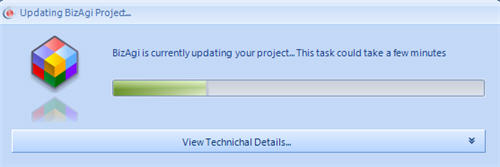
If the project is in a previous version, the user will be asked to upgrade it.
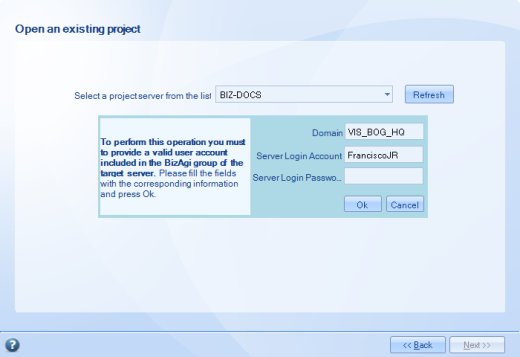
4. When the project has to be accessed in a different server, the user will be be asked to provide a password and to be registered in the Bizagi Group of the server.
To access a project remotely, the computers MUST BE IN THE SAME NETWORK AND THE SAME DOMAIN.
This way several users can access a single server and work in the same Bizagi project at the same time.
<span id="Bizagigroup" />
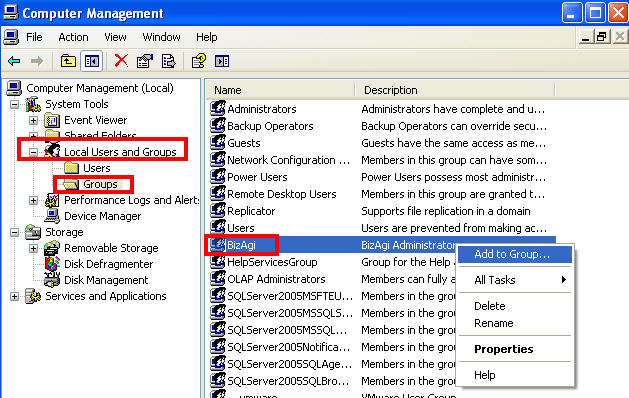
In order to include a user in a Bizagi Group, go to:
Control Panel/Administrative Tools/Computer Management
Look for Local Users. Go to the Groups folder and select the Bizagi item. Add the desired user to the list.
In the Bizagi Studio wizard, click on Finish for the new project to be registered.
Important
- If the project is in a previous version, the user will be asked to upgrade it.
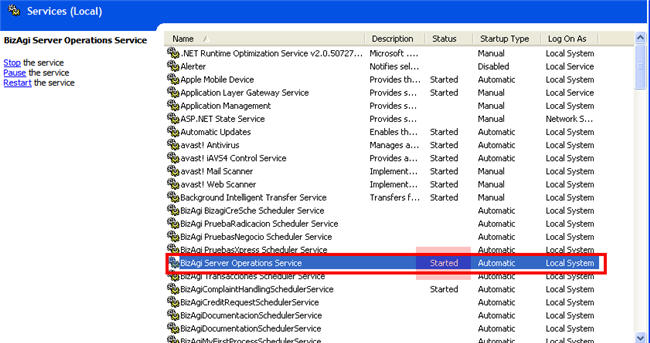
- Keep in mind that, in order to access a project in a server, the service: Bizagi Server Operation Service HAS to be Started
To access this service, in the target server go to: Control Panel/Administrative Tools/Services and Start it
To learn more about Bizagi's Security levels (join projects in different servers, execute to production) please go to Work on a remote server
5. When a project has been created in the JEE Edition it may not be opened in the NET. Edition. Similarly, projects created in .NET Edition can not be opened in the JEE Edition.
<span id="registered_projects" />
Projects
Access any project that you have opened using that Bizagi Studio. This menu has several options to work with each project.
1. On the Main Menu, select the Projects option.
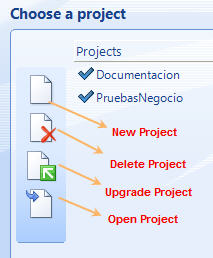
2. The Projects window is displayed with a list of existing projects. Click on the required project and then on the action to be performed.
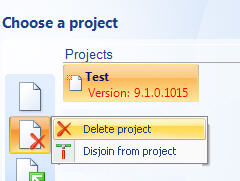
3. When Delete is selected, a new window will display two options:
To Delete the project, that will delete everything registered
To Disjoin from Project, that will just remove the Project's name from Bizagi Studio.
4. When a new version of Bizagi is released and installed, and the user has projects in s previous version, it is necessary to upgrade the them in order to work with them. Select the project and click Upgrade.
5. To work with on project click Open Project.
Free Process Central - Applies to .NET Editions
Bizagi Process Central includes several ready-to-use executable processes that you can use to boost performance in your organization. You can customize them to your company’s particular needs. Follow the next steps to import a Process Template to your Bizagi Studio. Learn, explore and adapt the process in any way you like!
Before getting started be sure to have installed the LAST Bizagi version. You will need internet connection.
1. Open Bizagi Studio On the lower right corner click on Free Process Central as soon as Bizagi Studio is opened.
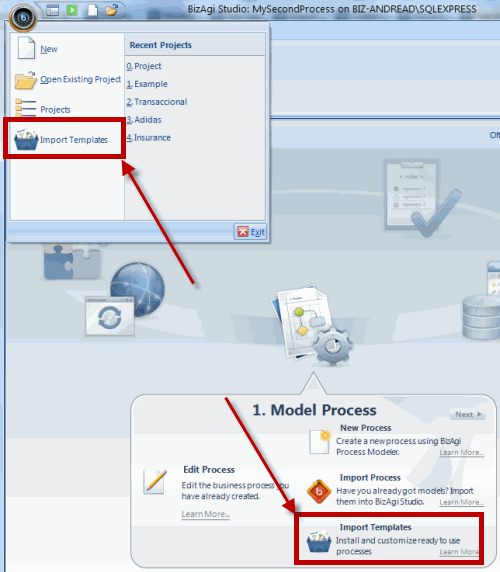
You can also access the Process Central through the Button on Bizagi Studio main menu and in through the Process Wizard, in the first Step.
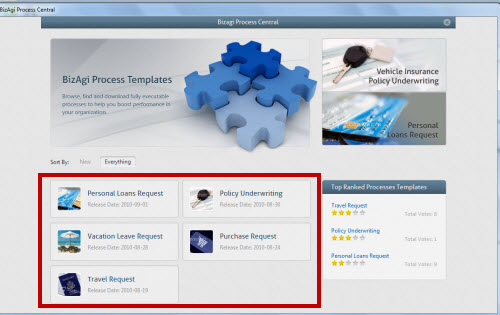
2. Browse the Free Process Central Browse through the Free Processes included in the Bizagi Process Central. Click on any process to learn more about it.
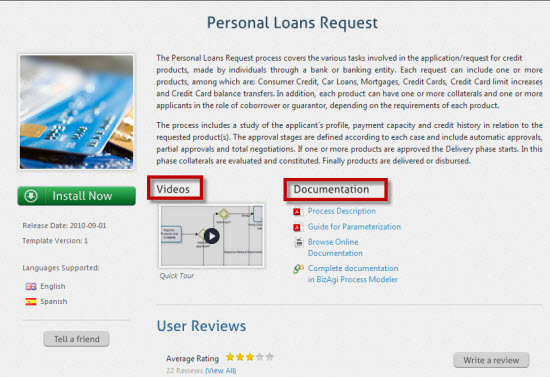
3. The Processes Learn all you need to know about each Process. Click on each link to access videos, documents and more.
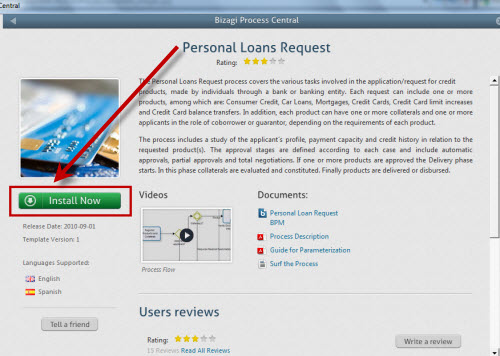
4. Install Now When you find a process you like you can download it right away and start using it! Click on the Install now button to download it.
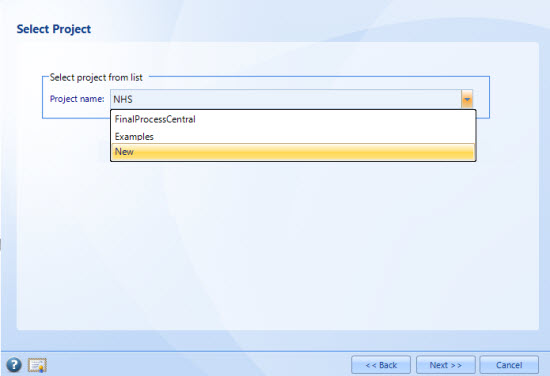
5. You can choose to download the process to an existing project if you have one, or to a New Project.
If you accessed the Process Central through the Button or the Process Wizard described in step 1, the Template will install in the CURRENT PROCESS OPENED. Thus, this step, and until the step 8, can be skipped.
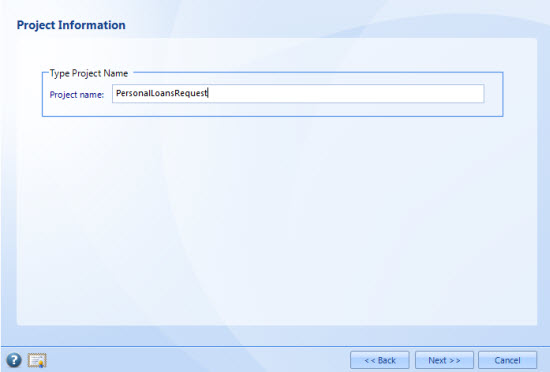
6. If you choose a New Project, give it a name.
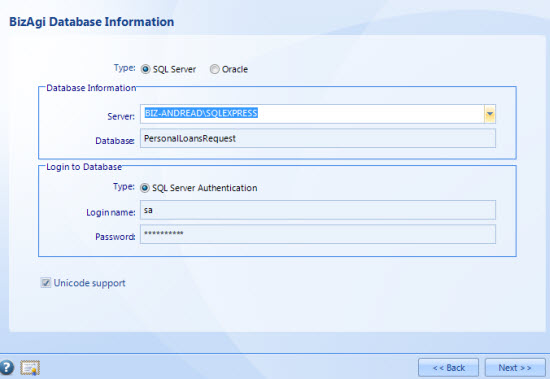
7. If it is a New Project Bizagi will request the Database where the project will be created Enter the information of the Database server and if you want your project to support Unicode.
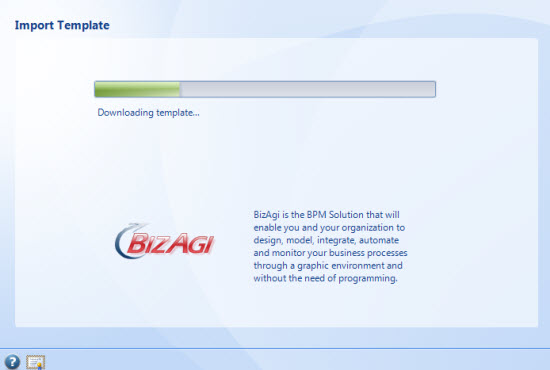
8. The process will start downloading and it will be automatically installed in your Bizagi Studio. As soon as the Wizard is finished, browse through the Work Portal to get to know your process. Feel free to customize the process to your particular needs and use it in your organization!
Important Considerations PLEASE READ!!
- The Templates have to be imported one by one
- The Templates will have Emails DISABLED. You must configure your SMTP server to enable emails in order to avoid errors in the Work Portal. Click to learn about Configure SMTP server or Disable Email messages.
- Templates are imported with no Users. Test can be performed with the admon user before creating any user.
- To test the assignment rules you can create the users according to the roles that each task has defined. However you can create your own assignment rules and then, create the users that best suit your needs.
- When creating users be sure to check the Notify by Email option if the Email Messages are going to be sent.
- A Template cannot be imported to an existing database if there are entities or processes using the exact same name.
- If you have imported a Template and have changed the name or type of an attribute or you have changed the name of an entity, it will not be possible to import the same Template to that project again.
- If you want to test the Timers, start the Scheduler
- If you want to use the Work Portal in Spanish, you need to enable the ES language and restart you Work Portal.
Installation Of Web Services For The Process Central
Bizagi uses different mechanisms that allow the Suite to connect with the company’s existing systems in order to use the necessary information for the business processes execution.
Some of the Process Templates you can download from the Free Process Central include pre-configured web services that need an Internet connection to work correctly.
If an Internet connection is not available is necessary to install these services locally. The following instructions explain how to do this.
Install the Web Service in Windows XP
1. Depending on the process installed, download and unzip the corresponding file from this location: ftp://BizagiWSUser:[email protected]/ProcessCentral
- For Vacation Leave Request, Purchase Request and Policy Underwriting: ESB.zip
- For Personal Loans Request: WsCreditRequest.zip
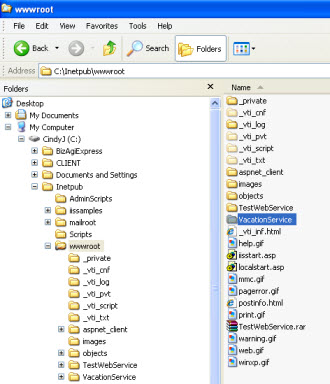
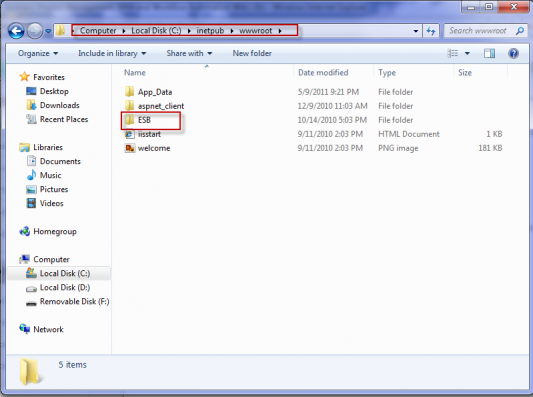
2. Copy the unzipped folder into your Default Web Site local path, usually C:\Inetpub\wwwroot
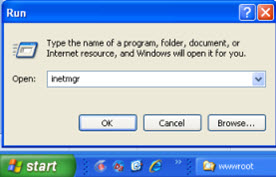
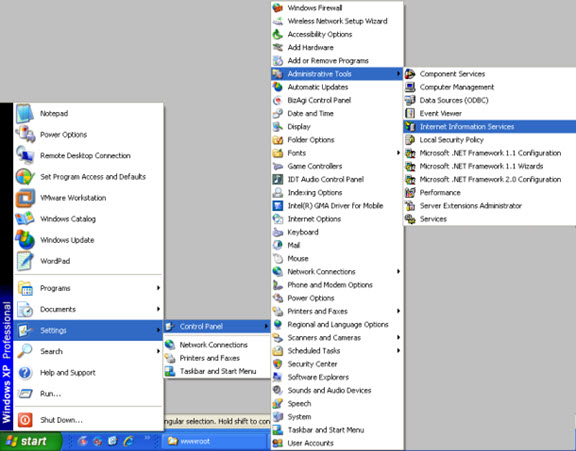
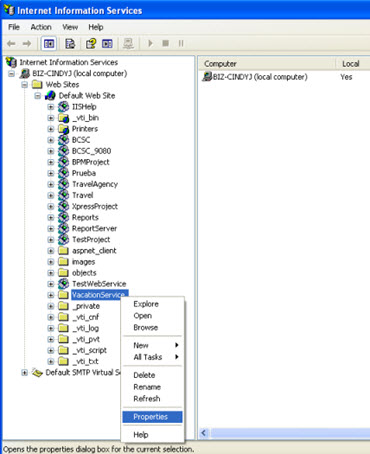
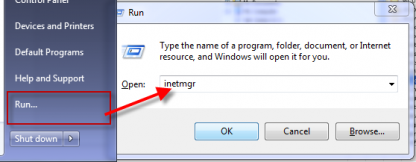
3. Open the IIS Manager either by running the command inetmgr or by selecting it form the Administrative Tools in the Control Panel. In order to verify if the IIS has been installed properly, please follow this LINK
4. In the manager open the Default Web Site and find the web service folder (ESB or WsCreditRequest). Right click on it and select Properties.
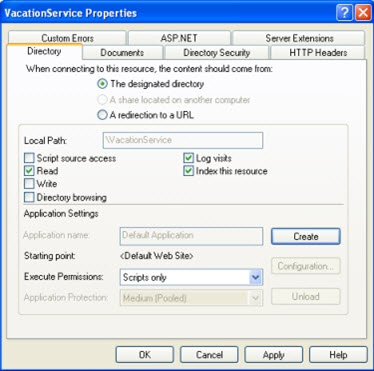
5. In the Properties window click the Create button and then OK.
Install the Web Service in Windows 7
1. Depending on the process installed, download and unzip the corresponding file from this location: ftp://bizagiWSUser:[email protected]/ProcessCentral
- For Vacation Leave Request, Purchase Request and Policy Underwriting: ESB.zip
- For Personal Loans Request: WsCreditRequest.zip
2. Copy the unzipped folder into your Default Web Site local path, usually C:\Inetpub\wwwroot
3. Open the IIS Manager either by running the command inetmgr or by selecting it form the Administrative Tools in the Control Panel.
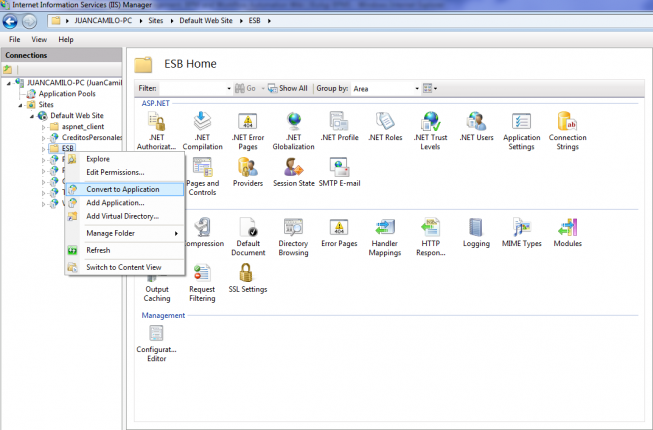
4. In the IIS manager, open the Default Web Site and find the web service folder (ESB or WsCreditRequest). Right click on it and select Convert to Application. In order to verify if the IIS has been installed properly, please follow this LINK
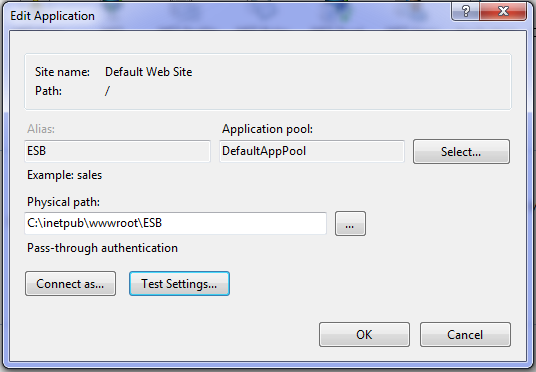
5. In the Edit Application window click OK.
|
Note: Keep in mind that some programs like Skype may create conflict when trying to start the Default Web Site. |
Modify the Interface Configuration
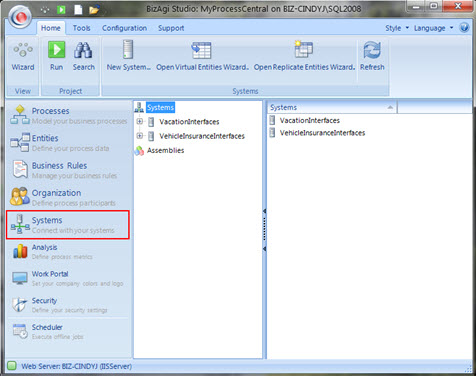
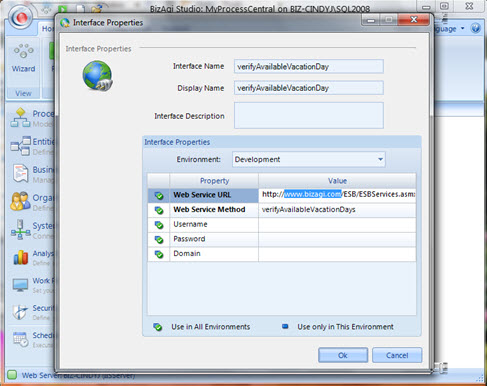
1. Open Bizagi Studio (or Management Console) in the Modules View and select Systems. Here you will see a System created for each Process Template.
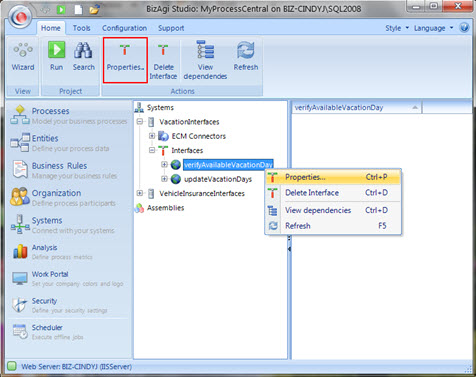
2. Expand the items until you reach the interfaces. For each interface in the System edit its Properties by right clicking on the interface or selecting it and using the button on the Standard Menu.
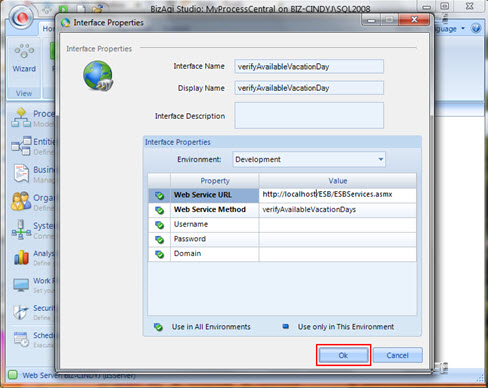
3. In the Web Service URL property, modify www.Bizagi.com for the name of your machine or type localhost.
4. Click Ok to save the change and continue with the following interface.
<comments />
