Modeling the Process
From Business Process Management, BPM and Workflow Automation Wiki | BizAgi BPMS
<keywords content="keywords"> model, process, define, processes, design, designing, draw, construct, develop, flow, flows, diagram, diagrams, process properties </keywords>
Contents |
Modeling the Process
Designing the process is one of the first steps in the implementation of Bizagi. This is a vital stage because the application is defined based on the flow of the process that has been diagrammed.
The workflow, known as a chain of activities, is the fundamental structure of the project, to which variables and elements needed are included in accordance with organization’s requirements.
In order to model the process, Bizagi uses a BPM toolbar, designed to easily implement from the simplest to the most complex process and to allow anyone familiar with the process to model it.
As for the available design tools, Bizagi supports process models made in MS Visio.
Before Modeling a Process
Organizing the structure of your projects is very helpful when the number of processes you have developed increases. With a defined structures you can identify, manage and control processes in a faster and more efficient way.
A project contains as many processes as you need to complete your company's automating initiative.
Within a project Bizagi allows you to organize your processes in applications, levels and categories
An Application is the higher level of hierarchy, and is in charge of arranging and organizing the processes interrelated with one another to achieve a business objective.
Each application created in Bizagi organizes your processes using two lower hierarchy components: Levels and Categories; these elements allow you to display the processes of an application hierarchically and classified within a structure.
Suppose your company has a wide number of processes. Bizagi strongly recommends to create applications based on the areas managing them and use the levels and categories to establish a sub-classification depending on the nature of each of them.
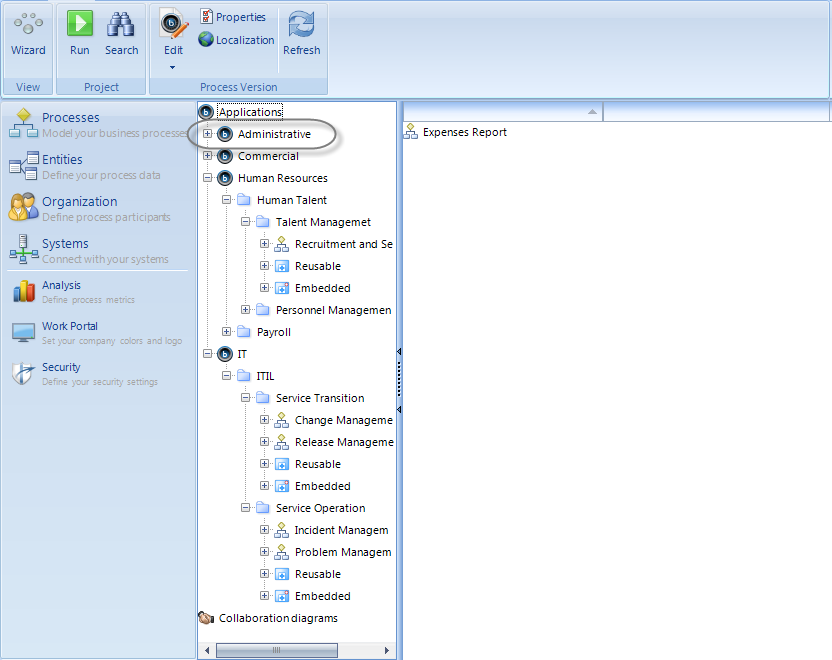
In the following image you can see the way the processes in a company should be classified. Applications are identified with the Bizagi logo and in this case depicts the Commercial, Administrative, Human Resources and IT Department.
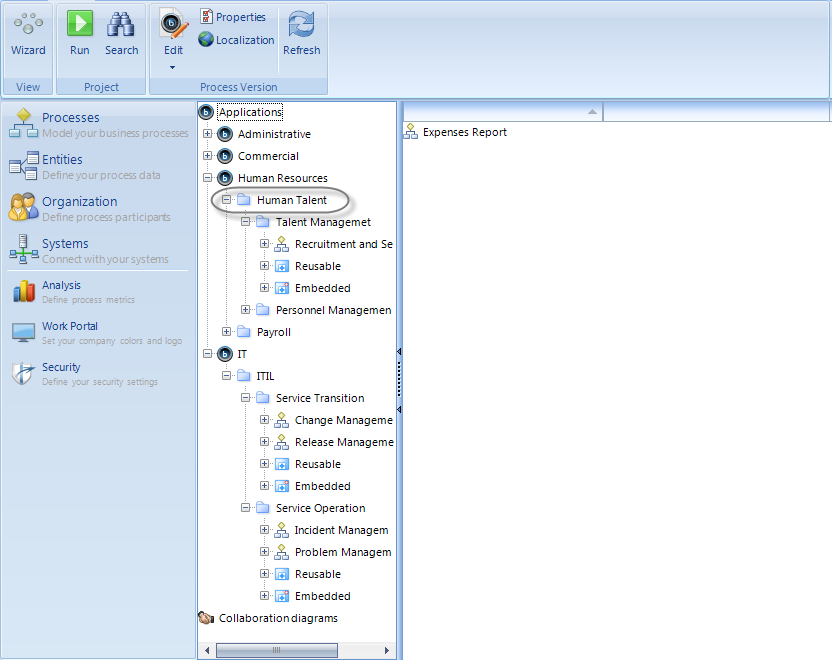
Note that in the Human Resources and IT applications categories have been included, these are depicted by blue folders, each of them can contain sub-categories or specified processes.
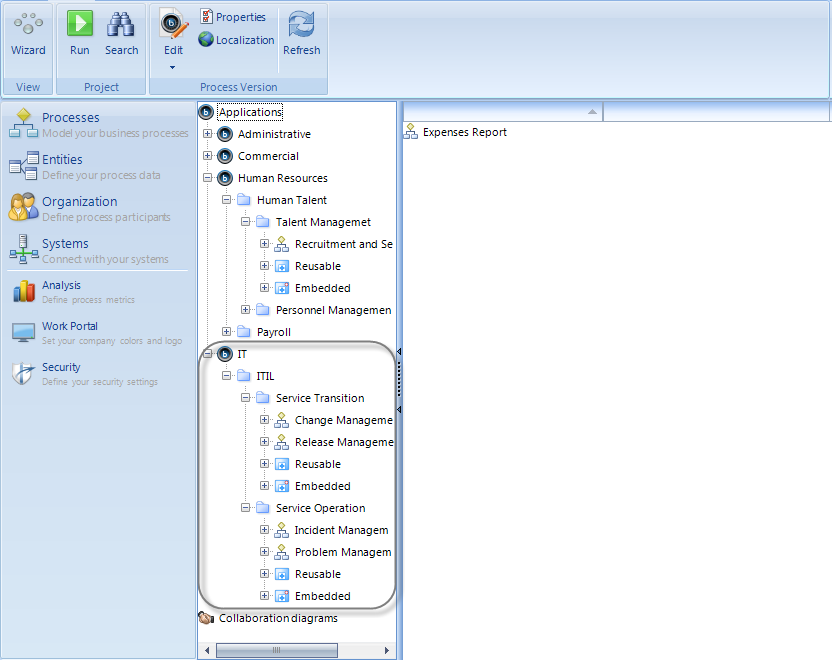
Lets take the IT Department as example. There is a parent category called ITIL which contains subcategories representing the different phases suggested by the ITIL (Information Technology Infrastructure Library) framework. Within each category there are different processes, for example, in the Service Operation category the Incident Management and Problem management processes are found.
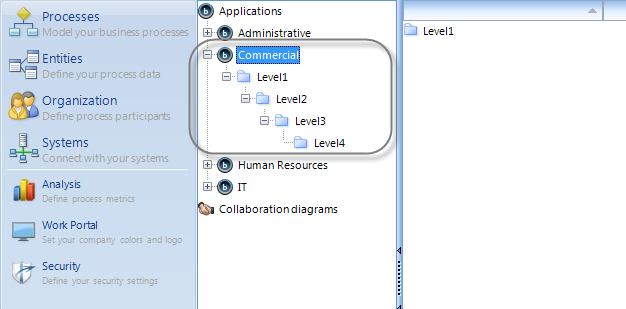
You can define as many category levels as you consider it necessary.
How to Model the Process
Once the structure you want to use for the new Bizagi application has been defined conceptually, follow the steps below:
1. Create the application and the process(es). For further information about creating processes and applications please go to:
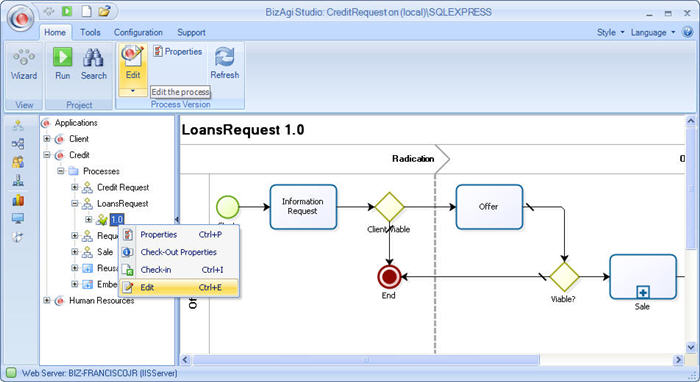
2. Select the version of the process you would like to create by right-clicking on it and select Edit or Check Out to edit the process:
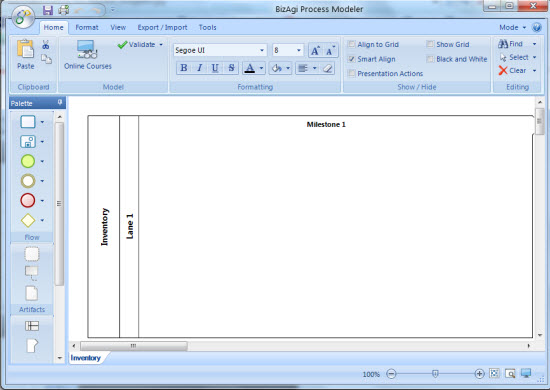
3. Bizagi’s business process modeler is enabled and a base process will appear, based on which the process can be defined.
When you create a process for the first time, a process will appear automatically with the blank diagram and one lane, one phase and the original name of the process and its version. You can construct the process you would like to model in Bizagi based on this diagram.
In the Bizagi modeler, there is a set of shapes or stencils to draw process flowcharts; the shapes available form a part of the BPMN notation, making it possible to standardize the diagramming of processes.
4. Diagram the process with the BPMN standard in mind.
<span id="create_application" />
How to Create an Application
An application is in charge of arranging and organizing the processes interrelated with one another to achieve a business objective. Each application created in Bizagi organizes the business processes using two components: Levels and Categories; these elements allow you to display the processes of an application hierarchically and classified within a structure.
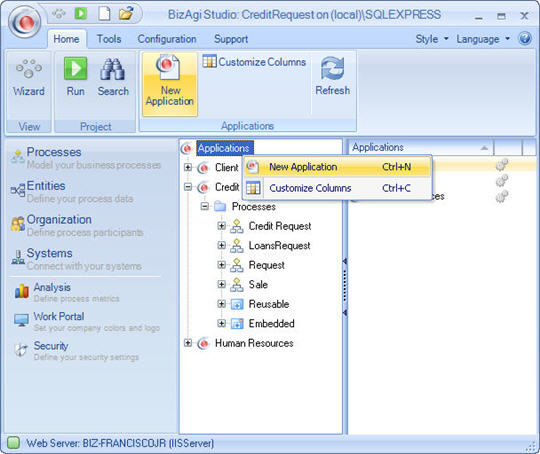
1. In the Bizagi menu, identify the Processes component. Right click on applications and click on New Application
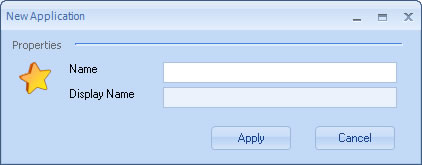
2. Define the name and display name for the new application.
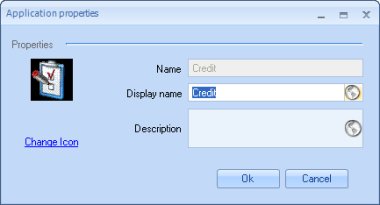
<span id="applicationsproperties" /> 3. After you have created the application, you can access its properties by right clicking on an application and clicking on the Properties option. The Properties window of the application pops up, where you fill in the following fields:
|
Name: The name of the application that will automatically appear as the name of the application entity. Do not use spaces or special characters. The maximum number of characters is 25; Display name: Allows spaces and characters. The maximum number of characters is 40; Change Icon: This link enables you to select and modify the icon that identifies the application on the web. |
<span id="category" /> 4. A category will be created automatically. Create the structure of categories that you will use for your process.
A category enables the organization of the processes in a determined hierarchy. The categories can in turn contain other categories so as to be able to arrange the processes in a way that is logical and easily identifiable by the application users.
|
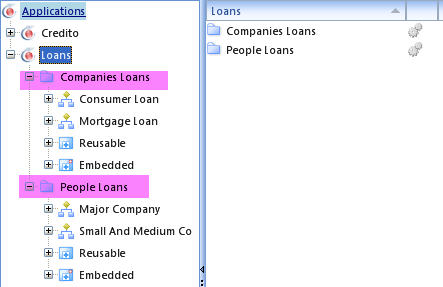
Example: If you have an application with the following processes: Request for Consumer Loan, Request for Mortgage Loan, Request for Major Company Loan, Request for Small and Medium Business Loans And you want to arrange them as follows: I. Loans for People: Request for Consumer Loan Request for Mortgage Loan II. Loans for Companies: Request for Major Company Loan Request for Small and Medium Business Loans In this case, you would create a main category called loan, and then two subcategories: Loans for People and Loans for Companies. |
|
On the Web, these categories would be displayed as follows: |
How to Delete an Application
1. In the Bizagi menu, click on the applications component. Right click on the application you would like to delete and click on the Delete option.
|
Note:You can only delete applications that do not contain any processes or associated categories. Therefore, if you have not yet created any processes, delete the default category. |
<span id="create_process" />
How to Create a Process
A process is a defined sequence of events that must be carried out in a strict order to reach a specific business objective. In Bizagi, a process can be a process in itself, or a sub-process of another process, or a set of activities used as a module. In any case, they are all created the same way and the value of the type of process is adjusted for each case.
To create processes, subprocesses or modules:
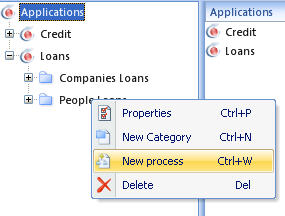
1. In the Bizagi menu, click on the applications component and select an application. Right click on a category and select the New Process option.
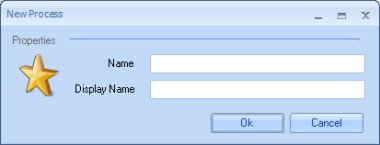
<span id="newprocess" /> 2. Define the name and display name for the new application.
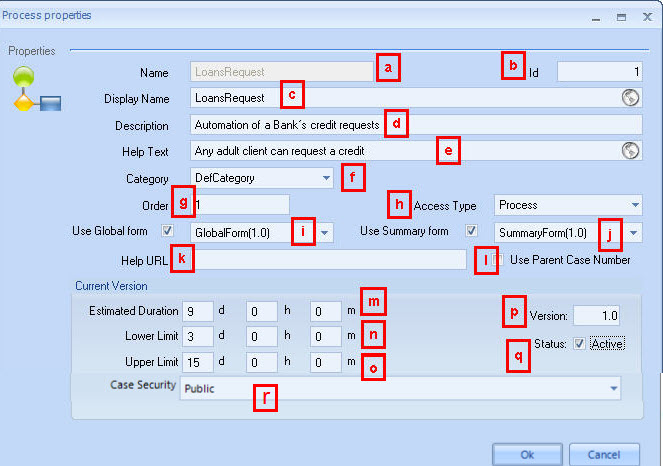
<span id="processproperties" /> 3. Once you have created the process, you can access its properties by right clicking on a process and clicking on the Properties option. The Process Properties window will pop up, where you will fill in the following fields::
|
a. Name: the name of the process. Spaces and special characters are not allowed. b. ID: the consecutive number automatically assigned by Bizagi. c. Display name: the name of the process, sub-process or module that will be displayed. d. Description: Description of the process. e. Help text: the help text displayed for the process. f. Category: select the category that the process, subprocess or module belongs to g. Order: determines the sequence in which the processes will be displayed on the registration menu. h. Access Type: There are three options: process, module and sub process. For further information go to Access Type i. Global Form: is the associated form that is viewed when consulting a case that has been closed or when the user has no pending activities. For more information Global Form j. Summary Form: is associated to the process and allows the user to view the progress information when clicking the Stoplight of the pending cases. The form is viewed in the lower part of the web application. For more information Summary Forms k. Help Url l. Use Parent Case Number: This option will enable the display of a single case number in the Web application for the parent process as well as the sub-process that has been indicated. If this box is not checked, the sub-process will display a number other than that of the parent process corresponding to the consecutive in Bizagi. m. Estimated duration: is the SLA (Service Level Agreement), that can be explained as the maximum time that a Process can be active (unfinished) to consider that it are still on time. The Duration is set in the development stage, and can be adjusted in production as needed. This time is defined by days, hours and minutes. n. Lower Limit: the estimated minimum run time of the process. It is defined in days, hours and minutes. o. Upper Limit: the estimated maximum run time of the process. It is defined in days, hours and minutes. p. Version: The version of the flowchart is specified here. q. Status: is the status of the process (active/inactive). If it is checked, the process will be available to be used (if it is a process, subprocess or module) and create cases (if it is a process). If inactive it will not be available to be used. r. Case Security: Security defined at the process level so cases can have private or shared security. For more information please go to Case Security |
4.When you are done click Apply.
Related Articles
- Advanced properties of the Process
- Clone Process
- New Version of the Process
- How to model using Bizagi Modeler
- How to Register a project
- How to disable a process in Bizagi
<comments />
